
Choosing the Right Contractors for Your Home Remodel
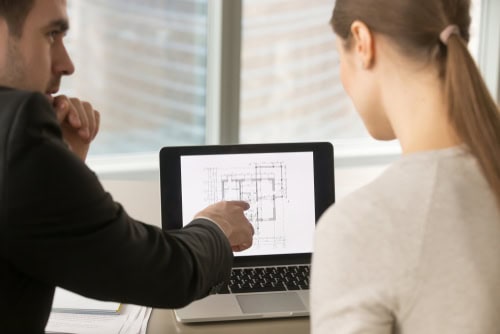
(858) 413-2305 Request a quoteChoosing the right contractor for your home remodel is crucial to ensuring a smooth and successful project. Whether you’re updating a kitchen, bathroom, or embarking on a whole-home transformation, finding an experienced and reliable contractor is key.
If you’re considering remodeling in Carlsbad, it’s important to select someone who understands the local market, building codes, and your specific needs. With so many options available, narrowing down your choices can be overwhelming, but by following a few essential steps, you can find a contractor who will deliver quality work on time and within budget, making your dream home a reality.
What points should you consider when selecting a contractor?
Here’s a guide to help you choose the right contractor for your home remodel:

1. Do your research
Start by gathering recommendations from friends, family, or neighbors who have recently completed a renovation project. Word of mouth can be one of the most reliable ways to find contractors who have a proven track record. You can also check online reviews and ratings on platforms like Google, Yelp, or Angie’s List. Pay close attention to reviews that mention specific aspects of the project that matter to you, such as quality of work, timeliness, and customer service.
2. Check qualifications and experience
Once you have a list of potential candidates, it’s important to ensure that they have the necessary qualifications and experience for the job. Make sure they are licensed, insured, and bonded. A licensed company is required to meet certain standards and regulations, ensuring they are knowledgeable about the latest building codes and laws. Insurance protects you from liability in case of accidents, and bonding gives you peace of mind that the contractor will fulfill their obligations.

Also, ask about their experience with the type of remodel you’re planning. If they only specialize in kitchen and bathroom remodels, they may not be the best fit for a whole-home renovation, and vice versa. Be sure to choose someone who has a track record of completing projects similar to yours.
3. Review past work
Ask them for a portfolio of their past work. They should have photos or references from completed projects to showcase their skills and style. This will help you assess whether their work aligns with your vision and the quality you expect. Don’t hesitate to contact previous clients for feedback on their experience working with the contractor. This can provide valuable insight into how they communicate, handle challenges, and meet deadlines.
4. Get multiple estimates
When you’re ready to narrow down your options, request written estimates from at least three contractors. The estimate should outline the scope of the project, the materials to be used, labor costs, and a timeline for completion. While the price is important, it’s essential to balance cost with quality. The cheapest estimate may not always be the best choice, as it could reflect subpar materials or shortcuts that could affect the longevity and safety of your remodel.
5. Communication and professionalism
Good communication is key to a successful project. From the initial consultation to completion, they should be transparent, approachable, and willing to listen to your ideas. Pay attention to how they communicate during the interview process—are they punctual, prepared, and willing to answer your questions? A contractor who listens carefully to your needs and offers helpful suggestions will be easier to work with throughout the remodeling process.
6. Understand the contract
Before signing any agreement, make sure you thoroughly read and understand the contract. It should include details about the project scope, timeline, payment schedule, and any warranties offered. A well-drafted contract protects both you and the contractor by setting clear expectations and preventing misunderstandings. If you’re unsure about any part of the contract, don’t hesitate to ask for clarification or consult a legal expert.
Who are the best experts in remodeling in Carlsbad?
Whether you’re looking to have your bathroom remodel done right, want to take a sustainable approach to your kitchen remodel, or make your home more attractive to potential buyers, reach out to Remodel Works. With years of experience and a dedicated team, we’re here to bring your vision to life. Whether your home is in the vicinity of the Miniature Engineering Craftsmanship Museum (MECM) or in another nearby neighborhood, you can count on our reliable specialists. Call today!

Latest Posts
The Kitchen And Bathroom Countertop Showdown: Quartz, Quartzite, Porcelain, Or Granite?
Kitchen Zones: How To Design A Kitchen Around The Way You Actually Cook
How to Make a Small Kitchen Feel Twice as Large
Get your in-home free estimate today!

Bathroom remodeling can breathe new life into your home, whether you’re looking to upgrade fixtures, increase storage, or create a more relaxing space. However, the process can be overwhelming if you don’t approach it carefully.
If you’re hoping to create affordable bathrooms in Carlsbad, it’s essential to find the right balance between cost and quality. By following the right steps and avoiding common mistakes, you can ensure that your project is both functional and stylish without breaking the bank. Let’s explore some crucial dos and don’ts to guide you.
What to know before a bathroom remodel?
From budget planning to choosing materials, there are several important factors to consider. Here’s what they are:
The dos of bathroom remodeling

1. Do plan your budget carefully
Before starting any remodeling project, it’s crucial to set a realistic budget. The cost can vary significantly, depending on the scope of work. Ensure that your budget covers everything from labor and materials to unexpected costs that may arise. Allow a contingency fund of around 10% for unforeseen issues. Prioritize the areas that will have the most impact, and keep in mind that quality doesn’t always mean the highest price.
2. Do focus on functionality
Aesthetics are important, but functionality should be your top priority. Think about how the space is used daily and make sure the layout and design meet your needs. Consider upgrading storage with cabinets, shelves, or even built-in vanities. Make sure the plumbing is updated to avoid potential future issues, and ensure proper ventilation to prevent mold and mildew growth.
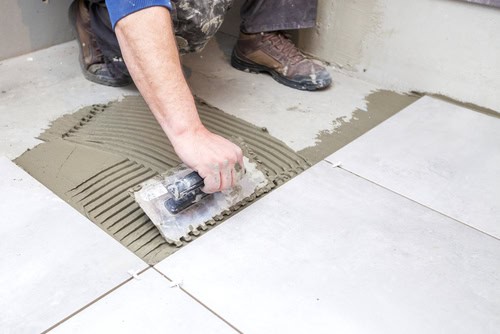
3. Do choose durable materials
Bathrooms are high-moisture areas, so it’s essential to choose materials that can withstand humidity and frequent use. Opt for water-resistant options like porcelain or ceramic tile for the floors and walls, and choose durable countertops such as quartz or granite. Avoid overly delicate or porous materials that can absorb moisture and lead to long-term damage.
4. Do hire a professional
Unless you’re an experienced DIYer, it’s often best to hire professionals for plumbing, electrical work, and other complex tasks. A skilled contractor can ensure that your bathroom is remodeled according to code and provide expert advice on materials, design, and layout. Professionals also have the experience to tackle unexpected problems, saving you time and potential stress in the long run.
5. Do consider energy efficiency
This is the perfect time to upgrade to energy-efficient fixtures. Low-flow toilets, water-saving showerheads, and energy-efficient lighting not only help the environment but can also reduce your utility bills. Look for products that are labeled with the EPA’s WaterSense or ENERGY STAR certifications for reliable energy and water efficiency.
The don’ts of bathroom remodeling
1. Don’t skip the planning phase
It can be tempting to jump straight into a remodel, but skipping the planning stage can lead to costly mistakes. Create detailed plans and layouts, and consider the overall style you want to achieve. Consider factors such as plumbing, electrical wiring, and lighting placement in the design phase to avoid unnecessary delays.
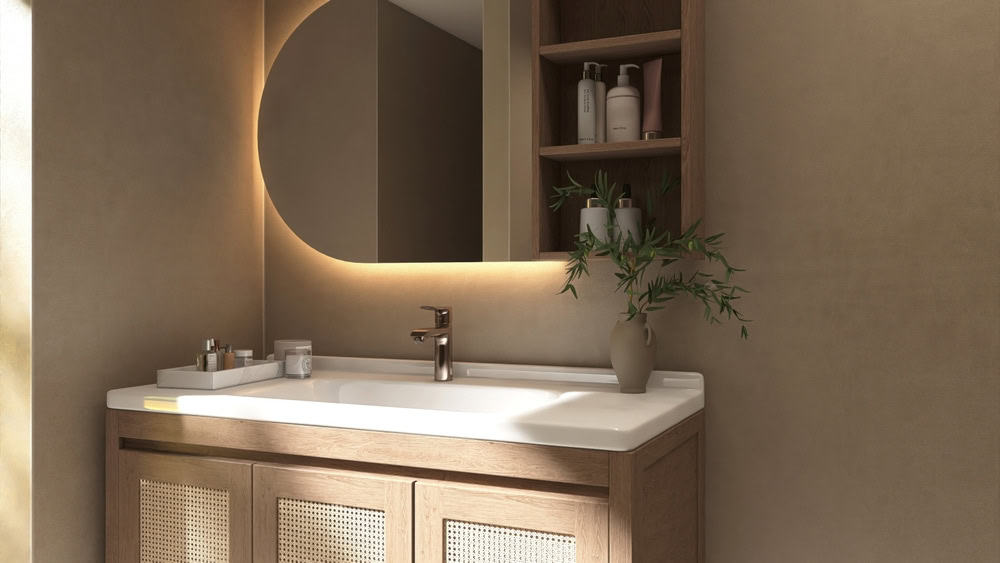
2. Don’t underestimate the importance of lighting
Poor lighting can make a bathroom feel cramped and uninviting, while well-placed lights can enhance its overall appeal. Don’t rely solely on a single overhead light. Instead, incorporate task lighting around mirrors, and add ambient lighting to create a calming atmosphere. Consider using dimmer switches for more control over lighting levels.
3. Don’t forget about storage
Bathrooms often lack sufficient storage, leading to cluttered countertops and disorganized spaces. Be sure to incorporate storage solutions into your project. This could include built-in cabinets, under-sink storage, or even a small closet for towels and toiletries. Make use of vertical space with shelving or consider a floating vanity to create the illusion of more room.
4. Don’t overlook small details
From the handles on your cabinets to the color of your grout, small details can make a big impact. Don’t neglect these elements—they can elevate the overall look and feel of your space. Choose finishes that complement your chosen materials and overall style to create a cohesive design.
Who provides quality affordable bathrooms in Carlsbad?

Whether you’d like to make your home more attractive to future buyers, you’re considering an eco-friendly kitchen remodel, or want to find the best contractors for your project, Remodel Works is the team you can completely rely on. We employ proven methods, reliable equipment, and high-quality materials to provide you with tailored solutions that stand the test of time. Whether you need us near the Carlsbad City Library or across the region, we’ll be there to make your dreams a reality. Give us a call today!
Latest Posts
The Kitchen And Bathroom Countertop Showdown: Quartz, Quartzite, Porcelain, Or Granite?
Kitchen Zones: How To Design A Kitchen Around The Way You Actually Cook
How to Make a Small Kitchen Feel Twice as Large
Get your in-home free estimate today!

Planning your kitchen remodel in the right order can help you save money while achieving the best results. A well-structured approach ensures you avoid costly mistakes, unnecessary rework, and unexpected expenses.
If you’re considering budget kitchen remodeling in Scripps Ranch, prioritizing tasks like demolition, plumbing, and electrical work before aesthetic upgrades can make a big difference. In this blog, we’ll outline the ideal remodeling order to help you get the most value out of your investment while staying within budget.
What should I replace first in the kitchen remodel?
Whether you’re upgrading cabinets, countertops, or appliances, following a logical sequence can maximize efficiency and keep your project on track.
1. Plan and budget first
Before any demolition begins, start with a clear plan and budget. Outline your must-have upgrades and determine where you can save by choosing affordable materials or doing some work yourself. Getting quotes from contractors and researching costs ahead of time will help prevent unexpected expenses later.
2. Demolition and removal
Once your plan is in place, remove old cabinets, appliances, flooring, and anything else that needs replacing. If you’re doing a partial remodel, focus only on the areas that need updating. Salvaging materials like cabinet doors or fixtures can help cut costs if they can be refinished or repurposed.
3. Electrical and plumbing updates
If you’re moving appliances, sinks, or lighting, this is the time to handle electrical and plumbing work. Making these changes later in the remodel can be costly and disruptive. Even if you’re keeping everything in the same location, outdated wiring and plumbing should be inspected and upgraded to prevent future issues.

4. Structural changes (if needed)
For larger renovations that involve knocking down walls, expanding space, or changing layouts, structural work should come next. This ensures your kitchen has the proper support and meets building codes before proceeding with cosmetic upgrades.
5. Walls and paint
Once plumbing, electrical, and structural changes are complete, it’s time to repair drywall and apply paint. Painting before installing cabinets and appliances prevents splatters on new surfaces and makes the process more efficient.
6. Flooring installation
Flooring should be installed before cabinets and appliances to create a seamless look. However, if you’re using materials like hardwood, some homeowners prefer to install flooring after cabinets to save on material costs. If this is your approach, make sure to account for height differences when placing cabinets.
7. Cabinet installation
Cabinets should be installed before countertops, as they provide the foundation for the workspace. If you’re refacing existing cabinets rather than replacing them, this step will be quicker and more budget-friendly.
8. Countertop and backsplash installation
After cabinets are securely in place, install countertops. Choosing durable yet cost-effective materials like laminate or butcher block can help save money. Once countertops are installed, adding a backsplash enhances both style and functionality.
9. Appliance installation
Now that the major construction work is complete, you can install appliances like your stove, refrigerator, and dishwasher. Be sure all electrical and plumbing connections are properly secured before final placement.

10. Finishing touches
The last step is adding final details, such as cabinet hardware, light fixtures, trim, and decorative elements. These small changes can make a big impact on the overall look and feel of your kitchen.
Looking for budget kitchen remodeling in Scripps Ranch?
Whether you’re looking to remodel your kitchen on a budget, save money in a bathroom renovation, or have a budget bathroom remodel, reach out to Remodel Works. Our reliable professionals are here to listen to your needs and provide you with tailored, high-quality solutions. Whether your home is near Scripps Ranch High School or across the region, you can count on our expertise. Give us a call today!
Latest Posts
The Kitchen And Bathroom Countertop Showdown: Quartz, Quartzite, Porcelain, Or Granite?
Kitchen Zones: How To Design A Kitchen Around The Way You Actually Cook
How to Make a Small Kitchen Feel Twice as Large
Get your in-home free estimate today!

Remodeling your kitchen doesn’t have to break the bank. With smart planning and cost-effective choices, you can give your space a fresh, updated look without overspending. Whether you’re refinishing cabinets, upgrading countertops, or adding stylish yet affordable fixtures, there are plenty of ways to create beautiful budget kitchens in Scripps Ranch without sacrificing quality.
Prioritizing the right changes and finding creative alternatives can make a big impact while keeping costs under control. In this blog, we’ll explore practical tips for remodeling your kitchen on a budget, helping you transform your space without stretching your finances too thin.
How to inexpensively remodel a kitchen?
Whether you’re looking to refresh outdated cabinets, upgrade countertops, or improve functionality, there are plenty of ways to achieve a stylish and modern kitchen while staying within budget. Here’s how:
1. Prioritize your remodeling goals
Before making any changes, determine which aspects of your kitchen need the most attention. Focus on updates that will make the biggest impact, such as painting cabinets, changing hardware, or replacing outdated lighting. By identifying your priorities, you can allocate your budget effectively and avoid unnecessary expenses.
2. Refresh instead of replace cabinets
New kitchen cabinets can be one of the most expensive parts of a kitchen remodel. Instead of replacing them, consider refinishing or repainting your existing cabinets. A fresh coat of paint in a modern color, along with new handles or knobs, can completely change the look of your kitchen at a fraction of the cost. If your cabinets are structurally sound but look outdated, refacing them with new doors or veneer can also be a budget-friendly alternative.
3. Choose affordable countertop options

Granite and quartz countertops are beautiful but can be expensive. If you’re looking for a more budget-friendly option, consider laminate, butcher block, or tile countertops. These materials can still provide a stylish look while keeping costs down. Another option is to use high-end materials for a small focal area, like a kitchen island, while using more affordable surfaces elsewhere.
4. Upgrade lighting for a big impact
Lighting can dramatically change the look and feel of your kitchen. Swapping out old light fixtures for modern, energy-efficient options is an affordable way to refresh the space. Under-cabinet lighting, pendant lights, or LED strip lights can enhance both functionality and style without a major investment.
5. Shop smart for appliances and materials
Look for discounts, sales, or open-box deals on appliances, fixtures, and materials. Many home improvement stores offer seasonal promotions, and you can often find high-quality used or refurbished appliances at a significant discount. Shopping at outlet stores, checking online marketplaces, or waiting for holiday sales can help you save even more.
6. Incorporate a backsplash for style and affordability
A backsplash adds character to your kitchen and protects walls from splashes and stains. Instead of expensive tile, consider peel-and-stick backsplash options, painted shiplap, or even beadboard for an affordable yet stylish upgrade.
7. Don’t overlook small changes
Sometimes, the smallest updates can make the biggest difference. Replacing cabinet hardware, updating faucet fixtures, or even adding decorative elements like open shelving or a fresh coat of wall paint can enhance your kitchen’s look without a major expense.

Where can I find quality budget kitchens in Scripps Ranch?
If you’re wondering what you should replace first in your kitchen remodel for maximum savings, how to save money when remodeling a bathroom, or you want to design your bathroom on a budget, Remodel Works is the team you can rely on. With years of experience and a dedicated crew, we’re here to help bring your vision to life. Whether you need us in Scripps Ranch or in another SD neighborhood, we’ll be there to help. Call today!
Latest Posts
The Kitchen And Bathroom Countertop Showdown: Quartz, Quartzite, Porcelain, Or Granite?
Kitchen Zones: How To Design A Kitchen Around The Way You Actually Cook
How to Make a Small Kitchen Feel Twice as Large
Get your in-home free estimate today!

It is no secret that bathroom remodeling can be a costly endeavor. From time and labor investments to purchasing materials and fixtures, the entire undertaking can quickly bloat and bust your home budget.
However, with some strategic planning and informed decision-making, budget bathroom remodeling in Scripps Ranch is not only possible – but near-certain. Today, we’re bringing you some lesser-known tips to save money and still end up with your dream bathroom.
How can I save money in a bathroom renovation?
While having a strategic plan is key to a budget-friendly remodel, there are always ways to further reduce costs – some of which may not be obvious at first glance. Here are 10 of them:
Materials & Fixtures
Estimated Savings: $2,000 – $5,000
Choose affordable materials
The most important thing to note here is that “affordable” does NOT mean “poor quality”. Today’s technology gave us some cost-effective alternatives for flooring, countertops, and fixtures, such as porcelain tiles, quartz countertops, and mid-range fixtures from reputable manufacturers (to mention a few). Exploring these options can lead to significant savings without compromising on looks or functionality of the finished product.
Shop smart
A little bit of patience (and footwork) can lead to major savings. Therefore, take your time to look for sales, discounts, or clearance sections at home improvement stores. If you don’t mind materials or elements that are pre-owned, you can also visit salvage yards and online marketplaces where you can find both for next to nothing.
Go for pre-fabs
Opting for a pre-fabricated shower or bathtub is an excellent way to reduce the overall cost of the remodel. Since they come in standardized sizes and designs, installing them is much faster, which directly translates to lower labor costs – and bigger savings!
Labor & Construction
Estimated savings: $1,500 – $4,000
Hire a contractor during the off-season
Timing your bathroom remodel to fall in the off-season (usually winter) can often lead to potential discounts due to lower demand. Plus, there is a good chance to further bring down the overall cost of the work, which brings us to the next point.
Negotiate with your contractor
Don’t be afraid to discuss possible cost savings, discounts, promotions, or even bundle services with your contractor. You’d be surprised at how many companies are willing to meet you halfway, especially during the off-season.
Permits, Inspections, & Miscellaneous
Estimated savings: $500 – $1,500
Understand local regulations
Non-compliance with local building codes can potentially lead to mandatory reworks, which can be incredibly expensive – and unavoidable. Therefore, be sure to familiarize yourself with San Diego building codes and regulations, as Scripps Ranch falls under their jurisdiction.
Schedule inspections efficiently
If your remodel involves structural changes, plumbing, or electrical work, you’ll be dealing with multiple inspections at virtually every milestone. These inspections aren’t cheap, costing around $100-$300 dollars per visit, which is why you should do everything in your power to prevent re-inspections, which you can do by:
- Providing advance notice to your local inspectors, informing them of upcoming milestones;
- Ensuring required work and documentation are complete and ready for inspection;
- (if possible) Scheduling multiple inspections on the same day (e.g., plumbing, electrical, etc.), to reduce repeat visits.
Reclaim and reuse
Repurposing old materials is an excellent way to save money on remodeling – not just because you’ll buy less but because you’ll be reducing waste disposal fees as well. Many people don’t know this, but you can even further reduce these fees if you donate materials that are unused or used but in good condition, as you’ll be eligible for donation tax credits!
Long-Term Savings
Estimated savings: $500 – $2,000 per year
Finally, you can enjoy some amazing long-term savings just by making a few smart choices, such as:
- Investing in energy-efficient lighting: LED lights can significantly reduce energy consumption and they can look amazing.
- Installing low-flow fixtures: Water-efficient toilets, showerheads, and faucets are options that can noticeably lower your water bills.
Who should I turn to for a quality budget bathroom remodeling near me in Scripps Ranch?

With a track record of excellence spanning 40 years, Remodel Works is de facto the top choice when it comes to bathroom and kitchen remodeling – on a budget or otherwise.
The knowledge and experience of our specialists enable us to tailor solutions according to your needs and budget, ensuring the final product reflects what you envisioned.
Whether you’re located near Miramar Reservoir or elsewhere in Scripps Ranch, you can count on us to deliver on the promise of quality, further reinforced by our comprehensive 5-year warranty on all the work. Reach out to us today and discover how you can realize your dream of a perfect bathroom – without breaking the bank!
Latest Posts
The Kitchen And Bathroom Countertop Showdown: Quartz, Quartzite, Porcelain, Or Granite?
Kitchen Zones: How To Design A Kitchen Around The Way You Actually Cook
How to Make a Small Kitchen Feel Twice as Large
Get your in-home free estimate today!

Design on a Dime: Tips for a Stress-Free Budget Bathroom Remodel
(858) 413-2305 Request a quoteIn today’s economy, price is a major deterrent for homeowners wishing to give their bathrooms a meaningful overhaul. But, what if we told you there is a way to create your perfect home oasis – without obliterating your home budget?
Budget bathrooms in Scripps Ranch can be designed to be aesthetically pleasing and functional, adding to your home value and your quality of life without breaking the bank – if approached strategically and conscientiously. Let’s see how you can do that.

How to design a bathroom remodel on a budget?
A thoughtful approach with a touch of compromise is key to preventing overspending and even saving money when remodeling a bathroom, especially if you’re working with limited funds. Fortunately, you can overcome many of these limitations if you:
Set clear objectives
Whether it’s a bathroom or a kitchen, the correct remodeling order is what makes or breaks the complete experience (and the bank). Therefore, the first step is to identify your “must-haves” and “nice-to-haves”. Based on this initial assessment, you’ll be able to create a prioritized list of tasks and features, allowing you to allocate your budget in the most efficient and effective manner.
Seek inspiration
Do not rush your decision. Instead, take your time and collect budget-friendly remodeling ideas from home improvement magazines or online resources. Once you’ve narrowed down your selection, further adapt the aspects of the remodel to fit your style, the aesthetics of your home, and of course, your financial capabilities.
Assess the space
Modifying the layout of your bathroom, as well as plumbing and electrical infrastructure, are the most costly aspects of the renovation. However, if you work with what’s already there, you can potentially save thousands of dollars. So, do your best to adapt your vision to an existing layout – it will be more than worth it.
“Wet Zone” focus
The “wet zone” refers to the areas that are commonly getting wet, such as bathtubs, showers, toilets, and similar fixtures. Since these areas are typically the most used, you should concentrate your budget around them, and only allocate the remainder of your funds to “dry zones”, such as storage, vanities, or decor.
Avoid DIY-ing
There’s a saying in the remodeling world: “Everything you save DIY-ing today, you’ll spend on repairs tomorrow”. Not only that but there’s a good chance that you’ll spend much more than you would if you’d hire pros to do the job.
Poor remodeling work can cause a host of problems further down the line, potentially leading to expensive repairs or even full do-overs which can absolutely obliterate your budget – and you won’t be able to avoid them.
Therefore, if you’re not 100% confident that you can finish the job – and finish it well – don’t risk it. Go for the professionals and enjoy peace of mind knowing that everything is done well and up to standards. Plus, having a workmanship warranty is always a nice failsafe!
Where to find remodelers that do quality budget bathrooms near me in Scripps Ranch?
For the full four decades, Remodel Works has been delivering top-tier bathroom and kitchen overhauls on budget and on time to the residents of Scripps Ranch and every other part of the San Diego region.

Our extensive experience and partnerships with some of the industry’s leading manufacturers ensure quality workmanship and a finished product certain to stand the test of time. Plus, we offer a comprehensive, 5-year workmanship warranty for your satisfaction and peace of mind.
Get in touch with us today to explore your options and enjoy the benefits of a remodeling experience that saves you money without sacrificing quality!
Latest Posts
The Kitchen And Bathroom Countertop Showdown: Quartz, Quartzite, Porcelain, Or Granite?
Kitchen Zones: How To Design A Kitchen Around The Way You Actually Cook
How to Make a Small Kitchen Feel Twice as Large
Get your in-home free estimate today!

Rightfully proclaimed “the heart of the home”, the kitchen is a haven where meals are savored, memories are crafted, and moments are shared. Over time, however, this vibrant space can lose its luster, becoming outdated, inefficient, and downright uninviting.
This is where thoughtful experts for kitchen remodeling from Carmel Mountain Ranch come into play, offering a multitude of amazing solutions that can breathe new life into this, most central of household spaces. But, let’s see what you stand to gain by committing to this step.
What are the benefits of remodeling?
The advantages of expertly envisioned and masterfully executed kitchen remodel extend far beyond the aesthetics. This one home upgrade can single-handedly improve numerous aspects of your property – and your overall lifestyle. Let’s explore further!
Enhanced Aesthetic Appeal
Starting with the most obvious, kitchen remodeling enables you to personalize your space so it reflects your unique taste and lifestyle, thanks to the broad selection of customized designs, materials, and finishes available today.
More importantly, it allows you to create a warm, welcoming space that beckons family and friends to gather, share stories and experiences, and make memories that last a lifetime – and that alone is worth more than anything else on this list or in the world.
Improved Functionality & Efficiency
Advancements in design and craftsmanship methods paired with technological achievements, can take the functionality of your kitchen (and your efficiency in it) to a whole new level. You can optimize the layout to reduce cooking and cleaning time, making meal prep a breeze.
You can maximize storage capacity with innovative, space-saving designs, keeping your kitchen clutter-free and organized. And, our favorite, you can seamlessly incorporate smart technologies (e.g. appliances and gadgets) to elevate your cooking experience and simplify daily tasks.
Health & Safety Improvements
Arguably one of the biggest advantages of a well-imagined remodel is that it can improve the health and safety of all users. For instance, today you have anti-microbial countertop materials and even self-disinfecting surfaces, making the space more sanitary while reducing the effort needed to clean them.
It is also possible to enhance air quality by installing powerful, efficient ventilation systems instead of the old ones. Finally, if there are elderly or children in your household, you can incorporate advanced safety features, such as anti-slip flooring and secure cabinet storage, to minimize the possibility of injuries.
Increased Property Value
For the end, let’s briefly step into the financial realm, since kitchen remodels offer significant benefits on that front as well, including:
- High return on investment (ROI): Kitchen remodels consistently rank among the top home improvement projects for recouping costs at resale.
- Boosted curb appeal: A modern, beautifully designed kitchen can significantly enhance your home’s overall appeal to potential buyers, should you decide to sell.
- Competitive edge: In a crowded real estate market, a modern, sleek kitchen can be the deciding factor for potential buyers.
- Enhanced resale appeal: In addition to all of the above, a gorgeous kitchen can broaden your home’s appeal to a wider range of buyers, from young professionals to growing families.
Who are the leading experts for kitchen remodeling near me in Carmel Mountain Ranch?

Since 1984, Remodel Works has been the preferred home improvement contractor in Carmel Mountain Ranch and across the region, specializing in innovative kitchen and bathroom remodeling solutions that make a difference.
Whether you’re considering giving your bathroom a complete overhaul or need help picking an ideal color scheme for your kitchen, you can count on us to deliver results that align with your vision and surpass your expectations. Get in touch with us today!
Latest Posts
The Kitchen And Bathroom Countertop Showdown: Quartz, Quartzite, Porcelain, Or Granite?
Kitchen Zones: How To Design A Kitchen Around The Way You Actually Cook
How to Make a Small Kitchen Feel Twice as Large
Get your in-home free estimate today!

17 Smart Details that Can Completely Revamp Your Bathroom
(858) 413-2305 Request a quoteAre you tired of your outdated bathroom but not ready to commit to a full-scale renovation? Understandable, considering how completely replacing a bathroom can be a costly and time-consuming endeavor.
Fortunately, when it comes to bathroom remodeling at Carmel Mountain Ranch, numerous remodeling solutions can revamp how the space looks, feels, and functions – without breaking the bank. Let’s dive in and explore some of these clever fixes.
How can I update my bathroom without replacing it?
Believe it or not, you don’t have to pay the hefty price tag of a full renovation to transform your bathroom into a haven of form and function. All you need to do is incorporate some (or all) of these smart solutions into your existing space.
Painting & Refinishing
Sometimes, all it takes to refresh your space is a new coat of paint. Here are some of the options:
- Wall revival: Updating your bathroom’s color scheme with a fresh coat of paint can instantly brighten up the space – or dim it, depending on the effect you want to achieve.
- Cabinet refinishing: A good refinishing job can breathe new life into outdated cabinetry while saving you up to 50% compared to replacement costs.
- Tile reglazing: A simple reglazing treatment can revitalize worn-out tile surfaces, eliminating the need for new tile installation for the foreseeable future.
Bonus tip: These color-based methods can be applied to your kitchen with the same effect!
Lighting Makeover
Now, here are 3 bright ideas (pun intended) for a budget-friendly bathroom update:
- Layered lighting: Introduce a combination of overhead lighting, sconces, and LED strips to create ambiance and enhance functionality.
- Replace outdated fixtures: Swap old lighting fixtures for sleek, modern alternatives. This can instantly elevate your bathroom’s style and it’s dirt-cheap.
- Smartify your bathroom: With today’s smart lighting systems, you can fine-tune brightness and color temperatures, creating the ideal atmosphere – all from your smartphone.
Sink, Toilet, and Shower Solutions
Some of these upgrades are on the slightly pricier side but, for the most used parts of your bathroom, they’re well worth it:
- Vessel sink installation: These sinks are all the rage now, and for a good reason – they add a touch of sophistication to every bathroom and they’re super affordable.
- Toilet upgrade: Install a new, water-efficient toilet model, enhancing both functionality and eco-friendliness.
- Glass door or panel installation: Adding a sleek, frameless glass door or panel to your existing shower can offer that oh-so-desirable high-end look.
Flooring Fixes
Replacing the flooring is generally very expensive. Fortunately, these options are anything but:
- Refinishing/re-glazing: Whether it’s hardwood, tile, or natural stone, a good refinishing or re-glazing service can easily (and swiftly) revitalize it.
- Flooring overlay: Installing a flooring overlay, such as luxury vinyl tile (LVT), directly over your existing floor is minimally disruptive and cost-effective.
Storage & Organization Solutions
For a clutter-free bathroom in which you can function without obstructions, consider some of the following solutions:
- Custom cabinetry: Yes, custom bathroom cabinets are generally quite expensive – but they don’t have to be. There are options that allow you to maximize storage on a budget while staying true to your style.
- Over-the-toilet storage: This upgrade can be ridiculously cheap – and super-effective, especially because it allows you to utilize the often-wasted space above the toilet.
- Accessory upgrades: Replace outdated towel bars, grab handles, and soap dispenser holders with modern, sleek alternatives for a quick-and-easy touch of style.
Take it a step further – to the future
Modern technologies can significantly enhance convenience and, with constant and rapid advancements, they are becoming cheaper by the day:
- Smart mirrors: Yes, smart mirrors! They come with built-in LED lighting, Bluetooth connectivity, speakers, and some models even feature a full-on TV. The future really is now!
- Water-saving faucets: Incorporate touchless, voice-controlled, or motion-sensing faucets for both convenience and water conservation.
Where can I find specialists for bathroom remodeling near me in Carmel Mountain Ranch?

With a legacy of excellence spanning a full four decades, Remodel Works remains the top choice of home improvement contractor on either side of I-15. Our solutions are characterized by innovative design, high-quality materials, and expert execution, ensuring that you can reap all the benefits of your kitchen or bathroom remodel. Reach out to us today and discover how we can take your space to the highest heights!
Latest Posts
The Kitchen And Bathroom Countertop Showdown: Quartz, Quartzite, Porcelain, Or Granite?
Kitchen Zones: How To Design A Kitchen Around The Way You Actually Cook
How to Make a Small Kitchen Feel Twice as Large
Get your in-home free estimate today!
What to Keep in Mind When Choosing the Paint for Your Kitchen
(858) 413-2305 Request a quotef you’re planning kitchen remodeling in Carmel Mountain Ranch, choosing the right paint is an important part of the process since it directly impacts the room’s functionality, appearance, and longevity. Kitchens are high-traffic areas, exposed to heat, moisture, and regular wear and tear, making it essential to select a paint that not only complements the aesthetic but also stands up to these conditions.
A well-chosen paint color can enhance the atmosphere, make cleaning easier, and even increase the value of your home. With so many colors and finishes available, finding the right one can seem overwhelming. This guide will walk you through the key factors to consider when selecting kitchen paint, ensuring that you’ll get style, balance, beauty, durability, and practicality.
How to choose paint for your kitchen?
When selecting paint for your kitchen, it’s essential to think beyond just color. Factors like durability, finish, moisture resistance, and ease of cleaning all play a role in finding the ideal option for this high-use space.
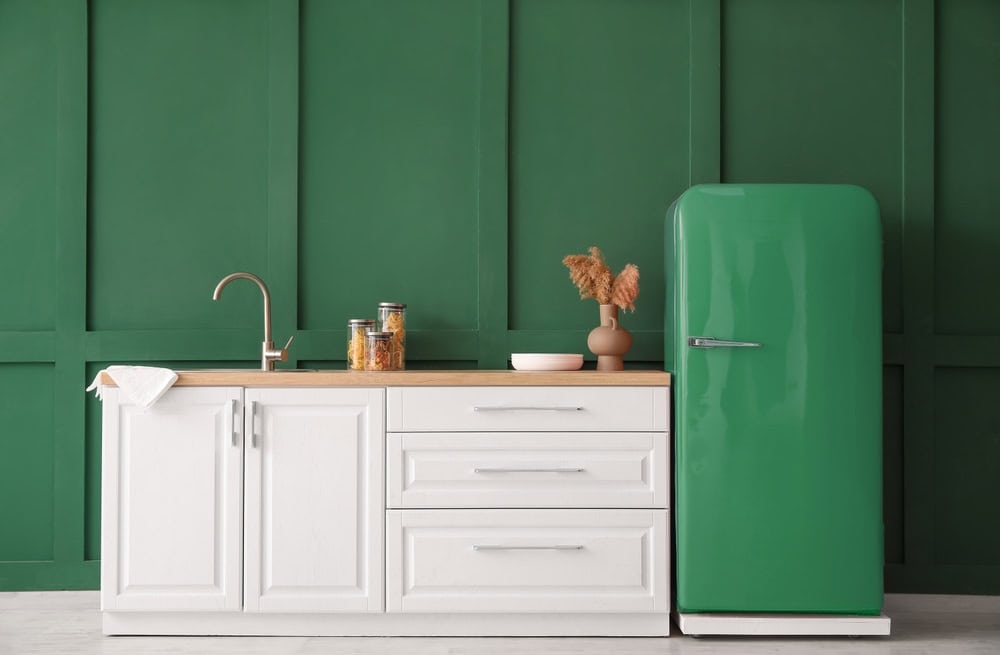
1. Consider the color scheme
Color can transform the mood of any room, and in the kitchen, it’s particularly impactful. Choose colors that complement your cabinets, countertops, and appliances. Neutral shades like whites, grays, and creams are timeless and versatile, working well with various kitchen styles. If you want to create warmth and coziness, warmer tones like soft yellows or muted reds are excellent choices. For a modern, sleek look, consider darker shades, though you may want to balance them with lighter elements to avoid making the space feel too enclosed.
2. Choose the right finish
The finish of your paint is crucial in the kitchen because it affects durability and ease of cleaning. Kitchen walls are prone to splashes, stains, and fingerprints, so look for finishes that are both resilient and easy to wipe down. Avoid matte finishes in the kitchen, as they are harder to clean and can absorb stains and moisture over time.
- Satin or semi-gloss finishes: These finishes are popular choices for kitchens because they’re durable and washable. Satin is a bit more muted, offering a soft shine that’s easy to clean, while semi-gloss provides a higher shine and is even more resistant to moisture and grease.
- Gloss finishes: For high-wear areas like cabinets or trim, gloss paint is a good choice as it provides maximum durability and is highly moisture-resistant. However, it’s less forgiving on walls, where imperfections can show more prominently.
3. Consider moisture & stain resistance
Kitchens are naturally exposed to humidity from cooking, so selecting a paint that resists moisture is essential. High-quality paints with moisture resistance help prevent mildew and mold growth, especially in areas near the sink and stovetop. Look for paints labeled specifically for kitchens and bathrooms, as they’re designed to withstand humidity better than standard paints.
4. Think about VOC levels
Paints with high volatile organic compounds (VOCs) release harmful fumes that can cause headaches, nausea, and long-term health issues. Since the kitchen is a place where food is prepared and consumed, choosing low-VOC or zero-VOC paint is a healthier option for you and your family. Fortunately, many reputable paint brands offer eco-friendly, low-VOC options without compromising on color quality or durability. These paints reduce indoor air pollution, creating a safer environment during application and after drying.
5. Evaluate your budget
Kitchen paints can vary widely in price, so set a budget that takes into account both the cost of the paint and any supplies needed, such as brushes, rollers, and primer. While it may be tempting to go for the most affordable option, investing in high-quality paint usually pays off in the long run. Premium paints with durability and easy-clean properties reduce the need for frequent touch-ups, saving time and money over the years.
6. Test samples before committing
The lighting in your kitchen can affect how a paint color appears on your walls. Before purchasing a large quantity, test samples of a few selected shades on your walls and observe them under different lighting conditions throughout the day. This small step can help you avoid costly mistakes and ensure the color looks just as you envisioned.
Who should I call for sophisticated kitchen remodeling in Carmel Mountain Ranch, CA & the area?

If you’re looking for precision craftsmanship, increased longevity, hassle-free execution, and a wide selection of designs and styles, Remodel Works is the team for you. We have the experience, know-how, and can-do attitude to turn the most complicated ideas into a picture-perfect end product.
Whether you’re looking to revamp your old bathroom, want to explore the perks of kitchen remodeling, or want to lean on the power of smart details in upgrading your bathing area, we have all the solutions you need under one roof.
No matter where you’re located between Sabre Springs Recreation Center on the south and the northern reaches of Carmel Mountain Ranch, we have the tools and the prowess so get in touch with us today!