
What is a granny flat? A granny flat or “accessory dwelling unit” is a self-contained unit in addition to the main house. It is typically designed for one or two people to live in with a bed and kitchenette. It can be attached, detached, or in the main house, but is always built on the same lot where the original owner resides. Thus, the granny flat shares a water meter and electric bill with the main home. However, California granny flat law maintains that there can only be one granny flat and one house on the same lot.
Why do people build granny flats? Granny flats are known for being the perfect place for parents or grandparents to live in during retirement. This style of home is the perfect housing to keep grandparents living independently while also being close to the family. On the other hand, they’ve been known as a perfect home for recent graduates and young adults to live as they save for their first home. If you don’t need the extra space as your kids get older, consider the granny flat as a perfect guest house to host family and friends when they come to stay over.
However, over the past years, not enough homes have been built to keep up with the growing population in California, creating a housing crisis and skyrocketed rent prices. In times of increasing rental costs, and high demand for affordable housing, the granny flat can be used to house not only grandma in her elderly years but other friends and family as well.
Though there are many legal requirements to navigate before doing so, another great use for the granny flat is to earn extra income. Having a steady passive income from someone renting out a portion of your property can drastically improve your quality of life and ease the stress of mortgage payments.
Despite the logical reasons for wanting a granny flat addition, most California homeowners know that in the past it has been almost impossible to add a granny flat onto an existing home due to stringent regulations that were put in place during the 80’s. These granny flat regulations intended to preserve public health, safety, and welfare. Laws that required proof of property owners living in one of the properties and could only have a relative living in the second property have since been overturned allowing non-dependent children and relatives to live in the space.

How Has it Changed?
As a result of the housing shortage in California, a series of laws has taken place to make the building of granny flats on single-family residence zoning codes much more lenient. The intent is to ease the stress of high rents for low to middle-income workers in a fast and cost-effective manner.
In January, a state law took place which required cities to ease the current regulations that limit the ability to build granny flats through various steps. These regulations included issues regarding restrictions on parking, fire sprinklers, buffers between property lines, and utility limitations. The new sizing rule increased from a maximum flat size of 700 square feet to the lesser of either half the size of the original home or 1,200 square feet. On the other hand, units called “companion units” or “in-law suites” at a maximum of 500 square feet are now legal to be built in single-family homes on the restriction that they are equipped with a kitchenette. To deter homeowners from renting these dwelling units as short-term vacation rentals, tenants are required to be listed under a 30-day lease minimum. San Diego City Council also unanimously approved legislation to lower the development fees associated with building granny flats in San Diego which, in most cases, previously matched the cost of building the flat in the first place.
Who is Eligible to Build?
Although the state of California has made it significantly easier to adopt an accessory dwelling unit, not every home can provide the framework for an ADU not every homeowner is ready to take on tenants. So who is eligible to build one? Checking with your local governments and city ordinances is a good place to start. Check to see what your city codes are for building an ADU based on criteria such as construction fees and parking requirements. San Diego County currently requires one parking space for an accessory unit, unless the unit is close to mass public transit. Some cities may also find pre-planned and pre-approved floor plans to make the process of constructing a granny flat even more manageable without the hassle of getting every step of the process approved.
Those Looking for an Efficient Way to Earn Extra Income
Rental properties are great investments for homeowners looking for an additional steady income. However, purchasing a rental property, renovating it, filling it with tenants, and managing it can be a pretty difficult task for anyone who hasn’t done it before. To add to that, another property comes with another mortgage to pay down. So, for those looking to try renting out a space in a more straightforward way, building a granny flat is a viable option. Having an ADU on your own property not only provides you with extra cash flow, but it is much easier to manage tenants and maintain the building and amenities when they are located conveniently on your own property. If you are looking to get your toes wet as a landlord, the granny flat is a great place to start.
Homes with Large Side or Backyards
The size of your granny flat is dependant on the size of your yard or whatever space you choose to build the ADU on. However, it is also dependant on how much space you are willing to give up or share. Building an ADU is done much easier on a lot that has a significant amount of space on the side or backyard to where the extra home doesn’t overcrowd the area but is still easily accessible from the main home. According to zoning laws in California, you’ll also need enough room for buffer zones between homes and fences. An excellent place to start is by thinking about what kind of tenants you will be renting to. Does your neighborhood have a vibrant nightlife? If so, you may be renting to young singles who probably won’t need much yard space. On the other hand, if your neighborhood is known for having a great schooling system in a family neighborhood, renting to a small family may require more shared backyard space.
Homes Structured for Success
Certain cities such as San Diego allow garages to be converted into a granny flat which is great for those who do not find themselves needing the extra space that a garage provides. If on-street parking is abundant in your neighborhood, this may be a great option for you. If your garage is an essential part of your everyday life, another option would be to construct a granny flat above your garage. This will grant you your privacy while still utilizing every inch of your home. On the other hand, granny flat regulations in San Diego also allow for porches to be converted into an accessory dwelling units. This is typically done by enclosing the preexisting structure. However, if your home has any pre-construction structural issues, more work may need to be done before enclosing the porch. In this case, constructing an attached external accessory dwelling unit may be more feasible for budget and time allowances.
Attached Internal ADU
An in-home granny flat is made by converting part of your existing home into a separate dwelling unit. This type of property change is converted from within and therefore is less obvious that there is an extra unit within the single-family dwelling when looking from the outside of the property. The internal ADU is often built from an existing basement or attic. Although there are typically no external entryways to this type of ADU, it is the cheapest type to build because they require little materials for construction. And to reduce costs even further, they typically do not require large and expensive appliances that are typically found in other housing units. The perfect candidate for this type of ADU is a close family member, teens who need more privacy, or recent college grads who are saving money to live on their own.
Attached External ADU
An attached granny flat can be less costly than a detached granny flat because it utilizes an already existing part of your home which cuts down on costs in the construction phase. However, you’ll still need to provide an entrance to the flat that is separate from the primary residence to ensure that guests and tenants can come and go without disturbing those who live in the main house. Although rare, an attached ADU can be more on the costly side since you may have to do structural changes to the original home in order to support a second structure. When building this type of attached structure, you should consider who will be living in it as they will be in very close proximity to your family home. A good candidate for this property would be independent family members or friends since you’ll likely be sharing entrances and spaces with them.
Detached ADU
The detached ADU provides additional habitable space that must be set on a foundation, which eliminates the ability to use an RV or mobile home for the space. These are used primarily to provide the least amount of disturbance to those in the main house. Because the unit and main entrance are entirely detached from the original home on the property, they are best suited for dwellers who want to remain independent. The ideal candidates would be family members who need their own space or tenants who want to keep their privacy from landlords. Detached units must have a kitchenette and bathroom for renters, which brings the building cost per square foot up significantly. However, more amenities can mean higher price points when discussing rent projections. You will need to keep in mind that the detached unit also requires the most space in the back or side yard of your home.
Can a Granny Flat Boost the Value of a Home?
As we have mentioned before, the granny flat or “ADU” can be a very cost-effective way to house elderly family members or students while remaining independent. On the other hand, they can also be a great way to earn extra income by turning it into a rental property. But what does constructing a granny flat do to the value of your home when it comes time to put it on the market? Does the presence of a granny flat increase marketability? The answer is yes. If the granny flat is built properly, doesn’t miss any steps when getting a building permit and abides by the rules and regulations of construction, it can be a great asset to increasing the value of your home.
For this reason, it is incredibly important to have a professional take control throughout the whole process. Depending on what type of flat you choose, a granny flat can increase the value of a home by up to 60 percent. So before you build, it is a good idea to get advice from a professional to make sure that you’re building cost effectively. Another thing to keep in mind is the location of your home. Will the new owners be renting it out the same way you did? Will they use it as a haven for their older children? Is there a college nearby that might provide an abundance of student rental demand?
Wrapping Up
Overall, the much sought after granny flat addition has been made much more accessible through the change in regulations throughout California. The decrease in fees and regulations has brought about a spur of Californians to construct ADUs on their properties as a place for their loved ones and even to try their hand at landlordship to diversify their income.

Latest Posts
The Kitchen And Bathroom Countertop Showdown: Quartz, Quartzite, Porcelain, Or Granite?
Kitchen Zones: How To Design A Kitchen Around The Way You Actually Cook
How to Make a Small Kitchen Feel Twice as Large
Get your in-home free estimate today!

There’s no denying the results of a solid open floor plan kitchen remodel – maximized space, better functionality and design, and modernized aesthetic.
But what all goes into the process? If you’re moving forward with a remodel, what do you need to know? Here’s what to expect during an open floor plan kitchen remodel.
What to Expect During the Planning Process
Planning is a pivotal phase of going through an open floor plan kitchen remodel. During the planning phase is when you seek out design inspiration, decide what you like and don’t like, and take a serious look at your space to determine exactly what could work for you. Here are key considerations and steps to take during the planning process.
Envision Your Dream Kitchen
The great thing about planning a kitchen remodel in today’s day and age is that there are seemingly limitless design and aesthetic options for you to choose from. Especially with inspiration easily found through platforms like Pinterest and even our own gallery, there’s no shortage of sources to look up that will help you envision your dream kitchen.
So, during the planning process, take the time to use these resources and reflect on any and everything you could want for your dream open kitchen remodel. Save pictures in an “idea” folder or Pinterest board, where you store pictures and architectural details that appeal to you.
In addition, start by creating a detailed wishlist that takes into account your goals for remodeling. Do you want more space? More storage? A distinct style? A fluid, functional design? Organize your wish list by priority, to help make sure you focus on the elements that are truly important to you (this will especially help in the budget planning phase!)
For open concept kitchen design inspiration, see our blog post, Open Concept Kitchen Design Ideas.
Get Personal
Now that you’ve saved pictures that appeal to you and thought about your dream wishlist, it’s time to get real and personal. As important as visual inspiration is, it’s crucial to ground your remodel in functionality. Take some time to think about the usability of your kitchen. For example: how many chefs usually work in your kitchen? More than one? What’s your cooking style – more formal or laid back? Is your kitchen mostly for “work,” or does it take on a more social quality? How much do you enjoy (or not enjoy) cleaning?
Go Big (or Go Home)
Going through the process of a kitchen remodel is the ideal time to expand. Luckily, there are several ways to do it!
A great way to enlarge your open concept kitchen even more is by “stealing space” from other rooms during the remodel. “By repurposing square footage from an adjacent hallway or a no-longer-needed chimney, closet, or porch, you can expand your kitchen at perhaps half the per-square-foot costs of an addition”.
If you want to go the extra mile in your remodel, you can also consider adding a bump out and actually building your house to make your open concept space even bigger. If you were ever considering an addition, now is the time to do it!
Budget
Another key aspect of the planning phase is setting a budget. Doing this very early in the process will help prevent stress and frustration later on.
Take a realistic look at your available budget. A great rule of thumb is to “cap your kitchen renovation budget at 15% of your home’s value. For budgeting purposes, figure about 30% on cabinets; 14% on appliances; 10% on countertops; 5% on lighting; 4% on plumbing fixtures; 2% to 3% on paint; 1% to 2% on tiles, and 35% on construction costs, such as windows, flooring, and labor”.
One of the surest ways to shave costs and work cost-effectively in your remodel is to do more with what you’ve got. Envision your ideal layout for storage and appliances – how much of that is a departure from your current structure, and what is the same?
Working with a Professional
Despite the added cost, working with a professional can save a lot of time and headache during the process of an open concept kitchen remodel. Here’s what to expect if you are debating working with a professional designer.
Working With Designers in Your Remodel
Since your project will only be as good as its design, we recommend choosing to partner with a designer to create the open concept kitchen of your dreams. Expect to pay 3 to 10 % of your project budget on for design.
Another consideration for working with a designer: if you are considering re-selling your home at any time in the future. The design and structure of your kitchen remodel will significantly impact the resale value of your home, should that be your end goal, working with a professional will ensure you get maximum value.
To sum up, we highly recommend working with a professional designer for your kitchen remodel – and almost every other person in this industry will recommend the same!
What to Expect During the Remodel
An open concept floor plan, specifically an open concept kitchen remodel, is an investment in both money and time. Here’s what you can expect during the actual remodeling process.
Working with Contractors
One of the biggest components of your remodel will be the contractors and team who actually work to complete it.
Doing serious research on your contractor ahead of time will help give you the confidence during the remodel process to let them fully dive into their work. A great way to ensure this confidence from the start is researching your desired contractor’s reputation, and maybe even visiting one of their current jobs in progress. And speaking of reputation, even though you may want to get your remodel done as soon as possible, remember that the best contractors are worth waiting for. Build your schedule around the general contractor of your dreams, not vice versa.
During the process of your model, let the professionals do their work – after all, this is what you hired them for. Do your best to stay out of the way, and provide refreshments when needed. Respect on both sides will keep the work environment as enjoyable as possible.
Time
Perhaps one of the biggest expectations to set for yourself in the remodel process is that it will almost always take longer than you think. Even if the remodel goes almost exactly according to plan, setting an expectation up front that it will take longer than you expected will keep you from getting unnecessarily stressed.
Common Mistakes to Avoid<
In a perfect world, demolition starts on time, deliveries arrive on schedule, installation takes place without a hitch, and cleanup is quick and easy. Chances are, your remodel will have a hiccup or two, but you can ensure things go as smoothly as possible by avoiding these common mistakes.
Do NOT try to be your own contractor. A kitchen remodel is one of the most costly, complicated, and time-consuming projects imaginable, and the input of qualified professionals is not only valuable, in most parts of the country it’s mandated by law. Ideally, you did the heavy lifting during the research phase and can sit back and let the team do the job you hired them to do.
Do NOT pay in advance. The rule of thumb here is to never pay more than 30 percent of the total job cost up front (typically to cover startup materials). Then work out a schedule of progress payments based on the completion of predetermined phases of the job. You never know what may come up that will affect the original quote: the materials you originally chose may run out of stock so you have to choose something else. Or, you may end up not wanting to install the trim you originally picked out. The point is: the original quote may not end up being the final cost, so paying it 100% up front is almost always a mistake.
Do NOT get distracted by trends. It’s so important to stay true to your original wishlist and priorities. Don’t get distracted by the “latest and greatest” and risk spending money on something you’ll regret down the line. Reordering, reconfiguring, changing your mind over and over —it all leads to delay, tapped-out budgets, and exasperated contractor teams.
Do NOT ignore what you can’t see. Yes, it’s fun to focus on your new quartz countertops, distressed cabinet panels or marble floors, but don’t forget to pay attention to the elements you can’t see. If the sides and hardware aren’t assembled efficiently, the doors will be crooked in no time. Don’t be seduced by surfaces: It’s what’s behind the walls and under the floors that really counts.
What to Expect After the Remodel
Congratulations! You made it through your open concept kitchen remodel. Now that you’ve gone through the process, here are a few things you can expect.
Open Flow
After your remodel is complete, your new kitchen layout will be much more open and flows directly into your family room and/or dining room, making the space perfect for the way so many of us entertain today. You will experience a much more efficient and functional flow of traffic and activity in your home after opening up a kitchen to a dining room.
As a result, you can probably also expect more bodies in these open, easy to use rooms and passageways. Everyone is going to want to hang out in your open concept kitchen now that there is lots of new space to navigate.
Influx of Light
Another adjustment you can expect after your open concept kitchen remodel is an influx of natural light into your home, perhaps into spaces where you’re not used to having any natural light. Opening walls up in your new kitchen will brighten the entire space. There are also significant health benefits that come from exposure to natural light. Research has proven that “natural lighting helps people be more productive, happier, healthier and calmer. Natural light has also proven to regulate some disorders including Seasonal Affective Disorder”. So you may begin to experience those health benefits as well!
Social Gatherings
Another pro of an open floor plan? The influx of friends and family members who will want to come over and see your new space! Open concept kitchens are notoriously great for entertaining, and you can certainly expect to be the “host with the most” with your new kitchen.
Hopefully, now you have a better understanding of what to expect during an open concept kitchen remodel: before, during, and after the process. As you can see, like any good thing, a proper remodel takes a lot of planning, time and energy, but the end result will be well worth the wait!
Latest Posts
The Kitchen And Bathroom Countertop Showdown: Quartz, Quartzite, Porcelain, Or Granite?
Kitchen Zones: How To Design A Kitchen Around The Way You Actually Cook
How to Make a Small Kitchen Feel Twice as Large
Get your in-home free estimate today!

Open floor plans have become incredibly sought after in recent years. Especially with the rise in popularity of home improvement and remodeling TV shows that demonstrate what a change they can make in a home, open floor plans are a common request from homeowners. Before moving forward with implementing an open floor plan in your own home, here are the pros and cons that you should consider.
What is an Open Floor Plan?
Before discussing advantages or disadvantages, it’s helpful to have an understanding of what exactly an open floor plan is.
An open concept floor plan in a home is generally defined as the elimination of barriers such as walls and doors that traditionally separated distinct functional areas, such as kitchen, living room, and dining room. A house with an open floor plan will not have any walls or partial walls in the common spaces; rather heavy-duty beams carrying the weight.
Open floor plans are visually and aesthetically more “open, ” and often promote a seamless flow of common areas, with multiple rooms being combined into a single living space. These floor plans work extremely well in homes with less square footage.
History of Open Floor Plans
The open floor plan is a relatively new concept in residential home design.
Homes up until the 1940s and 1950s employed designs where a room had its own unique function: the kitchen would be a separate room, the dining room would be a separate room, and so on. Even if the divisions between rooms were only partial ( three-quarters of a wall), this was common practice. The mindset was that “the more rooms a house had, the more attractive, compartmentalized, and functional it was”.
But, after World War II, it became possible for ordinary homeowners to have houses with open floor plans, due to social and technological advances. Open floor plans became seen as a more convenient, social option. This is also because cooking had evolved to become a social function: Mom was no longer the one always preparing the meals, and the open floor plan facilitated social interaction amongst families.
In addition, improvements in structural materials made open floor plans easier to create. “Stronger and more compact structural beams, such as the micro-laminated beam, made it easier to create open floor plans”.
Over time, designers and homeowners alike began to realize that homes with open floor plan designs could fit more
usable living space into the same amount of square footage. Today, open floor plans are more common than ever. “Cellularized,” separated rooms are seen as more “retro” and are making a design resurgence for that reason, even though they were once considered the norm!
Common Uses of Open Floor Plans
The most common use of the open floor plan is the “great room,” which combines the kitchen, dining room, and living room in one shared space. This arrangement is particularly popular because it helps the living room get more use and the kitchen gain some much-needed extra space – two of the rooms where families naturally spend more time anyways.
According to The Spruce, here are three other typical open floor plan uses:
- Kitchen/Dining Room: Opening up a kitchen to a dining room. Often a kitchen and dining area share one common space, with a kitchen island design or peninsula serving as a visual dividing line between the two spaces.
- Dining Room/Living Room: A dining area and living room share a common space, with unique touches like stairs, two different paint colors, or a handrail serving as a visual dividing line.
- Kitchen/Dining/Living Rooms: All three areas may be connected.
Advantages of an Open Floor Plan Kitchen
Here are some of the top advantages of installing an open concept kitchen in your home.
Easier Traffic Flow
One of the biggest advantages and effects of installing an open floor plan is a much easier traffic flow between rooms. There’s more space to navigate, no tight corners to avoid, few doorways and doors to open and close… It’s an altogether more seamless, natural experience. Especially if you have a large family or are used to having lots of bodies in your home, and open floor plan will help create a less hectic environment for everyone.
Make Spaces Appear Larger
Open floor plans also offer the significant benefit of making spaces of any size appear larger. This is why open plans are especially good for smaller homes and can make small areas feel much larger than they actually are. If you have a home with lower square footage, an open floor plan in the common areas may be just what you need to open up the space.
Shared Light
Another benefit of opening up your common areas with an open concept floor plan is the influx of light, specifically natural light that you can create in your home. The removal of interior walls allows sunlight from windows in the exterior walls to permeate throughout the home and helps allow more natural light to reach areas of your house that would normally be blocked by walls. Fewer walls means more light.
This also means that by installing an open floor plan with lots of natural light, you can save money on buying lamps and lighting fixtures, and may even be able to decrease electricity used in your home.
Room for Lots of Furniture
If you have a knack for interior design and decoration and enjoy having lots of furniture in your home, an open floor plan may be a great choice for you. With minimal walls, there is plenty of space for additional seating, tables and accents pieces, and few limits on how you can arrange them.
Resale Value
As mentioned earlier, open floor plans are incredibly desirable in today’s housing market. By implementing an open concept in your home, you will inherently increase your home’s resale value. Open floor plans are a trend that is here to stay!
Promotes Social Interaction
The openness that accompanies this floor plan option lends itself extremely well to social interaction and is ideal for a homeowner who likes to host frequent social gatherings. In a house with an open floor plan, you can easily host a large number of guests who can socialize without splitting up into different rooms.
Furthermore, the person cooking or cleaning in the kitchen can converse with people in other rooms very easily.
Family Friendly
In that same vein, open floor plans also are a great choice for families. Great rooms allow parents to cook and do other household duties while their kids play in the same room. That way, kids are never too far out sight, and can easily be kept an eye on from most vantage points in the common areas. For families with young children, this is an especially nice benefit.
Disadvantages of an Open Floor Plan Kitchen
Here are some of the “cons” of open floor plan kitchens that you should consider before moving forward with one in your own home.
More Expensive Climate Control
With a classic, or closed-space floor plan, it is possible to heat some rooms, while leaving others unheated. But with an open floor plan, all rooms share the same heating or cooling system. Since the space is larger and more open, you have more of it to heat or cool, which could lead to higher energy bills.
Expensive to Build
As with any home or kitchen remodel, installing an open floor plan has significant costs. A lot of the costs of an open floor plan remodel have to do with the fact that it is more expensive to purchase and install microlam beams than to install conventional load-bearing walls.
For more information on what exactly you can expect before, during and after an open floor plan remodel, check out our article, What to Expect During an Open Floor Plan Kitchen Remodel.
Lack of Privacy
While open floor plans are great for families since parents can easily keep an eye on kids, this “benefit” alludes to a potential drawback of open floor plans: lack of privacy. Many households “have people contending with different ages and schedules, from babies to teenagers and grandparents or nannies that all live in the same home”. For this reason, closed floor plan homes with separate rooms may work better for families that need more privacy.
Less Sound Control
With fewer walls to block or absorb sound from room to room, open floor plans certainly offer less sound control in common areas. This means that you can expect more noise in common areas if you opt for an open floor plan.
Less Wall Space for Art Work
If you are an art enthusiast and need ample space to display your favorite works you will need wall space, which you will not find as much of in an open floor plan. In addition, depending upon the delicacy or type of art, direct sunlight may damage it. So an open floor plan, which facilitates more natural light, may not be a good choice for you.
More Upkeep Needed
Open floor plans create more openness in homes, but this also means that all common areas of your home are out in the open almost all the time. With an open floor plan, more upkeep (tidying, sweeping, vacuuming, dusting and more) may be necessary, and at a more frequent rate. It’s more difficult to “hide” messes in an adjacent room since there are fewer rooms to go around.
How to Decide if an Open Floor Plan is Right For You
Here are a few key questions that will help you determine if an open floor plan may be a good fit for your family and needs:
- Do you enjoy entertaining or hosting large groups of people?
- Do you enjoy cooking, baking, or spend a lot of time in the kitchen?
- Do you prefer more modern decor?
- Do you have the budget necessary for a home open floor plan renovation?
If the answer to any or all of those questions is “yes,” then an open floor plan may be just what you’re looking for. Conversely, if your answer to any of these questions is yes:
- Do you prefer cozy spaces?
- Is your home life pretty noisy?
- Do you like to hang a lot of art on your walls?
Then you may want to think twice before moving forward with an open floor plan.
But if you do elect to move forward with an open floor plan, you can expect a host of design questions and challenges. We created this in-depth guide to Open Concept Kitchen Design Ideas to help you design the kitchen of your dreams. In it, you can find design inspiration to fit the exact form, functionality and aesthetic you’re looking to create.
Now that you know the pros and cons of open floor plan options, hopefully you will be able to make a more informed decision on whether or not this design trend is right for you.
Latest Posts
The Kitchen And Bathroom Countertop Showdown: Quartz, Quartzite, Porcelain, Or Granite?
Kitchen Zones: How To Design A Kitchen Around The Way You Actually Cook
How to Make a Small Kitchen Feel Twice as Large
Get your in-home free estimate today!

Open concept kitchens seem to be all the rage these days – and with good reason. They maximize the appearance of space, and lend themselves to better functionality and design, especially for a family home. In this article, we will explain exactly what an open concept kitchen is, elements to consider if you’re thinking about installing an open concept kitchen in your home, and how to determine if your house should have an open concept kitchen.
Open Concept Kitchen 101
Open concept spaces in a home are generally defined as the elimination of barriers such as walls and doors that traditionally separated distinct functional areas, such as kitchen, living room, and dining room. In the context of the kitchen, an open concept floor plan is typically based around a kitchen that opens up to a dining room, a dining room and living room (often called a “great room”), or some other combination of multiple rooms.
Open floor plans are visually and aesthetically more “open, ” and often promote a seamless flow of common areas, with multiple rooms being combined into a single living space. These floor plans work extremely well in homes with less square footage, and help busy families with multitasking, since cooking, eating and catching up can all happen more-or-less in the same place.
How Are Open Concept Kitchens Built?
Open concept kitchens are not built or supported the same way as traditional walled kitchens. One of the defining characteristics of an open concept kitchen is that it will not have any walls or partial walls in the common spaces. Instead, the weight of the ceiling or 2nd floor is carried by load-bearing support beams.
History of Open Concept Kitchens
Like open floor plans in general, open concept kitchens are a relatively new development in the world of residential home design.
Traditionally, and up to the mid-1900s, homes were designed and built to accommodate different rooms for different functions. Each room had its own role – the kitchen was for cooking, the dining room was for eating, the living room was for spending time as a family, and so on. To change functions (e.g. to go from cooking to eating), you also had to distinctly change rooms.
Not to mention, kitchens back then were noisy, and potentially dangerous before all the advances that have been made in appliance technology. Stoves could easily overheat, kitchens could become filled with smoke – there were too many possibilities for disaster for the kitchen to be in such a publicly accessible part of the home.
Multi-roomed homes also were somewhat of a status symbol – the number of rooms you had in your house could be associated with what you could afford. Simply put: more rooms traditionally equated higher status.
However, around 1940-1950, things changed. Kitchen design and cooking technology experienced significant improvements, and builders recognized the efficiency using an open layout to combine spaces within a home and better utilize square footage. Although open concept floor plans and kitchens began as an economical, logical option for homeowners, today they have transformed into the preferred option by the majority of homeowners.
In fact, “cellularized” separated rooms reminiscent of closed floor plans are now seen as more “retro” and are making a design resurgence for that reason, even though they were once considered the norm!
Pros & Cons of Open Kitchens
Open concept kitchens are popular, but that doesn’t mean that they don’t have a host of drawbacks (and benefits that should be considered.
For example, while open concept kitchens will certainly promote easier traffic flow between busy rooms, the lack of walls lends itself to a noisier environment. Open concept kitchens can facilitate more social interaction, but can also make it hard to get away if you just need some private time.
Probably one of the biggest benefits of open concepts kitchens is that they almost always add significant value to your home. Especially if you are investing in your home for resale value, an open concept kitchen is an excellent choice.
For more detailed pros and cons of open floor plans, check out our article, Pros and Cons of an Open Floor Plan
Popular Open Concept Kitchen Floor Plan Layouts
As mentioned earlier, the most common use of the open concept kitchen is the “great room,” which combines the kitchen, dining room, and living room in one shared space.
This design idea is especially popular because it turns the kitchen into more of a social hub, while also increasing the usable space that a busy room like the kitchen requires.
Another typical open concept kitchen layout is opening the kitchen into a dining area. This practice has helped to de-formalize the idea of a “dining room,” and has given rise to more informal dining spaces, such as “the breakfast nook.”
Questions to Ask When Thinking About Designing an Open Concept Kitchen
An open concept kitchen can be a great move for your home. However, there are a few elements you should consider if you are thinking about designing an open concept kitchen.
How much space would you ideally like to have in your kitchen?
One of the obvious benefits of installing an open concept kitchen in your home is the added space. Knocking down separating walls can add any number of square footage into a space where you need it the most. But, it’s imperative to have an understanding of exactly how much space you’d like to add by installing an open concept kitchen. Being clear on that with your architect, contractor, and renovation team ahead of time can help clarify expectations and make sure that you are 100% happy with the end result of your remodel.
Do you need an island in your open concept kitchen?
One of the most common practices of demolishing and installing an open concept kitchen is removing existing closed space countertops and cabinets. Initially, this can diminish the amount of counter space available in your new kitchen. After all, the way you “open” up your kitchen is by removing the elements that make it feel enclosed.
A common way that designers account for this reduction in counter space in by implementing a kitchen island.
Islands work well in open concept kitchens for a number of reasons, one of them being that they naturally create a “focal point” within the space. According to Homedit, the key to success with open floor plans is “to treat each space as its own ‘room’ while keeping it proportionate to and seamless within the larger space. One way to accomplish this is to give each of the functional components a focal point while making these focal points all work together within the greater whole.” In a living room, the focal point may be a couch or other piece of furniture. In a dining area, there may be a table or central lighting fixture. In the case of an open concept kitchen, an island can really help define the space, and also enforce the design aesthetic you’re looking to create.
Do you have a cohesive design aesthetic in mind?
Speaking of design, a favorite element of open concept spaces is that you can create a cohesive design aesthetic throughout several areas of your home, which will ,in turn, make your home look well-designed.
That being said, if you are the type of person who struggles to envision or put together the interior design of a single room – furniture, accents, lighting, etc. – then you will want to do some serious thinking before assembling an open concept kitchen. Since your new kitchen will open up to at least one other room or space, you’ll need to ensure the design is consistent and/or complementary between rooms.
Of course, there are tons of resources to assist you with this if the idea of designing two-to-three rooms at once seems overwhelming. You can seek out inspiration on sites like Pinterest, and our personal Kitchen Remodel Gallery. Or, you can choose to work with a designer or kitchen remodel professional to ensure you create the open concept kitchen of your dreams.
Are you okay with having pantry items and kitchen essentials exposed?
As mentioned above, installing an open concept kitchen creates space in your home by removing traditional kitchen elements like countertops and cabinets. This means that by default when you make the switch to an open concept kitchen, more of your kitchen tools and items take on a more “visible” quality.
For example, exposed pantries and open shelving have become an increasingly popular trend as open kitchens also rise in popularity. But they require meticulous organization.
Do you enjoy cleaning?
Another potential drawback of open concept kitchens is that standard kitchen messes – dirty countertops, just-used pots and pans, dirty dishes – also become more visible, even when onlookers are not actually in the kitchen.
If you don’t enjoy cleaning, or have a difficult time doing it regularly, you may want to think twice before moving forward with an open concept kitchen.
Do you like to entertain?
This concept also trickles down to entertaining – if you enjoy having people over, open concept kitchens are great because they create more space for guests to hang out, and also help the hosts be social as they prepare food or drinks.
But, if you’re the type of host who prefers to keep meals a surprise until it’s dinner time, you may want to opt for a closed kitchen that maintains that quality of allure.
What kind of dining area do you want or need?
While formal dining rooms used to be more-or-less the norm in family homes, they have become more informal as open concept spaces have risen in popularity. If you like the idea of having a formal, separate dining room in your home, then you may want to stay away from open concept kitchens. If you’re okay with having a dining room that is constantly on display, or even a less formal dining area, such as a breakfast nook or bar, than an open concept kitchen may be exactly the design adjustment you’re looking for.
Do you have the budget to complete an open concept kitchen remodel?
The kitchen is already the most expensive room in the house to remodel, and turning a closed kitchen into an open plan can add to the cost. This is because tearing down walls means dealing with plumbing, electrical and structural work on a huge scale.
This is why it’s imperative to carefully think through the budget before moving forward with any major home remodel, let alone one in the kitchen. In fact, being solid on the budget is one of the best things you can do to make sure you’re not unhappily surprised during the course of your kitchen remodel and have a better idea of what to expect during an open floor plan kitchen remodel.
Open Concept Kitchen Ideas
Once you’ve made the decision that an open concept kitchen is the right move for you and your family, next comes the fun part: design! Here are some of our favorite open concept kitchen design ideas.
Dining Room Directly Across from Kitchen Island
One common open kitchen design idea is to place your dining room table directly across from the kitchen so that the kitchen truly opens up into the dining room. More often than not, this creates a more casual quality, since the kitchen and dining areas are closer to each other. It’s also incredibly family friendly: mom and dad can easily walk food over to the dining table in just a few steps, or everyone can serve themselves buffet style by placing the main plates on the kitchen island.
Dining Room Offset from Kitchen Island
If you prefer to retain some of the formality of a true dining room, consider spacing your dining area offset diagonally or laterally from your kitchen space. Consider installing a significant focal point in the dining room area, whether it be a large table, a unique chandelier, or something of your own design to further differentiate the “dining” area from the food preparation area.
Open Kitchen Up to Backyard and/or Floor-to-Ceiling Windows
The obvious draw of open concept kitchens is how they open up spaces and often draw more natural light into the more commonly occupied areas of your home. But if you want to take this idea to the extreme, consider strategically positioning your open concept kitchen directly across from large doors or windows that open up into a backyard or patio space. This will maximize the amount of light that enters your kitchen, and all the rooms that are connected to it.
For a more in-depth guide to Open Concept Kitchen Design Ideas, check out our blog post.
Now that you know all about open concept kitchens, hopefully you will be able to make a more informed decision on whether or not this design trend is right for you.
Latest Posts
The Kitchen And Bathroom Countertop Showdown: Quartz, Quartzite, Porcelain, Or Granite?
Kitchen Zones: How To Design A Kitchen Around The Way You Actually Cook
How to Make a Small Kitchen Feel Twice as Large
Get your in-home free estimate today!

Deciding to invest in a home addition is not to be taken lightly. In fact a home addition is the single most expensive home remodeling purchase a homeowner will ever make – mostly because, unlike a coat of paint or a window treatment, it cannot be undone!
However, a home addition can do wonders for your property value and investment. Here are some of our favorite ideas for home additions, as well as a comparative list of pros and cons to consider before moving forward with a home addition.
Home Addition Ideas
There are a number of ways to execute a home addition creatively and effectively. Here are our favorite ideas.
Second Story Addition
Second story additions are the most common renovation, especially for people who are looking to add significant living space to their home without intruding on lawn space. Second story additions are wonderful investments since they hold the possibility to transform single level ranch and cape homes into spacious two story colonials.
Two-Story Additions
Different from a second story addition, two-story addition plans are perfect for homes that are already two stories, but need a two story extension of the existing house to make room for additional rooms and amenities.
The most common two-story additions transform the existing house into an L-shape or T-shape. A common way to execute a two-story addition (or multi-level addition) is by adding a family room to the first floor and adding a bedroom to the second floor. If you’re existing home is two stories, you will likely want to opt for a two-story addition.
Bedroom/Room Addition
Any room addition can best be described as a mini-house addition. This type of addition is made up of at least one room: usually a living room, dining room, or family room. Usually, more than one room is added. For example, a bedroom plus a master bathroom or living room plus an extra bathroom.
A room addition is one of the best cost-saving alternatives to full house additions and return a lot of value in relation to cost, but it still requires a lot of work and planning, since you are basically building a mini-house, complete with all the trappings of a house-build, such as architect, contractor, permits, electrical, plumbing, and more.
Bump Out
A house bump out is an type of home addition that is especially scaled-down. It’s smaller than a room addition, since it’s not a room addition, but actually an enhancement to an existing room.
One of the smallest addition options out there, the bump out can prove very valuable by adding another 50 square feet or so to your home. With that extra 50 square feet, you can transform a powder room into a full bathroom with toilet and shower, or you can expand a kitchen by adding more counter space. Simply put, if you just want a little more space, a bump out may be a good home addition option for you.
Although they are space-efficient, bump-outs aren’t always a cost-saving option, since the per-square-foot cost is high. But your total square footage is small, so you will save costs over building a full-scale addition.
Dormer Additions
One of the most unique home addition ideas is the dormer addition. There are many dormer options to consider, and because of their unique look, sometimes people just install them for looks (which are considered “false dormers) because they tend to improve curb appeal of houses substantially.
But there are many other ways to install dormers and actually increase the space of your home. “A common dormer option for Cape Cod-style homes is to put to dormers on the front and a shed dormer on the back that stretches the full length of the house in the rear” (Simply Additions).
More often than not, dormer additions do not require extensive heating or cooling work to be done, which keeps costs relatively low for this type of home addition.
Home Addition Alternatives
If you don’t want to lean into a full-scale home addition, here are some simpler addition ideas that may provide you the space expansion that you are looking for.
Sunrooms or Conservatories
If you opt for a single room expansion instead of a full “home addition,” you may want to consider a sunroom or conservatory.
While considered unpopular or impractical by some, sunrooms can make a beautiful single-room home addition to increase the size and value of your home.
With both of these room options, you definitely want to consider weather elements in your home city and building materials. While simpler to install, sunrooms that are made out of just aluminum and thin glass get a reputation for being too cold or too hot, and they can prove to be more of a headache than a respite for homeowners.
On the positive side, prefabricated sunrooms, with thermal-resistant glass and better temperature have evolved and are more readily available for homeowners today. Even aluminum frames for sunrooms have become more structurally sound.
Either way, you can expect to pay at least $11,000 for a well-made sun room of around 150 square feet.
Conservatories bear many of the same burdens and advantages as sunrooms, but they are differentiated by a specific focus on showcasing flora. Conservatories are a variety of sunroom, but tend to be pricier than sunrooms. If you have a lovely backyard or garden to emphasize, a conservatory may be an excellent home addition choice for you.
Finished Basements
If your home already contains a basement, specifically an unfinished basement, you already have access to a prime home addition alternative. By “finishing” a basement that already exists in your home, you’re creating a new livable room for your family to spend time in. Or, you may even create another bedroom for family expansion or rental possibility.
However, basements also hold the disadvantage that you’re investing a lot of time in finishing space in your home, but you don’t get the added benefit of adding any square footage to your home. Furthermore, finished basements are completely viable spaces, but unless you have a daylight basement (one side is ground-level or nearly so), they are gloomy places with few or no windows. So, you may not end up spending as much time in this room you’ve worked so hard to remodel as you would in a new, ground-level home addition.
Garage Conversion
Similar to a basement renovation, garages pose an interesting opportunity to homeowners for conversion. The space already exists, which is less intrusive, and connects to the house in a functional way.
In many cases, if your plan is to turn a garage into a general living space, there are already a number of outlets and wiring setups in existence that can be extended. Another benefit of garage conversion is that some garages already have drywall on the studs, leaving one less task to do.
However, garage conversions have their own set of drawbacks that should be considered. But garage conversions come with some serious downsides. For example, since garages are designed to separate from the home, it’s inherently harder to make a garage renovation “blend” with the rest of your house. There are a number of technical issues that may arise as well.
And finally, homes with garage conversions typically have low resale value, since houses without garages are less desirable and harder to sell, especially in neighborhoods with inclement weather to worry about.
Cons of Home Additions
Before making the decision to move forward with an addition, there are also a handful of drawbacks or “cons” you should consider.
Cost
The most obvious “con” of deciding to move forward with a home addition is the significant cost. As with any investment in your home, there is a substantial cost up front, that hopefully your efforts will pay off and provide a nice profit on.
When planning for an addition, it’s imperative to plan for all possible costs, including the often unforeseen costs of utilities and taxes that a home addition may prompt. Generally, many homeowners opt to build or renovate when interest rates are low and they can take advantage of home equity loans.
More Space = More Upkeep
By adding on any number of square feet to your home, you will of course create more space, which is commonly considered the primary benefit of any addition.
However, by adding on more space, you’re also adding on any number of rooms, furniture, electrical costs, and so on. In short, more space means higher heating and cooling costs, more windows to wash and gutters to clean, increased property taxes, and more house to clean. If you cannot support a higher electrical bill or don’t have the time to upkeep a larger space, a home addition may actually prove more costly than valuable for you.
Loss of Yard Space
Depending on the type of home addition you opt for, you will likely have to sacrifice space from your exterior to extend your interior. In fact, unless you are adding a second story addition, you can plan to permanently lose yard space. This seems to be more and more of the norm in the United States, though, as the trend toward smaller and smaller yards continues.
This should be a significant consideration in your decision, especially if you have children or pets that like to play outside. In many cases, parents will wait until their children are grown up enough to not depend on outside play space to install a home addition.
High Risk for Mismatched Design Aesthetic
Additions are large enough that they can either enhance or severely detract from your existing home’s design aesthetic.
For this reason, many homeowners opt to work directly with an architect who has the experience and knowledge to create an addition in keeping with the aesthetics of your home. Especially if you are looking to add on to your home for resale purposes, you will need to make sure the addition is visually attractive to future buyers.
Long Construction Process
Like any sizable renovation to your home, with a house addition, you can expect a long construction process. And after a while, having workers and contractors in your home at all hours of the day, not being able to feel truly relaxed in your own home, and unforeseen costs can add up, leading to a highly stressful situation for you and your family.
Pros of Home Additions
There are numerous benefits to the home addition process. It is the single-best way to add space to your home. Here are some of the top “pros” of planning a home addition.
High Cost/Value Ratio
The obvious benefit of investing in a home addition is the potential for return on investment. It is typically cheaper to build an addition than to buy a new home that equals the space of your existing house plus addition. At the very least, “the closing costs involved with selling your old house and buying the new house would push this option over the top” (The Spruce).
Studies show you can recover the cost of a mid-range home addition at the point of sale, which is oftentimes the main inspiration for many homeowners investing in home additions. But it’s worth noting that, even though extra square footage should drive up the value of your home, sellers don’t necessarily recoup their entire investment due to other variables associated with property values. This is because it’s so difficult to predict market values into the future.
Satisfying Creative Project
Any time you get to put in work on your home is an opportunity for a challenging, yet satisfying creative project. Especially with a project like a home addition, which is an opportunity to truly create something that’s your home. You can experiment with the career of an interior designer, on a much smaller, much less risky scale. In short, few remodeling projects are as thrilling and creatively satisfying as working with the blank slate that a home addition can provide.
Latest Posts
The Kitchen And Bathroom Countertop Showdown: Quartz, Quartzite, Porcelain, Or Granite?
Kitchen Zones: How To Design A Kitchen Around The Way You Actually Cook
How to Make a Small Kitchen Feel Twice as Large
Get your in-home free estimate today!

Extending your home is a popular way to add space without the hassle of moving to a brand new house. And although home extensions are considerably less stress (and cost) than executing a full move, there are a lot of moving pieces and components that should be thoroughly researched. From the the planning process, to costs, design work and more, here’s what you need to know about home extensions.
Why Should You Extend Your Home?
There are lots of reasons to extend your home. Whether you want to create more space, add value to your investment, or just generally improve the comfort and aesthetic of your home, a house extension provide an attractive alternative to moving. “‘The increasing cost and hassle of moving combined with uncertainty in the property market makes staying put an attractive prospect,’ says Hugo Tugman, co-founder of Architect Your Home. ‘Many properties have untapped potential, and renovations can make a home more enjoyable to live in as well as adding to its market value’” (Ideal Home).
Here are some other benefits.
Save Time & Money
Simply put, moving is expensive. Between the actual cost of the sale (hiring a realtor, putting down a deposit, paying closing costs), the process and expenses associated with moving, and all the stress that comes with trying to sell your existing home, the process is taxing. Putting that money and effort towards expanding your home with an extension will save you more than just costs.
Increase Your Home’s Value
Not only will you save money in the short term, but home extensions are a great way of adding value to your home’s worth! Especially if you go the extra mile to craft an extension that truly complements your home’s design and improves the overall aesthetic, you can expect an increase in the market worth of the home (oftentimes just based on the increase in square footage alone). That’s not to say that there won’t be a significant investment upfront – most home extensions costs are recovered at the point of sale, so you need to be prepared to wait for your investment to pay off, if it’s ROI you’re after.
The Opportunity to Create the Home of Your Dreams
Home extensions are an excellent way to further hone your house into the home of you dreams. By moving forward with a home extension, you can design and build this new space exactly the way you want to, and even get input from your family on what they like to make it a project that benefits the entire household.
Still looking for more reasons to get a room addition? Check out our blog post.
Cost of Home Extensions
Like any major home improvement, the costs of home extensions are significant. Based off the most recent data, the national average for building a home addition or extensions is about $42,000, with the range extending from $21,000-$65,000. Although, some extensions have been reported to have cost less than $10,000.
So, if you are not willing or able to invest a minimum of $10-20,000 on a home extension, you may want to push back your project.
How to Finance Your Home Extension
The good news for inspiring home-renovators is that there is no shortage of options when it comes to borrowing money to finance your extension. Especially in today’s day and age, the financial landscape has become one that favors borrowers over savers.
If you need to borrow the money to finance your home extensions, your best options are:
- Credit card: If you need to borrow thousands rather than tens of thousands for your work, an interest-free credit card is a good choice.
- Loan: Personal loans of up to around $35,000 are suited to smaller projects. The only drawback with a loan, of course, is thay payments must be made consistently and in a timely manner.
- Remortgage or secured loan: If you are borrowing more than $35,000 you may need to remortgage your home or take our a secured loan against your home. Many banks and associations offer “Home Improvement Loans” for this very reason.
What Part of My Home Should I Expand?
Once you’ve done your research on whether or not a home extension may be a good fit for your unique situation and financial standing, one of the obvious questions that comes next is, “What part of my home should I expand?”
When it comes down to it, there are really two ways you can go with your home extension: building out or building up.
Building Out
The majority of home extensions are horizontal – meaning they increase the footprint of the ground-floor level of the building. That’s largely because so many additions are first-floor additions — whether you’re expanding the kitchen, adding a family room, or simply live in a one-story home.
Build out extensions are popular because they are easier to install – the process typically involves less disruption to the existing space because you’re not supporting the new space over the existing structural framing or foundation.
The disadvantage of “building out” is that, of course, that extra space has to come from somewhere – usually your yard.
Building Up
“Building up” is the other option for how to add room extensions, and there are many ways to execute this. You can add another story onto a one-story home, you can expand an existing top floor by installing large dormers, or you could add living space above an existing garage, porch, sunroom or other one-story wing.
Before you opt for a “building up,” make sure you research local codes in your area. Many towns limit the allowable height for houses, which can be an issue when building up.
Steps for Planning a Home Extension
Once you have an idea of the type of home extension you’d like to forward with, the next phase is to familiarize yourself with the actual process and moving forward with a home extension. Here are the steps to start planning a home extension.
1. Determine Your Property Lines
Before getting too deep into planning the details of your home extension, the first step is to determine where your home addition can feasibly go. Property lines will be a huge contributor to this decision, so locate your property lines and develop a plot plan which would include your home, landscaping and the location of the utilities.
Property lines are especially important to consider because of how they may affect your neighbors. Many cities have local codes that restrict how close you can build to your neighbor’s property, so you will definitely want to figure out this information sooner rather than later.
2. Finalize Budget
Finalizing your budget and how much you can afford to spend on your home extension project is a step that’s crucial to make in the early stages of planning. Home extensions (and all home remodeling projects) are notorious for having unplanning costs arise during the build phase, so nailing down a budget early on will help prevent more headaches and stress.
Plan a preliminary budget of how much you are comfortable spending, and add in anywhere from $10-20,000 in “padding” costs, especially if you live in an expensive area of the country or have heavy sloping. If your addition is small or will have relatively few bells and whistles, take off some costs.
Once you have an idea of your budget, then reach out to contractors (and architects) to start gathering bids. Plan to get bids from at least five contractors so you can get a good sense of price range and talent.
Why Use An Architect?
Although at first hearing it, hiring an architect may seem like an extraneous cost, In most cases, architects will be a necessary hire for your extension project.
Think of it this way: Contractors specialize in building, and architects specialize in designing. Going straight to a contractor means you are skipping the crucial design stage, and putting a humongous burden on your contractor.
By using an architect, you’ll end up with a home that’s right for you and that you’ll love living in.
The design of your home extension is worth the investment. A poorly designed extension can actually do more harm than good to your design aesthetic and eventual selling price.
Furthermore, you can hire an architect to help you manage all of the building process, including “helping you secure planning consent and building regulation certification, finding a suitable builder, monitoring progress, standards and safety on site, and overseeing construction to completion” (Ideal Home). When it comes to deciding where to spend your extension budget, a good architect can be worth their weight in gold.
3. Develop the Design
After taking a solid look at the structure and floor plan of your home, and choosing an architect or designer, the next stage is a fun one: developing a design and plan that will work perfectly in your home.
Home Extension Ideas Example
One of the most exciting aspects of planning a home extension is debatably one of the most overwhelming: the design. Here are some home extension ideas examples to give you some inspiration.
Flooring
When planning your extension, the flooring will be a huge component of the aesthetic and a major design decision. Whether you are building a kitchen, dining room, living room or all three in one open plan setting, here are some flooring ideas to get you inspired.
A trend that’s become very popular, especially in colder climates, is installing heated floors in your home extension. Not only do heated floors provide the comfort of making your feet feel all warm and toasty, but they are also efficient way to heat your home. Underfloor heating is also highly versatile and can lie underneath a number of different types of flooring such as stone, ceramic, terracotta, timber, some laminates and even carpet.
Laminate flooring is another increasingly popular choice for homeowners making renovations. This is because laminate, specifically engineered wood flooring, offers the benefit of looking like top-of-the-line true wood floors, but also being water-resistant and highly durable – an excellent investment for the long haul in your home.
Room Design
Room design itself can be a struggle for homeowners to ideate as they begin the home extension planning process. Here are a few extension room design ideas to inspire you and your design team.
High or vaulted ceilings are a classic, elegant option for room extensions. High ceilings can transform the way a room feels — even if you opt for less of a square footage extension, high ceilings tend to help make rooms look bigger than they actually are. Plus, vaulted ceilings offer maximum shock value. When pulled off well, the look can be stunning.
One trend that’s gained popularity amongst female homeowners in recent years is the idea of a “she-shed.” As explained by Country Living, “More and more ladies are staking claim to backyard sheds as a little place to call their own, whether it be for gardening or just somewhere to curl up with a good book.” If you’re envisioning your home extension to serve as an office or relaxation room, then perhaps a “she-shed” or other back-house type option may be a great choice for you.
4. Create the Plans
The last step before work on your home extension begins is to have detailed descriptions of the materials and the scope of the work to be done.
Although your contractor can certainly help you with this, it’s smart to make an initial list of desired materials on your own – anything from flooring to fixtures to paint. Be sure to also include first, second, and third choices, so you end up getting something you actually like if your first choice isn’t available, or you end up needed to cut costs in materials.
There’s a lot of work and planning involved in home extensions, but the end result can be something beautiful, economical, high-value and truly unique for you and your family.
Latest Posts
The Kitchen And Bathroom Countertop Showdown: Quartz, Quartzite, Porcelain, Or Granite?
Kitchen Zones: How To Design A Kitchen Around The Way You Actually Cook
How to Make a Small Kitchen Feel Twice as Large
Get your in-home free estimate today!
Deciding to move forward with a bonus room addition in your house is a major decision for any homeowner. There are many factors to consider, especially with a sizeable addition (at a significant cost). Ultimately your bonus room addition can become a wonderful space for you to enjoy with your family, and also a significant investment for your home. Here are some of the top “dos and don’ts” for planning a bonus room addition and coming up with bonus room ideas.
Why Get a Home Addition?
Before we dig into the dos and don’ts, it may be helpful to first consider why you would want a home addition.
Home additions create opportunities that aren’t available in your current space. Maybe you are increasing the size of your family, but don’t want to go through the hassle of moving to a larger home. Maybe you want to invest in your home by adding value through an addition to increase resale value for potential buyers. Or maybe you want to install a type of room that currently doesn’t exist in your home, like a playroom, an office, or a “man cave,” and you just can’t do it with your current space.
Dos of Planning a Home Addition
So you’ve decided to move forward with planning a home addition – congratulations! Here are some of the top “dos” to include on your list.
DO Work With Your Existing Space
One of the things that will help you tremendously early on in the planning of your home addition is making the decision to lean into and work with the space and structure you already have.
There are two types of additions you can do – you can either build out or up. Meaning, you can In other words, does it add to the footprint of the home, or is it an addition that you build on top of an existing area of your house? It’s important to carefully these options, and determine which style may work best in your home.
For example, do you have a sizeable garage you can build a bonus room on top of? Is there another area of your house that would lend itself well to a second-story addition? Do you have a big enough yard that building out into it won’t lead to a significant loss of space? Is there a first-floor room that would work well with a build-out addition?
By working with rather than against your home’s existing structure and opportunity, you will save yourself not only unnecessary costs, but also headache and stress down the road.
DO Start With “Need”
Another great way to start when planning a home addition is beginning with what is actually needed. Besides “more space” in the home, what really is the purpose of your addition? Is it a sunroom or living room addition for the purpose of relaxing or entertaining? Is it another bedroom for guests? Is it a new office for your growing home business?
Based off the actual need of the addition – the primary reason you are choosing to build it – you will be able to construct a better plan for execution.
DO Research Styles and Options
The great thing about remodeling a home in today’s world is that there are seemingly limitless design and aesthetic options for you to choose from. With platforms like Pinterest, Houzz and even our own gallery, you have lots of sources of inspiration to start with. Make the planning process easier on yourself by doing significant visual research to identify things you like and don’t like in other additions that you see. This will make it all that much easier when you move onto working with a designer to complete your vision.
DO Hire an Architect
If you want to build a sizable addition for your home, investing in working with an architect will be well-worth the money. Especially since the design and structure will impact the resale value of your home, should that be your end goal, working with a professional will ensure you get maximum value.
Architects are highly trained in building design, engineering, and ergonomics. At the beginning of a remodeling project, they will examine your house, listen to your dreams and needs, likes and dislikes, and then provide solutions and approximate building costs.
Architects can also help work up floor plans or detailed blueprints, and even help you select a contractor. And what exactly is the difference between a contractor and an architect? The best way to explain it is that contractors typically look for an efficient and logical solution, but not necessarily the most innovative or aesthetically pleasing approach. So, if you are looking at a complex or unique design, an architect will definitely be necessary.
DO Shop Around for Contractors
If you wanted to buy a new car, you certainly wouldn’t purchase the first and only car you test drove – you would test drive lots of different cards and then choose from them based on price, deal terms, and any other number of factors.
The same goes with deciding on a contractor. Your architect/designer can refer you to their favorite contractors, or you can use search tools like Yelp or Google to find highly-rated contractors in your area. Either way, once you get a few names, reach out to them with your plans and get bids or quote from all of them. This will help ensure you make the most cost efficient labor decision for your remodel.
DO Price Out Multiple Material Options
Another important factor for staying within budget is the materials you select. Whether you’re looking at flooring, paint, drywall, insulation, windows, or practically anything else, you’ll be happy to know that there are near endless options for you to choose from.
Furthermore, designers and manufacturers today do an excellent job of creating affordable materials for a variety of budgets, many of which mimic higher end products very well. For example, you can install vinyl flooring instead of true wood flooring for almost the exact same aesthetic, but at a fraction of the price!
For this reason, it is incredibly important that when you’re selecting materials for your bonus room addition, you choose a couple of options for each design need. That way, if you need to cut costs to stay within budget down the road, you have some solid backup options that you like just as much. No need to settle for any last minute suggestions from your contractor!
DO Consider Working With a Professional Home Remodeling Agency
If you are really overwhelmed by the task at hand, you should definitely consider working with a professional home remodeling agency. These professionals can help guide you through the whole process, from planning to design to execution. Check out our suite of remodeling services.
Don’ts
For every “do” that comes with planning your bonus room addition, there are also a handful of don’ts. Make sure you don’t make these mistakes when working on your addition.
DON’T Skip Your Research
Research is a key step in any home remodeling process. Especially if you are planning an addition for resale value and investment reasons, you will definitely want to consult with local agents and get a gauge on the actual value an addition can hold for your home. Planning wisely in the research phase will help you add more value than you spend.
DON’T Ignore Building Codes or Restrictions
Are there lot restrictions for the property? Will the city need to provide variance approval or any type of permit or zoning change? This can add time, cost and hassle to the process, which could have been avoided with careful planning, so make sure you do your research up front to plan for them early on.
DON’T Assume Your Addition is a DIY Project
Even if you love the idea of executing a DIY project in your home, you may want to think twice before taking this approach with your bonus room addition. While you may be able to execute individual components, such as floor installation or wall-painting, at the DIY level, don’t shy away from getting professional help. Your bonus room addition is too big of a project, but literally and figuratively, to go at it by yourself. And with the variety of help available today, you certainly don’t have to.
DON’T Skip Working with a Designer
A contractor is pretty much a given for a major home renovation project, but don’t overlook the importance of working with a designer or architect as well. Contractors specialize in building, but architects specialize in designing. Going straight to a contractor means you are skipping the crucial design stage, and putting a humongous burden on your contractor. By using an architect, you’ll end up with a home that’s right for you and that you’ll love living in.
DON’T Forget the Details
Details can make or break a bonus room addition, so make sure you dive into the details. So, when planning, consider not only the purpose of the room, but also what types of furniture will be utilized. For example, will you need enough room for a sofa or sectional? Will there be desks or tables to account for? By envisioning these specifics, it’s much easier to determine when a planned space isn’t large enough, or is just right for its intentions. Figuring this out before work actually begins is crucial.
How to Add a Bonus Room
While there are many steps and phases to adding a bonus room to your home, they can be boiled down to five steps.
1. Plan
Planning is a pivotal phase of adding a bonus room to your home. During the planning phase is when you seek out design inspiration, decide what you like and don’t like, and take a serious look at your home to determine where an addition not only would look good, but also make sense, function-wise.
Another key aspect of the planning phase is setting a budget. Doing this very early in the process will help prevent squabbles and frustration later on. Plus, it will give you a more realistic sense of how much your bonus room will actually cost. Don’t forget to add some padding — around $10,000, depending on the size of your addition — to your expected budget.
2. Partner
As we mentioned earlier, choosing the right partners for building your home addition is crucial. From the designer/architect to the contractor team, you need to select partners who you trust to understand your vision and get the job done well and efficiently.
3. Build
The “build” phase is when the work actually gets done on your addition. Based on the size and scope of your contract, this can take anywhere from one to six months. Remember, quality work takes time, and the finished product will ultimately be one that will enrich your quality of life, and the value of your home.
4. Finalize
Once the addition is built, then comes the fun part – truly making it your own! Some of this will happen in the build phase, such as choosing the flooring and wall finishes, but the decorating and furnishings are what will make your bonus room addition unique yours. Details are where magic is made!
Bonus Room Design Tips
The great thing about bonus rooms is that they provide an opportunity to create design that may be the same, similar or entirely different than the rest of your home. And don’t underestimate the power of online resources, magazines, and social media to inspire your bonus room design. Just one photo can give you the spark you need to build a room around. Check out this bonus room design idea gallery from HGTV to get started.
Latest Posts
The Kitchen And Bathroom Countertop Showdown: Quartz, Quartzite, Porcelain, Or Granite?
Kitchen Zones: How To Design A Kitchen Around The Way You Actually Cook
How to Make a Small Kitchen Feel Twice as Large
Get your in-home free estimate today!
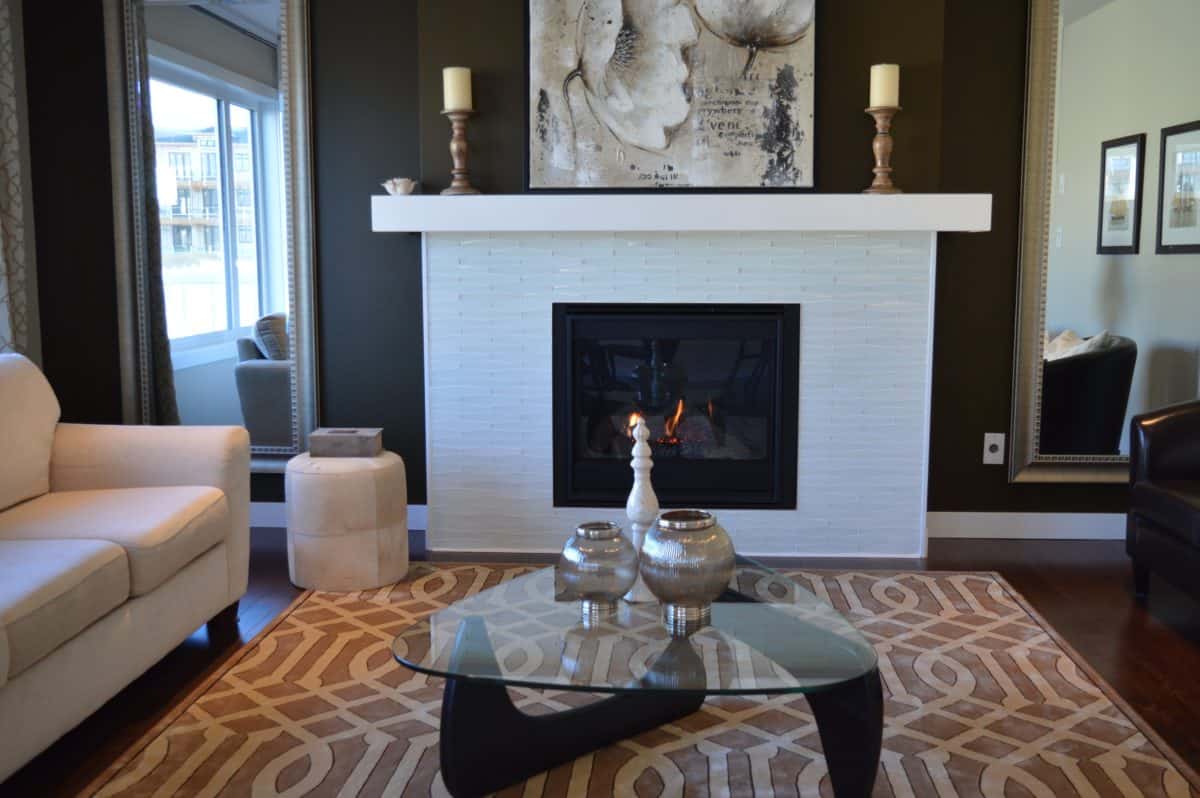
Living room additions are a great way to not only expand the square footage of your home, but also improve the comfort and design aesthetic of your interior.
Family room and living room additions have become incredibly popular over the last several years, so there are many different ways to execute a living room addition in your own home. Here are our eight favorite living room ideas.
1. Standard Addition
The easiest way to get started with a living room addition is with a standard room addition.
Although it’s a room addition (opposed to a more robust home extension), this is a major construction project that involves creating an additional building structure and integrating it with the rest of the home. Average costs run anywhere from $80 to $200 per square foot. A standard addition can cost you anywhere between $21,026 and $64,985, with the average national cost of adding a room at $42,058.
To begin with your standard room addition, start simple by first taking a look at your property (and your property lines) to determine where it makes sense to add your new room. Next, determine a budget that you can work with for your addition. Don’t forget to include to cost of hiring both a contractor and an architect or designer who can help you design the addition of your dreams. Working with an architect will especially help to make sure the addition design is cohesive with the rest of your home, and enhance the resale value, should that be your end goal. The last step before work on your home extension begins is to have detailed descriptions of the materials and the scope of the work to be done.
There are a few ways to add a standard room addition to your home, but they pretty much can fall into the categories of building out or building.
Building out typically involves adding a room at ground level, which is one of the most popular types of additions. If you want to expand your living space without increasing the footprint of your home, building up is a great option. For this type of addition, you add a room to the second story, or you could add an entire second story onto a one story home. For living room additions, building out is typically the more popular option.
2. Small Room Addition/Bump Out
Another popular option for living room addition ideas is a small room addition, like a bump out.
Full-scale, multi-room additions get most of the attention in the additions world, but bump-outs are a highly viable option for adding more living room space to your home without the cost of a full-scale addition. Room bump-outs are “less expensive than full-on additions: less square footage, less electrical, less (or even no) plumbing or HVAC”.
Typically, a bump-out is an extra space that is far smaller than a full addition. Bump-outs can extend as far as 10 to 15 feet from the house, but they can also be tiny “pop-outs” as short as 2 feet long. Although, if you’re looking to add or expand on your living room, you’ll likely need at least 5-10 additional feet out extension.
An advantage of bump out living room additions is that, due to their size, they do not substantially alter the exterior appearance of your home. They offer more of a seamless transition for homeowners.
Especially if you already have a workable living room that is positioned on your property with viable room for an expansion into the surrounding yard, a bump-out living room addition may be an excellent option for your needs.
3. Unique Shapes
If you’re looking to use your living room addition for a space that’s more “fun” than “functional,” consider a many-sided living room addition. In recent years, uniquely-shaped additions, such as hexagon-shaped (six walls) or octagon-shaped (eight walls) living rooms have become a popular choice among homeowners.
These multi-walled living room additions are excellent choices for homeowners who want to show off their lawn or garden, as the extra walls allow for beautiful, plentiful windows that look out onto your property. If you’re looking to create a truly unique space for entertaining and lounging, a hexagon or octagon-shaped living room addition may be the perfect fit.
One thing to note about these unique-shaped additions is that due to the use of space, they have to be build as true “modular” additions, meaning they extend completely off the existing property. If you do not have a lot of yard space to build into, they may not be the best option for your home.
4. Sunroom
Another classic, visually appealing option for a living room addition is a sunroom. A sunroom is a glassed-in living space typically attached to the house and accessible from indoors. While typically regarded as being a fit for warmer weather climates, today’s sunrooms can be constructed to four-season-room standards for year-round use.
Three-season rooms are simpler to install, but since they are made out of just aluminum and thin glass, they may be too cold to use in winter months. Nowadays, prefabricated sunrooms, with thermal-resistant glass and better temperature have evolved and are more readily available for homeowners today. Even aluminum frames for sunrooms have become more structurally sound.
Another benefit of choosing a four-season-sunroom for your living room addition, aside from the obvious aesthetic value, is that they are highly energy efficient.
In general, sunroom additions have a lower square footage cost than regular additions, but you can still expect to pay at least $11,000 for a well-made sunroom of around 150 square feet.
5. Conservatory
Conservatories are very similar to sunrooms, but they are differentiated by a specific focus on showcasing flora, and usually a glass roof (in addition to walls). Conservatories are a variety of sunroom but tend to be pricier than sunrooms. If you have a lovely backyard or garden to emphasize, a conservatory may be an excellent home addition choice for you.
Conservatories can be “dressed up” or “dressed down,” depending on the vibe and aesthetic that you are going for. For example, this Pennsylvania home conservatory is very formal, with all-glazed timber windows, doors and roof. In contrast, this fun conservatory borrows from beach style to create a fresh, relaxed, coastal look.
There are lots of different directions you can go if you choose to add a conservatory to your home.
6. High or Vaulted Ceilings
Another way to make maximum impact with your living room addition is to opt for high or vaulted ceilings. Large, open spaces are very attractive in homes and can definitely help with buyer appeals and resale value down the road.
It’s a well-known fact that high ceilings carry the benefit of making a room look bigger than it actually is. So, you can get away with a smaller addition by square footage, but build up to visually make the room look more spacious.
If you’ve always wanted to have a home with vaulted ceilings, building a room addition may be the perfect solution. Building a new addition as opposed to trying to make room for vaulted ceilings in your current home tends to be an easier option. When homeowners try to build vaulted ceilings within their existing homes, there are so many issues that may arise; they have inspect the attic (where they’d be building into) to looks for roof framing (rafters are good), trusses (which make building vaulted ceilings much more difficult and can cost 20-40% more), any chimney infringement (pretty much a deal-breaker), or any plumbing or ductwork that needs to be adjusted. For all these reasons and more, living room additions provide the perfect opportunity to install vaulted ceilings in your home.
One detracting factor of high or vaulted ceilings is that the extra space may in turn cost extra money to heat and cool. High ceilings are also more difficult to clean than standard-height ceilings.
7. Fireplace-Focused
A fireplace can provide an excellent focal point for your new living room addition, especially if your house does not currently have a fireplace. If you are looking to make your living room addition into a true “hub” for your family, nothing makes a house feel quite like a home like a fireplace does.
A fireplace focused living room addition can also work well if you already have an area in your house that you consider to be a “living room.” Perhaps the existing living room can become a place to watch TV where the kids can play, and the living room addition can serve as more of a “formal” sitting and relaxation room. The choices are endless!
8. Green Home Addition
Another great use of a living room addition is to build a green or eco-friendly room addition. Especially considering the initial cost of building a living room addition, making your new room highly energy efficient will help offset added costs of the new space down the road.
There are a couple ways to make your living room addition “green.” For example, installing solar panels on the addition can not only help with powering the addition itself, but also the rest of your house. You can also make a choice to use only natural and/or sustainable materials to craft your living room addition. Don’t overlook paint choice (both for the interior and exterior of your addition) as an opportunity to reduce toxins and improve environmental-friendliness.
Insulating the foundation by using concrete or a floating cement slab as a base for your addition will prevent cold air from seeping up from the ground into the building, which will help keep home temperatures moderate and prevent crazy heating or cooling costs.
For the walls, opting for engineered lumber or composite wood will leave a lighter carbon footprint. This is because engineered lumber is harvested from trees that regenerate quickly, where supply is easy to find. The same can be suggested to siding on the exterior of the addition – engineered wood siding is eco-friendly, lighter and easier to use than fiber cement siding.
These are just of the few directions you can go with your living room addition remodel. Regardless of your budget, desired aesthetic or family size, there’s an option for every home!
Latest Posts
The Kitchen And Bathroom Countertop Showdown: Quartz, Quartzite, Porcelain, Or Granite?
Kitchen Zones: How To Design A Kitchen Around The Way You Actually Cook
How to Make a Small Kitchen Feel Twice as Large
Get your in-home free estimate today!

Aging in Place Remodeling Tips
You’ve invested a lot of time and money into your home over the years – not to mention all the memories you’ve created there – so it’s no surprise that you want to stay there for as long as possible. The good news is, with a sound aging in place plan, you’ll be able to stay in your home for years into the future. Here are some of our favorite aging in place remodeling tips for homeowners who want to age in their home.
Start With the Bathroom
Because of its hard and slippery surfaces, almost 235,000 people visit the emergency room each year with injuries suffered while bathing, showering, or using the facilities (ConsumerReports.org). This makes the bathroom one of the first rooms that homeowners start with when they start the journey of aging-in-place remodeling.
However, there are numerous ways to practice aging in place remodeling in your bathroom without making it look like a hospital. For example, enlarging the shower is an easy change to make in the middle stages of life. You can also lower thresholds to ease entry, which will also give you the visual benefit of a more open space. Down the road, a curbless shower will prove to be a sound aging-in-place design.
You can also make other in-shower modifications to start prepping for an aging-in-place lifestyle without sacrificing aesthetic. For example, adding shower seats, upgrading lighting, and hanging shelves or ridges will all assist with ease of shower use down the road.
Another smart and safe upgrade you can make within your bathroom is modifying the floors. Water and slick tile are a bad combination, so switching to slip-resistant tile or vinyl is a safer move for the long-term. Seek out extra textured tile, or smaller tiles embedded in grout to create more friction and “grip” for safety.
Whether in your bathroom, kitchen or garage, sinks are another home element that are prime for aging in place remodeling. Dual-height countertops are a good idea for families with small children, and into the future, can benefit older home residents. If you choose to remodel your sinks, make sure they are wall-mounted, leaving space underneath for someone seated.
Other sink considerations should be faucets (lever handles are easiest to use), and installing full-length mirrors over countertop or medicine cabinet mirrors, which provide easier visibility for seated residents and wheelchairs.
Practice Aging in Place Kitchen Design
The kitchen is another key room of the house that should be considered for aging in place remodeling. First of all, make sure your kitchen is on the main floor of your home. If not, you should consider remodeling to add one, as food preparation is an activity of daily living.
Another thing to revisit in aging in place kitchens is the general layout and use of clearance space. The standard clearance between cabinets, walls, and appliances should be 36 inches, which is enough room to comfortably pass in a walkway and have access to drawers and doors.
If you are willing to rearrange your kitchen to add more clearance space, you should also use that time to make other layout modifications, such as moving the sink close to the stove. This is a great idea because, as we age, it’s harder on our arms and backs to carry big pots full of water or food to and from the cooktop.
With this advice in mind, you may be tempted to put your sink right next to your stove, but be sure to leave workspace in between. If your sink and stove are so close together that you don’t have anywhere to rest a hot pot or pan, you may be in more trouble than you started out with. In many cases, placing the sink across from the stove is a close enough distance.
Another expert kitchen remodel tip is to make the gradual switch to drawers instead of cabinets for storing all of your kitchen items. Drawers are an excellent choice for aging in place kitchen design because they display all flatware and utensils at once, which allows for easy grabbing. No need to get on your knees to peer into floor level cabinets, or use a step ladder to grab out of top-level cabinets.
Revisit Doors and Entryways
As you work on installing aging-in-place kitchens, bathrooms, and everything else, the last thing you want to realize is that your doors – your conduit between all those rooms you worked so hard to remodel – are not aging-in-place friendly.
Doors and doorways are often overlooked when it comes to revisiting the design of your house to make it more accessible. Over the years, you may find that your doors aren’t wide enough for access, they are hard to open, or swinging prevents access, the handles are difficult to use, and so much more.
Widening the doorways in your home are a good place to start, especially with older homes, where doorways can be 24-30 inches wide. Especially when you consider that the standard wheelchair is 26 inches wide, doorways may prove a more pressing issue for senior homeowners. We recommend installing doorways that are at least 36 inches wide, if your home can allow for it.
Typically, widening doorways is enough of a remodel improvement to allow for most accessibility needs, but there are other options for improving the user-friendliness of doors as you age in your home. For example, if you currently have several traditional swinging doors in your home, you may encounter mobility challenges when you introduce elements like wheelchairs and changing range of movement.
While swinging doors may seem easy to operate now, the dexterity and agility required to open these doors may diminish as the year progress, which will make them harder and harder to use. Not to mention, the wide range of movement makes it harder to pass through them with accessories like wheelchairs or walking assistants. And the last thing you want is to feel confined anywhere in your own home.
One of the best solutions for making doors easier to pass though is revamping doorways and doors to travel in a linear path rather than an arc. Ie. Transitioning from a swing door to a sliding/barn door (outside the wall) or pocket door (inside the wall).
In addition, another notable solution for small doorways and complicated doors is to install automated door openers, which allow you to unlock a door and open it with the push of a button. This is the ultimate solution for expanding mobility and ease of navigation within a home for aging-in place design, since it doesn’t require any physical exertion. While they can typically be installed relatively quickly, automated doors will top out on the higher end of the price range for aging-in-place door remodeling.
Stairs & Ramp Options
The kitchen and bathrooms are two of the first rooms that come to mind when one thinks of aging-in-place remodeling, but it is imperative to consider the outside of your house, or any other places where your home currently has stairs, as well. This is where ramps, lifts and escalators can really come in handy.
For a quick and easy installation option, threshold or portable ramps are your best bet. Angled entry plates and angled entry mats are two of the most popular examples of portable ramps. But, if you’re looking for a more permanent ramp solution, you may want to consider modular or custom ramps.
Usually, the biggest decision a homeowner needs to make is whether they want a modular ramp or a ramp that is built specific to their home and commonly constructed out of wood and/or concrete.
Modular ramps are made out of aluminum and can be installed and removed with little impact on the surrounding landscape. These ramps are designed to address the accessibility and aging-in-place remodeling needs of the residential market. Modular ramps are an excellent choice when accessibility needs extend beyond the scope of a portable ramp, especially since the design uses less hardware and no pre-assembly is required.
Custom ramps, on the other hand, are usually more labor intensive and more expensive, but they look better and can actually add value to the house when installed correctly. Modular ramps tend to be best suited for individuals who are looking for a short-term solution (like recovering from an injury), so a custom ramp may be your best bet for an aging-in-place design investment.
The general rule of thumb for ramp layout is that there needs to be one foot of ramp for every inch of rise. For example, if you have 14” of rise from ground level to the top of a stair landing then it is recommended that your ramp be at least 14’ in length. This rule of thumb helps to achieve the ADA recommended slope for a ramp. In some situations, there may be a time where a ramp will be too long to fit the location where it is needed and a vertical lift may be a more appropriate solution.
If you live in a multi-story home, one of the greatest challenges for “aging-in-place will be how to maintain access to the upper stories of your home. In many multi-story homes, the upper stories are where the bedrooms are, so unless you want to set up a new bedroom on your main floor (also an option), you’ll need to set up a way to safely handle stairs, or invest in an alternate form of transportation. Two of the most popular ways to do this are through the installation of a stair lift or vertical platform lift.
Stair lifts are an efficient way to quickly regain freedom and mobility in your home as you age. This device is typically composed of a chair that climbs up and down a staircase on a motorized rail attached. While getting up and down the stairs safely is the primary concern, today’s top quality lifts include numerous features to maximize comfort, ease of use and attractiveness in the home.
Installing a stair lift provides a great solution for mobility concerns, joint pain, leg strength, all of which can make it increasingly more difficult to navigate stairs as you age. Stair lifts can typically be installed in one day, and ordered to fit a variety of stair paths.
If you do choose to install a stair lift, there are a few considerations that should not be overlooked. For example, the size and capacity of the lift should be carefully considered. Depending on your specific needs, you will need to invest in either a standard size or heavy duty stair life. Standard size stair lifts usually hold up to 300 pounds, and can accommodate most needs.
In addition, if you live in a home with other family members, specifically family members who are younger than you, you may want to choose a stair lift that still allows for additional foot traffic and walking space. This is where a folding chair stair lift can prove to be a space-efficient option, since the chair can easily be folded out of the way to create more space.
Another option for maintaining open access between your lower and upper floors is a vertical platform lift or elevator. Elevators are a reliable and efficient way to travel between floors and are an excellent permanent solution for floor-to-floor transportation. If you’re planning to pass your home down to family, or re-selling is even a possible option, know that an elevator will greatly change the aesthetic and functionality of your home.
There are many ways to start implementing aging in place design in your home well before you actually need it, and still maintain the aesthetic of your house that you’ve worked on for years.