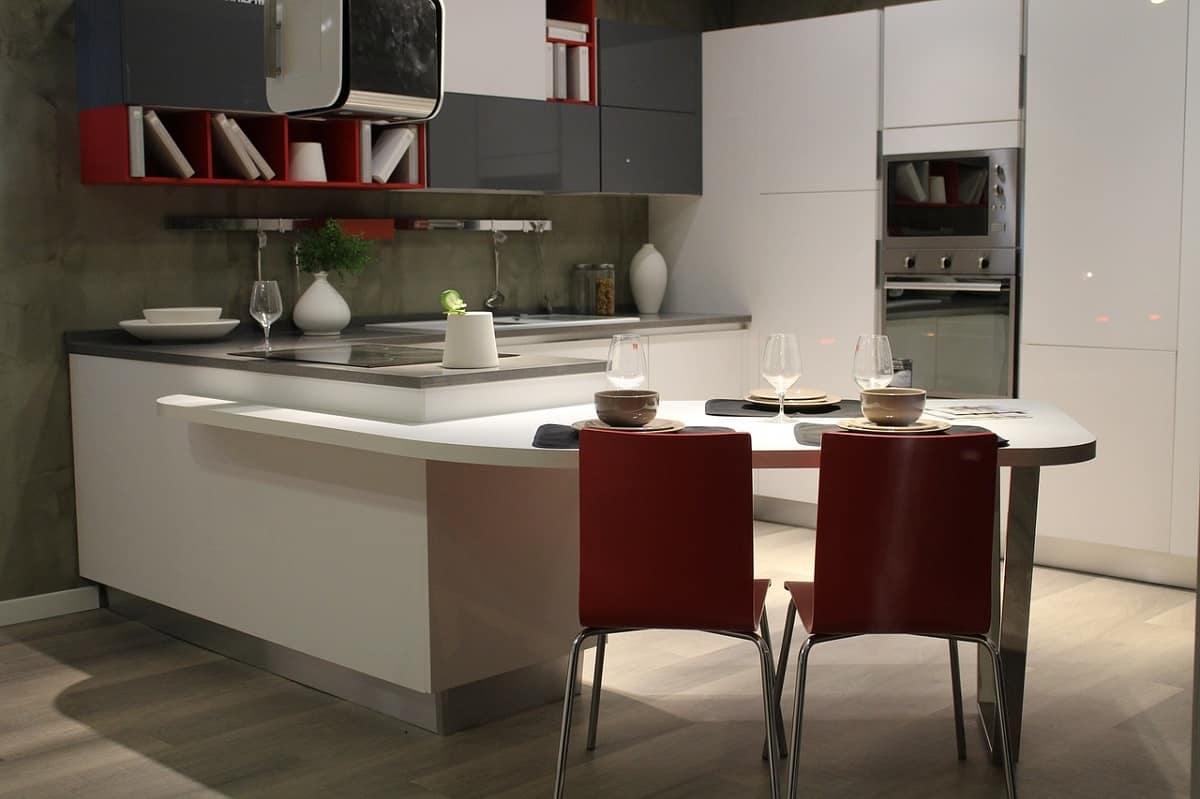
What Is the Average Return on Investment For a Kitchen Remodel?
(858) 413-2305 Request a quoteAre you considering remodeling your kitchen, but not quite sure whether you will recoup the cost? From a homeowner standpoint, remodeling your kitchen is a very rewarding home improvement opportunity. Sure, you will have to make some lifestyle changes while the remodel is underway but the outcome will not only drastically improve the visual appearance of your whole home but improve your quality of life as well. It is up to you to decide your purpose. Most older kitchens will generally need a full remodel to bring it up to date while some kitchens only need a change in cabinets or update in appliances to give it a new sparkle.
Kitchen remodels do the trick better than most room remodels, as far as increasing the value of your home goes. Updated kitchens drastically improve the marketability of your home once it is on the housing market and will give you a good return on investment without a doubt. To make things easier, kitchen remodels can be put into the categories: minor and major. This post will dive into what kind goes into each category and how much return on investment you can expect once everything is said and done. Because all homes are different and so are the neighborhood they are built in, it is important to speak with a professional to determine the average return on investment kitchen remodel for your home in particular.
Minor Remodel
We tend to hear the word remodel and run as fast as we can. Most homeowners have heard horror stories of their friends and family’s remodels either taking much longer than the proposed construction period or costing them much more money than they had ever planned to spend. But this doesn’t have to be the case. The realm of remodels falls on a sliding scale rather than into one large lump category which means that it is up to each individual and their contractor to decide what works for their home, time frame, and budget. Therefore it is important to note that minor kitchen updates are far different than major kitchen remodels.
A minor kitchen remodel includes but is not limited to renovations that fall under the surface level features. Think in terms of a kitchen facelift rather than preparing for major construction. These are generally the least costly, and therefore make your home appear much more updated with very little work.
If you are interested in the numbers behind a minor kitchen renovation, you will be pleased to know that recouping most of your cost is not hard to do. According to This Old House, an average minor kitchen remodel can cost around $14,773 and resell one year later for $13,039. This means that the average return on investment is 87%. So, If you have a tight budget on time and money spent on your kitchen project, consider a minor remodel. So what are some things that can be done to make this happen?

New Cabinets
Cabinets are one of the first things that people notice when they step into your kitchen which is why they are the first things to consider when beginning your renovation process. However, this does not mean you have to tear them out and start from scratch. Having your cabinets painted or stained is a great way to bring them into the 21st century without exhausting your budget, and it will go a long way in terms of ROI. Make sure to plan ahead and match your new cabinets to the rest of your kitchen updates.
On the other hand, some kitchens desperately need new cabinets for various reasons. Whether yours are scratched, chipped, or just too outdated to bring up to speed, you don’t need to fret. Cabinetry can be affordable. For example, stock cabinets generally range in price from $60 to $200 dollars per linear foot while more custom cabinets can range anywhere from $100 to $650 per linear foot.
New Floors
New floors are just about every homeowner’s dream which makes them a good project if the goal is to enjoy your home renovation for the remainder of the time you’re living in it. Although flooring may not be the first place that your mind goes when planning a remodel, it shouldn’t be taken for granite. The goal of putting new flooring is to keep the room looking put together. If you’re on a time and wallet budget, linoleum and vinyl tiles come inexpensively but may not return you any value. Another other option would be to install eco-friendly floors such as bamboo or cork.
New Fixtures
Once you have updated your cabinets and maybe even your floors, new kitchen fixtures take things to the next level in the simplest way. A small change such as updating lights, switches, and even outlet plates can drastically update the appearance of your home and make it seem more put together. However, it is essential to know precisely how every fixture works and will function in your home before purchasing. For example, many home fixtures have been updated in terms of technology and can function as a way to make your daily kitchen life much more manageable. For example, non-touch fixtures are becoming increasingly popular. In this case, make sure that your current kitchen updates can keep up with this technology!
Major Remodel
It is no surprise that a major kitchen remodel comes with a higher price tag, but it is definitely worth it. Major kitchen remodels are one of the best ways to improve the feel of your home because it is arguably one of the most used rooms in the house, and therefore the quickest to become run down. That being said, the return on your investment is not as high as a smaller kitchen remodel. The average cost of a major remodel is approximately $38,769, with a resale value of around $31,344. This means that you will be bringing home an average of 80% return on investment. So, what are some changes that are common in creating a beautiful kitchen in a major remodel?
New appliances
Replacing your old appliances is one of the quickest ways to make your whole space seem updated. If you’re more interested in increasing the marketability of your space to receive a maximum return on investment, then you don’t need to go with the most expensive name brand appliances out there. The idea is to think about appliances that are aesthetically pleasing and functional as possible. Unless you are in the luxury home market, buyers want products that look nice and work well. As a rule of thumb, stainless steel is the way to go. Stainless steel is a universal style that most buyers on the market will appreciate. In terms of adding value, opt for more energy-efficient appliances. These are seen by buyers as a way to save money and will, therefore, help them justify spending more money on a turnkey home in the first place.
New Layout
A new kitchen layout is probably one of the most dramatic changes that can be made during a kitchen remodel, but if it is in your budget it is well worth it! There’s no denying that a solid open floor plan kitchen remodel will leave you with a functional and highly sought after product. Working with a professional with make smooth the process of deciding which layout is best for the style of your home, but there are a couple most popular. For starters, the L-shape kitchen layout is coming back to popularity. The reason for this is its ergonomic status and emphasis on the work triangle which is a main priority in any kitchen. Constructing an L-shape kitchen also ensures that design is functional and traffic is directed away from working areas while supporting an open concept plan.
Open Concept
Open concept kitchens have become increasingly popular in recent years, and it’s no wonder why: they do a great job of creating space, improving functionality and flow, and generally enhancing and modernizing the aesthetic of any old home. In the 1900’s open concept homes kitchens were unheard of, which is why older homes are seen in a multi-room style where every single room was sectioned off for a purpose. As functionality became a main priority, architects began designing the open concept homes that we see more often today. While there are a wide variety of ways to design and execute an open concept floor plan, perhaps the most popular route is opening up a kitchen to a dining room. It’s easy to understand why so many potential buyers are seeking out homes with kitchens that open up into their dining room space.
Open concept kitchens are seen on the market as great for families. Opening up the space between a kitchen and dining room creates a space for families to bond during preparation and meal times. On the other hand, buyers who are looking for an entertainment space see an open concept design as a great asset to a home as well. The conjoined room is perfect for a larger amount of people to gather without separation and keeps the flow of serving much more fluid. Pro Tip: a new island will work wonders in this design as well.
Island
Now that you have an open concept or L-shaped kitchen, your next step is to consider adding a kitchen island. Kitchen islands are highly sought after by potential buyers because they increase counter space, storage space, enhance the work triangle, and provide more seating area. Potential buyers will see this as an asset that adds value to their prospected home. If you want a wow factor kitchen island, you could be spending upwards of $5,000, but you may not see a high return on investment compared to the price you spent for the improvements. The next step down would be a basic built-in island with stock cabinets that usually starts at $600. The downside to this option is the lack of ability to match your current kitchen style. To get back to the basics, freestanding and rollable worktables generally go for around $200; however, they’re better for personal preference rather than resale value.
Universal Styles
One of the most important things to remember when considering a kitchen remodel with a return on investment in mind is that personal preference should be set aside as far as possible. The best way to increase the value of your remodel is to situate it in a position that the majority of buyers will like. Keeping cabinet, flooring, and backsplashes more neutral and on par with current trends will allow buyers to envision themselves in the home much better. Make sure to do your research so you know which kitchen remodel trends to avoid.
Wrapping up
Although a kitchen remodel is a big project to take on, it is definitely worth it for two main reasons. First, there is nothing more valuable than having one of the most used communal spaces in your home fresh and updated. And second, once it comes time to sell, you will be able to recoup most of the renovation costs. Aside from recouping the cost, an updated kitchen will also help your home sell quicker which means less time and fees for staying on the real estate market. Whatever scale remodel you decide fits your homes needs best, don’t do it alone. Be sure to involve the help of a professional to make sure that you’re getting the best prices for your materials, and the project is finished as quickly as possible.

Latest Posts
The Kitchen And Bathroom Countertop Showdown: Quartz, Quartzite, Porcelain, Or Granite?
Kitchen Zones: How To Design A Kitchen Around The Way You Actually Cook
How to Make a Small Kitchen Feel Twice as Large
Get your in-home free estimate today!

There are always new trends in the world of remodeling, some of which are more beneficial than others. They each have their advantages and deciding on the right remodel for your kitchen will obviously depend on your lifestyle and your plans for your home.
It’s not hard to spend a lot of money on a remodeling project for your kitchen, but it’s a project that can produce the most return on investment. An impressive kitchen remodel is often one of the main selling points of a home.
Staying updated on what is in demand will help you make the right choices when picking a new style for your kitchen, so you can get the greatest return on investment for your kitchen remodel. Here are some of our top kitchen remodel trends to avoid.
Over-the-range microwave
Installing an over-the-range microwave, that sits above your stove, has been a common practice in kitchen designs as a way to leave your kitchen with more counter space, but now there are more convenient alternatives to keeping your microwave over your stove. Contemporary and trendy kitchen designs keep the microwave in places that are easier to reach by the entire family such as small nooks or within an island, allowing for more accessibility while hopefully maintaining some counter space.
Granite Countertops
Another countertop material that used to be a focal point but isn’t being utilized as much as it used to be is granite. As beautiful as they can be, granite countertops can stain over time and might not be the most cost-effective option if you’re considering changing out your countertops. Although many homeowners still choose to add granite to their kitchen decor, quartz is another common, less expensive alternative. Quartz is a great option for someone that’s hoping for that classic look, but also need a durable surface that can handle the use of an entire family.
No More Brass
Color can be seen as a crucial aspect of your home, including you kitchen and trends in color choices occur just as they do in kitchen layouts and designs. One kitchen color that is losing its appeal is the bright brass coloring that was once a very sought-after look. There are so many choices when it comes to picking a color theme for your kitchen, avoiding what was once a desirable style still leaves plenty of attractive alternatives such as other metals that will give your kitchen a more modern feel. Changing up the color of your kitchen hardware from brass to a more fashionable color is a reasonably simple undertaking and you can usually complete this type of project without breaking the bank.
Open Shelving Vs. Closed Cabinets
Open shelving has long been a popular choice during a kitchen remodel and can provide great opportunities to put your cookbooks and colorful dinnerware on display, but choosing this might not be the most functional or convenient choice during your next kitchen renovation. Open shelving is still a favored look, but closed cabinets can help keep fragile and precious valuable safe while leaving more room for storage. You might not always want to put your kitchenware on display which leaves you with an obvious choice when it comes to kitchen cabinets. No matter whether you go for open or closed shelves, you probably won’t have to worry about whether your choice will maintain its appeal, as both of these cabinet layouts are still common in kitchen remodels.
Rustic Wood Look
While this once desirable and holistic look is alluring, this theme may not stand the test of time as you might hope, especially if your planning to put your house on the market sometime soon. The wooden finish may give you just the natural and calming effect you’ve been hoping for but, It seems that this color-theme can be very hit or miss when it comes to finding a buyer for your home. You may even decide that you’re tired or bored with your design which is why adding wooden items to your kitchen might be a smart alternative to installing wood all over your kitchen. A simple way to mock this look is by adding cork flooring into your kitchen plan. For more information about flooring, check out our blog about choosing the best kitchen flooring options.
Brightly Colored Appliances
One of the more unique trends in kitchen coloring and design is the use of brightly colored, appliances or those that contrast the general look of your kitchen. Adding some colorful appliances to your kitchen is an easy way to spice things up, but before you invest in those larger appliances, such as a magenta stove, think about how you’ll feel about it in a few years and whether magenta is really your favorite color–your prospective buyer or your in-laws might not agree.
Hanging Pot Racks
It used to give you the feeling that there was some real cooking going on in the kitchen and also saved you plenty of room, but now a hanging pot rack might be viewed by many as an eyesore. These days, most people are choosing to hide their pots and pans in drawers and cupboards to maintain a neat look. Unless you spend your night furiously cooking up dishes that require you to be able to pull pots and pans quickly out of the air, we suggest simply storing your cooking tools inside the island rather than above it. Check out our kitchen island design ideas for inspiration!
No More Kitchen Desks
Who knew that so many people were trying to eat and get work done at the same time in the same place. The kitchen desk became an interesting element to include in your kitchen, especially if you enjoyed reading the paper with your breakfast, but now people are ready to simply enjoy their meals and save work for another room in the house. Although a kitchen desk might seem like a good use of space, they can end up becoming the perfect spot to store whatever is in your hand at that moment leading to a desk buried in stuff and a significant loss of kitchen space. Not that many people are trying to work at their kitchen counters anymore, so foregoing the kitchen desk during your kitchen remodel is probably a solid choice.
Leave the Farmhouse Sinks to the Farmhouses
If you’ve ever wanted to live on a farm, but you weren’t sure if how you’d adjust, then installing a farmhouse sink might be a way for you to get a feel for the lifestyle, but when it comes to your kitchen remodel, you’ll probably want to steer clear of this kitchen trend. There are plenty of more contemporary looks that can give you a similar rustic feel, but provide your kitchen with more practicality and long-term value.
Tiled Countertops
Tiled countertops were once a very fashionable look for kitchens around the country. Now they seem to give the feeling of existing in a bygone era not to mention they are a pain to clean. Who likes scrubbing the grout in between tiles trying to bring back the original color? Not many people, which is why it’s a good idea to explore other countertop options, such as granite, quartz or stainless steel.
While we’re on the subject of tiling, another kitchen trend that has lost its demand is the small and minimal backsplashes that some people have been utilizing in their kitchen designs and using tile, in this case, might be your solution. There is an abundance of choices when it comes to choosing a tile for your backsplash and going with a tiled surface behind your sink will give you an opportunity to add some color to your kitchen.
Forget Faux Finishes
This once edgy and stylish look is not as common in contemporary kitchens for various reasons. This type of finish provides a very specific look that future buyers might find unattractive, not to mention, it is not an easy treatment to apply during a kitchen renovation. There’s a multitude of other colors and treatments that will help you maintain a modern look throughout your home and provide visitors and buyers with a more welcoming feel.
Windows Without Curtains
Another kitchen design trend that has come and gone many times is the inclusion of window curtains and shades in the kitchen. For some time now, a common practice has been to abandon curtains for a more simplistic look that provides plenty of natural light. The problem with this trend is that you have no choice in the amount of light coming into your kitchen or the amount of privacy you have when you’re in the room. It seems that people are remembering why they first installed curtains on their kitchen windows and this is becoming the new trend.
Distressed Cabinets
If you trying to decide on a color or finish for your cabinets, you should know that distressed cabinets are no longer a go-to in most contemporary kitchen designs. Although this style of finish was once very popular, most people don’t feel that this look is keeping up with modern kitchen themes. There are plenty of other options out there when choosing a finish for your cabinets and bold colors for cabinets are becoming more of a trend these days.
Trendy Alternatives
Now that we’ve covered some of the trends that should be avoided during kitchen renovations, here are some contemporary suggestions that will keep your kitchen looking stylish and inviting and help you steer clear of bad kitchen designs. An entire kitchen remodel can be costly and end up taking more time than planned, but there are certainly a few cost-effective things you can do to spruce up your kitchen’s design and maintain the value of your home.
Add Some Color
A fresh coat of paint in your kitchen is one of the simplest ways to update your kitchen and can really change up the entire feel of the area. While all white kitchens have been a popular theme in modern kitchens, many people are now choosing to stylize their kitchen with bold colors. Instead of spending money on big appliances you can add some color by simply purchasing a toaster or teapot that brings your favorite color into your kitchen.
Wooden Cabinets
Another one of the infamous kitchen design trends that has gone in and out of style, but always sticks around is wooden cabinetry. There are numerous options when it comes to the style and stain of your cabinets and they are easy to repaint if you grow tired of the original color. Many homeowners are choosing cabinetry with an unfinished look that differs from the traditional wooden cabinets we’ve seen in the past.
Lighting
Changing the lighting setup in your kitchen might seem like an overwhelming undertaking but can be worth the effort if you’re hoping to revamp the feel of your kitchen and your home. Today, most modern home designers are implementing asymmetrical lighting into their kitchen plans. It’s a way to add some action and edge to your kitchen and will allow you to emphasize different spaces in your kitchen.
Wrapping Up
Kitchen trends can change very quickly and the theme for your kitchen will ultimately depend on your own taste. If you’re ever in any doubt, minimalism and neutral colors are common themes throughout home designs today and will be safe bets if your thinking about redesigning your kitchen space.
Don’t forget to do your homework on surviving a kitchen remodel if you’re planning to remodel your kitchen for an eventual sale. The region that you live in, as well as your neighborhood, are things that will affect what is trendy and what is out. Some of the trends that are listed above are likely to come back into style so keep your eyes and ears open. While you’ll want to keep these kitchen remodeling trends in mind if you plan to put your home on the market, you may decide you still enjoy the look of a less popular trend. You might end up finding someone that appreciates a specific look and feel just as much as you.
Latest Posts
The Kitchen And Bathroom Countertop Showdown: Quartz, Quartzite, Porcelain, Or Granite?
Kitchen Zones: How To Design A Kitchen Around The Way You Actually Cook
How to Make a Small Kitchen Feel Twice as Large
Get your in-home free estimate today!
Remodeling any part of your home can be a scary, overwhelming, and frustrating experience. If you’ve remodeled before and had a poor experience, you might be afraid of starting another (what seems to be) never-ending remodeling project (or “nightmare”). You may be saying, “Never again!” Or, you are at the point where you walk into your bathroom and see the outdated fixtures and cracked tile in the shower, and think to yourself, “I want to re-do this entire bathroom, but I have no idea where to start!” and then continue on your way with your old-fashioned style. There’s also those of us that look to hiring an interior designer and remodel crew to come into our home, give us an idea of what it could look like, and sign away, allowing them to freshen up our place. This could be the best decision you make during your entire remodel process. At Remodel Works, we offer free quotes for your San Diego County remodel. Let us help you every step of the way during your remodel. Request a quote today.
Getting started is sometimes the hardest step, but with the right information, it can be the easiest part (and the most fun)! This is the time that you get to be creative and let your imagination flow! Your possibilities are endless. Lucky for you, we’ve compiled information on the most popular trends and styles. All you need to do is pick which trends call out to you and match your personal style. After you’ve planned, everything is a breeze. If problems arise or you want to change something that you initially planned for, head back to the drawing board and re-evaluate your options. All of these practices together will give you the easy, stress-free, and fun bathroom remodel you deserve.
Although a bathroom size can range from big (luxury, master bathroom) to small (pocket-size bathroom), the list of things to consider for remodeling one is the same. Some important factors will be the must-haves (toilet, sink), and some will be add-ons to your bathroom area. All of these things are up to you (the creator and designer or your new space). With Remodel Works, we work with you so you can get the best return on investment for your bathroom remodel.
Here is a quick list of things to consider for a bathroom remodel to get your wheels turning (or read here for a more extensive bathroom remodel checklist):
- Toilet (style, color, type of toilet handle/flush)
- Shower (material for the walls, material for the floor, style of fixtures/faucets/shower head, walk-in or with a tub, shower door or none, material for shower curtain)
- Tub (material of tub, connected to shower or stand-alone, jacuzzi tub or basic)
- Sink (material of sink, color, style of faucet/fixtures)
- Flooring (material for the floor, dark or light color, pattern, temperature of the floor)
- Shelving (material of cabinet doors if any, color, open shelving or closed off, how much storage needed)
- Counter (material, how much area for countertop)
- Walls (paint color, or add a material to walls)
- Accessories (bath mat, rug)
- Color Scheme (which colors do you like together, what colors match your style, what colors make you think of a fresh and inviting space)
- Functioning vs. for Show (will the space be used as a functional and practical space, or is it just for show)
- Floor Plan (how could you move things around, toilet, shower, etc.)
- Bathroom size (be realistic about the size of space you have to work with)
- Patterns (which patterns do you like on the floor, walls, shower, etc.)
The list provided may seem like a lot to think about right now, but it is helpful when figuring out your own personal style. If you aren’t really sure what you like (or you like a lot of different styles), then you’re at the right place. By matching different personalities with different styles, textures, and materials, you may just find the perfect remodel ideas to implement in your own home.
Keep in mind, nothing is set in stone. Feel free to mix styles around and create a space that is 100% you. That is of course what this all about…answering your questions about what is trendy this year, and “What’s your ideal bathroom style?” The message I’d like to start you off with is that 2018 is the year for functionality, minimalism, and conservation! You’ll soon come to see what exactly that means in terms of a bathroom remodel.
The Out of Date Duo: Tub and Shower
There’s nothing that saves more room than the combination of a tub and shower. Although it may be convenient and functional, the bathroom remodel trends 2018 are saying otherwise in terms of style. This year, designers have said goodbye to the old-fashioned bulky tubs and showers. If you have little ones at home and/or if you sometimes just want to soak in the tub, go for it! With limited space, it’s hard to separate the tub and shower. By creating a clean and sleek shower and tub combo, your bathroom will stay up-to-date and trendy. Nothing is better than functionality, simplicity, and comfort.
Consider the Floorplan
With so many options of where to lay things out in your bathroom, it is essential that you consider your floor plan during the planning stage of your bathroom remodel. If you are planning to change plumbing, wall placements/support, and other major moves, make sure that the space is thoroughly thought-out and that it works exactly for what you need.
When choosing the best bathroom floorplan (or creating the floor plan, if you’re building the house from the ground up) be sure to create a realistic space. This is where that word “functionality” I’ve been mentioning really comes into play. If you do not have a functional space to move around in and use, you will regret the money spent on the remodel. Do not make the mistake of prioritizing style and looks over the practicality and functionality of the space.
Draw it out! I cannot emphasize this enough. The more you draw out the floorplan you envision for your bathroom space, the better thought-out your ideas will become. I’m a firm believer in seeing it to believe it. If you start moving things around without fully thinking things out (or measuring), you may find yourself in a lot more trouble than when you started the project. Things will not fit, or they will stick out, interfering with your use of the space.
Side note: plumbing is an expensive thing to move around. Once a toilet, shower, sink, or tub are in place, it will be costly to freely move them around. Plan out the space before making any permanent decisions.
Color Trends
If 2018 bathroom remodel trends have taught us anything, it’s that colors are a key factor in making a clean bathroom space. Designers are ditching colors that appear dated (mustard and salmon to name a few) and traditional neutral colors. Beige used to be the go-to color for any home/bath remodel. It needs updating, and too much of it can become boring and tired for a home. Colors that are too extreme can also make it hard to sell your home, as interested buyers see the color and are immediately unattracted. These types of colors also make it hard to easily upgrade the style of a bathroom without painting the walls.
All-Dark
When looking for a color that matches the feeling of a fresh, new, clean space, go for something rich and bold. That being said, do not (and I emphasize do not) paint every wall a deep red, or make the entire bathroom navy blue. This will make the bathroom feel like a dark hole.
To create a space that feels open and inviting, paint all of the walls white except for one — make this wall the rich and bold colored one. This creates an accent wall and compliments the other touches of color in the bathroom (possibly a vintage rug). You’d be surprised with how far a single colored wall can go in terms of making your bathroom welcoming and complete. By keeping most of the room white, the bathroom will feel lighter and more spacious.
All-White
Similar to my advice about not overdoing it with the “all red” or “all navy blue” walls, don’t get carried away with white paint and fixtures either. Although all-white makes the room look very open and clean, it can experience more noticeable wear-and-tear over time. With all-white, it is easy to see stains and dirty much better too.
Simple Shades
For a simple and clean looking bathroom, olive green and a soft-blue green are great colors to put off a happy and revitalizing feelings. These colors aren’t extreme (not a bold and rich colored accent wall), but aren’t a boring and dull neutral either. They are colors that go well with clean surfaces and different accessories, so you won’t get tired of it and have to paint in the next year or so. This color scheme is normal for a traditional bathroom. It provides simple color shades and clean lines for the whole bathroom. There’s no crazy fixtures or accents here; simply simplicity, functionality, and freshness.
Shower Design
In terms of your shower design, you can go any way you want. Read more here for Shower Design 101.
For maximum functionality, a shower and bathtub combo would be your go-to choice; however, if you don’t need a bathtub, go for a trendy shower! Walk-in shower benefits are amazing and definitely worth noting for making your final decision on the shower type you choose.
Showers with metal frames are a new hit in 2018. The frames make the shower look window-like and create a bathroom that looks and feels much bigger than it really is. The metal on the frames also adds a touch of the rustic and industrial style.
A simple glass wall is another trendy idea for separating a shower from the rest of the bathroom. This design can be taken in various directions such as a modern approach, European style, or simply a clean and sleek layout. Whatever you decide to do with the glass, it is guaranteed to make things feel more open and functional.
Although people steer away from hanging shower curtains, they are not out of style. They are functional, practical, and can sometimes even brighten up your bathroom. Get a color that compliments the colors in your bathroom. If your bathroom is mostly white and you want to add a dash of brightness, get a shower curtain with a fun design or pattern. If you want a clean and simple look, go for white. Shower curtains are made in all sorts of textures (plastic, cotton, cloth, etc.), so your options are endless. If you’re unsure about a few different colors and/or designs when looking at them in the store, bring them home and hang each of them up! Compare, see which one you like best, and return those you don’t! It’s as simple as that.
Tile Patterns
Popularity for the chevron tile pattern peaked in 2016 and carried over to 2017, but it started to drop in 2017 and continues its downfall as I write. Although it was the hottest new trend not too long ago, it is now seen as old school—especially when the chevron pattern is on the wall. As you will read more in the flooring section, patterns are transitioning from walls to floors, as floors are becoming the main accent piece of a room.
Different patterns of the same color used together can create a fun and inviting space as well. Although for some people it may be too busy to have four or five different patterns going on next to each other, it’s a trend growing in popularity and it works for those with a minimalist style.
Ceramic tiles and textures are the new big hit for remodeling! With the capability of looking like almost anything (literally everything including granite, marble, slate, and wood), ceramic stands as an affordable option that people need to take advantage of now! Ceramic textures are also much easier to maintain than other textures such as marble and wood. They allow you to enjoy high-quality results without the high cost.
Honeycomb tile has been around for a few years, but is still trendy, as it gives the impression of a much larger area (making small spaces look bigger). If you have a narrow bathroom, this is a great tile to use for the ground, as it makes the space look a little wider. By adding brass fixtures/faucets and some yellow honey accents, your small space is cute and complete!
Fish-scale pattern is another fun and popular bathroom tile this year. The tile has a scalloped shape, making it look like goldfish scales. This pattern could be a fun one to use as an accent shower wall.
Countertops
Granite was the rave a few years ago and stood its ground as a superior quality material for quite a few years before that. However, granite is losing its popularity as a focal point and for many designers, seems old and dated. The new rave is marble and quartz countertops.
Flooring
The latest trends for flooring are a little all over the place. Almost anything you choose to put on your floor will be in-style (as long as it goes with the rest of the style you have going on).
Wood Flooring
The popularity of wood floors has increased tremendously in the past few years. The trends of 2018 aren’t shying away from the either. Light colored wood, dark colored wood, or somewhere in between seems to be a hit in almost any home.
Although tile is generally the go-to for bathroom floors, wood works just as well for the material of your floors. It also creates a fluid style if the area outside the bathroom has wood floors as well.
Wood floors can achieve a variety of different styles within a bathroom. The following are some trends you can shoot for with wood flooring:
- Natural Materials: By using blonde natural colored wood, you can create a warm, relaxing, and peaceful space that is enjoyable.
- Minimal Rustic: By using a dark wood floor, the space will feel simple, cozy, and homely.
- Industrial: Any type of hardwood flooring can go in an industrial styled bathroom. However, this doesn’t mean that the wood needs to be rough and splintery. Exposed elements (including the wood) in the bathroom can make it industrial, but still functional and comfortable.
- Renewable Materials: For the person who is all about the environment and going green, choose to use bamboo floors! They provide amazing durability and are an excellent renewable resource.
Tile Flooring
For many years, tile has been the go-to choice for the cleanest and most durable bathroom floor. There isn’t much to argue about when the tile is easily kept clean and looks sleek. Certain styles of tile are no longer trendy, while some are taking off with their popularity. Here’s the scoop on the newest tile trends to hold on to, and those to leave behind.
A popular trend has been a matte finish over the once popular glossy tile bathroom floors. The dull-look from the matte finish brings warmth to the bathroom with its soft textures, giving it a smooth and comfortable look. This style of tile ties into a minimalistic bathroom design with a natural feel—a trend that is also heavily influencing interior design.
Terra-cotta styled tiling is also a favored tile choice. Similar to the matte finish, terra-cotta tile isn’t glossy either. Whether laid out on the floor as square tiles or arranged in various shapes to create a pattern, terracotta tiles brownish-red-orange color gives it an earthy look that expresses a more organic and natural feel as well.
More recently, tile patterns have become the main accent for an entire room/space. It’s a popular trend that continues to take off and gain more approval. With a pattern on just the floor, and light colored walls (i.e. white) or an accent wall to create a two-toned effect, a minimalist approach can be achieved. (more about patterns in pattern section)
Accent Rugs
Accessories to decorate bathrooms have taken a complete 180-degree turn from what they used to be. Instead of the basic bath mat that matches under the sink and around the toilet, designers are going for authentic and vintage rugs. The goal here is to promote elegance but keep the bathroom simple as well. Vintage rugs provide a dash of color and pattern, which helps dress up a simplistic and clean approach to a bathroom.
When planning out your floor plan and choosing the shower bathtub, consider the size and style of your accent rug if you want it to fit into the layout. However, don’t plan your entire bathroom around a rug. Although it does sound silly, it happens. Keep an open mind to it all. There is a huge variety of vintage rugs and they each offer their own unique style. Choose a few different styles and sizes and see which works best for your space.
Storage
Functionality and practicality call for storage! A common misconception about storage is that it’s ugly…big bulky cabinets that take up bathroom space; however, storage doesn’t have to be ugly. The key here is to find the best spot for storage. Utilize corners that are left empty, tall ceilings that go wasted, and spaces that are below eye-level. This goes for big and small bathrooms. Storage is your best friend…it knows everything about you, but hides it and keeps it safe when visitors come over. So, let’s be honest, we all need our best friend to keep our things hidden.
Accessories
High-tech accessories are always a trendy option, especially in 2018. This includes accessories such as digital temperature settings for your water, which enables you to set your shower at a preferred temperature. This results in a steady flow of water that doesn’t change temperatures during your shower, ultimately saving you money and time spent adjusting and waiting for your desired temperature.
Another high-tech bathroom installation is heated floors. Although they aren’t a necessity for living in San Diego, they sure are nice to walk on in the early mornings of the winter. They automatically heat to a certain temperature, so your tile floors won’t feel so cold, especially during the winter months.
For a consistent refreshing look for your bathroom, add accessories that are mostly white, but don’t be afraid to add a hint of some bold colors, such as green. You can add wooden accessories too, such as bamboo accessories.
For a simple and clean looking bathroom, olive green and a soft-blue green are great colors to put off a happy and revitalizing feelings. These colors aren’t extreme (not a bold and rich colored accent wall), but aren’t a boring and dull neutral either. They are colors that go well with clean surfaces and different accessories, so you won’t get tired of it and have to paint in the next year or so. This color scheme is normal for a traditional bathroom. It provides simple color shades and clean lines for the whole bathroom. There’s no crazy fixtures or accents here; simply simplicity, functionality, and freshness.
Accents for a certain feel
Brass and metal finishes are becoming more popular accents. Providing an industrial look, but also a look that could tie in with rustic, traditional, or modern style bathroom, these finishes aren’t likely to go out of style anytime soon.
Mirrors (and glass) are the best accents to make a room feel and look bigger. The reflection has that impact on every room, but for small pocket bathrooms, you can truly feel a difference.
For a bathroom that feels like a spa, aim for lots of open space. Put the tub out in the open, have a marble countertop, and even add a chandelier to create elegance and style.
Modern is a style that varies from person to person, depending on what their definition and linking of modern is. If you want extreme modern, possibly you go for clean lines on all fixtures and faucets, simple and geometrical shapes, a simple color scheme, very few earthy touches, and that’s it. For a mix of modern and vintage, simply add a rustic rug to warm up the room and bring it color.
For all things industrial, have exposed textures and fixtures stand as the accents of the room. Exposed light bulbs and piping are the two most popular things to give an industrial feel. If you want to add a vintage touch to the industrial style, install dark tile or a vintage looking wallpaper to stand as the vintage accent.
Bathroom remodeling trends to avoid include rose and copper finishes. Use of these finishes is declining, as gold, bronze, and silver increase. Although they may only small touches, they can heavily impact the overall look of your bathroom.
Small Pocket Bathroom
You may have what feels like the smallest bathroom on planet earth, and think that there’s no way you can remodel or redesign it to make it more functional and YOU!
Having a window is key in tiny bathrooms. It brings in natural light and makes the space feel breathable and more spacious. To add character and personality, find a tile that has a small pattern on it, and use it as your accent of the space. Keep the space as light and bright as possible. Any rich or dark colors will make the space feel smaller than it is. For a finishing touch, bring in a small plant—it will give life (literally) to the bathroom.
Large Master Bathroom
You may have what feels like the biggest bathroom on planet earth, and that you could fit a king sized bed inside of it. Because you have so much space to work with, the planning for your bathroom remodel may be a bit easier. However, too much space may be dangerous as it’s easy to get carried away and go overboard with decorations and fixtures that are unnecessary. Like mentioned before, a minimalistic style and practicality are the important trends of 2018. Stick to this trend, and your master bath will look functional, clean, spacious, and welcoming.
Read more here for 8 Master Bathroom Remodel Ideas For Your Dream Remodel.
Conclusion
As I’m sure you can see, a remodeling project in a bathroom has a ton of nuts and bolts. However, the challenging part isn’t knowing the design trends or styles (if you think this is the challenging part, reread all of the above info), it’s narrowing down your options of what you’ll love most!
Your decisions that need to be made have tons of options, so no need to panic. Knowing all-things needed for a trendy bathroom remodel and having the experts at Remodel Works to help you along the way, we believe you are ready to create a space that is truly functional, practical, clean, and you. Contact us today and get started on your new bathroom remodel.
Latest Posts
The Kitchen And Bathroom Countertop Showdown: Quartz, Quartzite, Porcelain, Or Granite?
Kitchen Zones: How To Design A Kitchen Around The Way You Actually Cook
How to Make a Small Kitchen Feel Twice as Large
Get your in-home free estimate today!

At some point, homeowners come across the question of which home improvements add the most value. Are you planning on selling your home soon? Or do you just want to make sure that the value of your home is keeping up with the market? Either way, there is a multitude of home improvement projects that can be done to not only improve your living standards but add value to your home on the real estate market as well. The first thing you want to think about is your budget. How much are you willing to spend to get a return? The second thing to think about is how long you’re willing to endure the process of remodeling. Some projects take longer than others are far more invasive on your daily lifestyle. For instance, bedroom and kitchen renovations will force you to find creative ways of cooking and sleeping. Lastly, you need to consider how much return on investment you’re looking for and which areas of your home improvement will help you reach your goal. This post will help shed some light on common areas of home improvement.
Kitchen Remodel
Remodeling your kitchen is one of the most rewarding home improvement opportunities. Sure, you will have to make some lifestyle changes while the remodel is underway but the outcome will not only drastically improve the visual appearance of your whole home but improve your quality of life as well. That being said, most kitchen remodels end up lasting a long time as long as you steer clear of the kitchen remodel trends to avoid. On the other hand, kitchen remodels can be as comprehensive or minor as you see fit. Most older kitchens will generally need a full remodel to bring it up to date while some kitchens only need a change in cabinets or update in appliances to give it a new sparkle.
As far as increasing the value of your home goes, kitchen remodels do the trick better than most room remodels. Updated kitchens drastically improve the marketability of your home once it is on the market and will give you a good return on investment without a doubt. Overall the many things that can be done to improve a kitchen, there are a few most notable. To begin it is important to speak with a professional to determine the average return on investment kitchen remodel for your home in particular.
Open Concept Kitchen
Open concept layout defined: the elimination of barriers such as walls and doors that traditionally separated distinct functional areas in a home. In the context of the kitchen, an open concept floor plan is typically based around a kitchen layout that opens up to a dining room, a living room, or some combination of the two. Open concept kitchens seem to be the most desired remodel at the moment – and it is not hard to see why. They have a special ability to maximize the appearance of space and therefore make your home look much larger than it would with an enclosed kitchen. They are also renowned for better functionality and design, especially for a family home where the main value is spending time together.
A home with an open concept design is shown on the market at a higher ticket price for the reason that it functions well for all types of buyers. The most obvious is its ability to keep families engaged during meal and down times. For other buyers, the open concept design is seen as the perfect layout to host events and entertain. Because of its versatility, the open concept design is a great way to boost the value of your home.
New Features
If your goal is to improve the appeal of your kitchen to buyers, implementing new features is a way to do so while keeping costs down and minimizing time spent without a cooking space during remodels. One way to go is updating countertops and painting cabinets. If you want to take things further, you might even add some fancy backsplashes and new hardware. However, if the plan is to improve the marketability of your home, chances are that once you sell it, the new buyers will change all this anyways.
So what can you do to add that extra push to buy? The answer is simple. If your home does not currently have an island, you might want to think about having one constructed. With enough surface area, an island becomes an extra feature that can be manipulated in many ways. For example, adding an extra sink to the island increases the scope of the working triangle, while still providing more area for preparation. Families generally appreciate an island because they not only allow for more storage but serve as an extra dining space as well. If your buyers don’t live the family lifestyle, the island serves as a station to entertain guests while food is being prepared as well.
Bathroom Remodel
When undertaking a home improvement project, remodeling an existing bathroom is a small tweak that can make a huge difference in the appeal of a home especially considering the current bathroom remodel trends. Aside from the kitchen, bathrooms are one of the top rooms that make a home feel outdated- and they’re one of the easiest to fix making a bathroom remodel return on investment so high. Fixes like new paint and appliances can go a long way in making things feel more up to date, but a full remodeling project will really do the trick and last for years to come.
That being said, one of the most commonly targeted areas is the master bathroom. The master bedroom is an area of the house that homeowners interact with every single day which means that it needs to be up to par and exceed potential buyer expectations. On the other hand, daily use causes quick wear and tear which means bathrooms need frequent fixes and updates.
A few of the best master bathroom remodel hacks are to focus on bringing in natural light, incorporating a luxurious bathtub, and bringing in sleek finishes. These are some of the things that are highly sought after by potential buyers and are sure to increase the perceived value of your home on the market.
Room Addition
Homeowners fantasize over the idea of adding square footage to their property. However, there are a number of things to consider when deciding to invest in a home addition, and it should not be taken with a grain of salt. In fact, a home addition is the single most expensive home remodeling purchase a homeowner will ever make – even when done in a cost-effective way!
However, a home addition can do wonders for your property value and investment. Room additions are one of the best ways to increase the value of your home because they allow room for families to grow. With more space, your home now has more to offer to potential buyers. Whether it is a bathroom, bedroom, bonus room, or living room a home addition can pay for itself and still provide a positive return on investment.
Living Room Addition
Living room additions are a great way to not only expand the square footage of your home but also to improve the comfort and design aesthetic of your interior. Family room and living room additions have become incredibly popular over the last several years, which makes expanding the one in your home a great way to increase its value. If your home does not currently have a large living room, you might be looking at a standard addition. However, standard additions can still be on the higher end of the price point because they require major construction that involves creating and building an entirely separate structure. Average costs run anywhere from $80 to $200 per square foot.
On the other hand, if you’re looking for a smaller scale version of a room addition that still opens up a living room a bump out is a viable option. Bump outs generally extend a living room 10 to 15 feet which is perfect for families that just need a little more space. They also do not alter the exterior of your home as drastically as a complete addition which creates a more seamless transition when the time comes to sell your home.
Although room additions can be costly, they can add significant value to a home not only by increasing square footage but also increasing usable family shared space.
Bonus Room Addition
Bonus rooms are highly sought after in the market because they create a shared living space for families to gather and entertain in addition to the kitchen and living room. The extra square footage demonstrates the homes ability to grow with families. Since most homeowners do not have the extra yard space for a bonus room addition, they are commonly built above an existing garage. The approximate cost of finishing the bonus room over your garage is approximately $35 per square foot. To find out more, check out our blog about how to add a bonus room above a garage which goes into more depth about this two-story addition.
Over-the-garage additions tend to have a high impact on the curb appeal of your home. Because they typically face the street, your home will appear much larger. Most two-car garages are typically upwards of 24 feet by 24 feet, which makes installing a sturdy garage bonus room drastically increase not only the visual appeal but also the resale value of your home to prospective buyers.
Bedroom Addition
Expanding your home for the purpose of adding a bedroom can be done for a number of reasons. The two most popular are a growing family or having an extra room for parents are grandparents to move in during their elderly years. Instead of leaving a beloved home with fond memories behind, families have the option to gain extra square footage. Homeowners almost always request a spare bedroom in their home when if they have space, just as buyers like to see an extra bedroom in potential homes. For this reason, a bedroom addition increases not only the housing capacity of a home but also the value return as well. Bedroom additions are typically on the more expensive side and can cost anywhere from 80 to 200 dollars per square feet depending on the existing structure and materials used. That said, extra rooms are highly sought after and can increase the value of your home significantly. Therefore, if you need the extra space, opting to add a bedroom is an excellent alternative to moving to a larger home for a number of reasons. To look at the sentimental side of things, all the memories that you have made in your home won’t go with you to a new home. On the other hand, the resale value of your home will most definitely cover the cost of building if you find a great architect.
Bathroom Addition
A bathroom addition is usually not done alone but in conjunction with a living room or bedroom addition. If a bedroom addition is done on the first floor where all other bedrooms are on the second, it is most likely intended to be a guest room. In this case, it is essential that the room has its own private bathroom so that guests can feel ease in their own private space. On the other hand, a downstairs bathroom addition can be used as a half bath addition for any and all guests in the home.
Fireplace Surround
If you’re looking to get your feet wet with a minimally invasive project, then replacing an old fireplace surround or adding a new one is a perfect place to start. The purpose of fireplace surrounds is to create a lovely focal point for your main room or even tie in another remodel to the rest of the home.
Wrapping Up
Overall, there are endless opportunities to improve the look, feel, and value of your home. No matter what you choose to take on, the most important thing to remember is not to go at it alone. Hiring a professional will not only help the project along smoothly but quickly as well. If you are unsure of what improvements could be made to your home, get the advice of a professional to steer you in the right direction and also to make sure that you are getting the most out of your home improvements.
Latest Posts
The Kitchen And Bathroom Countertop Showdown: Quartz, Quartzite, Porcelain, Or Granite?
Kitchen Zones: How To Design A Kitchen Around The Way You Actually Cook
How to Make a Small Kitchen Feel Twice as Large
Get your in-home free estimate today!

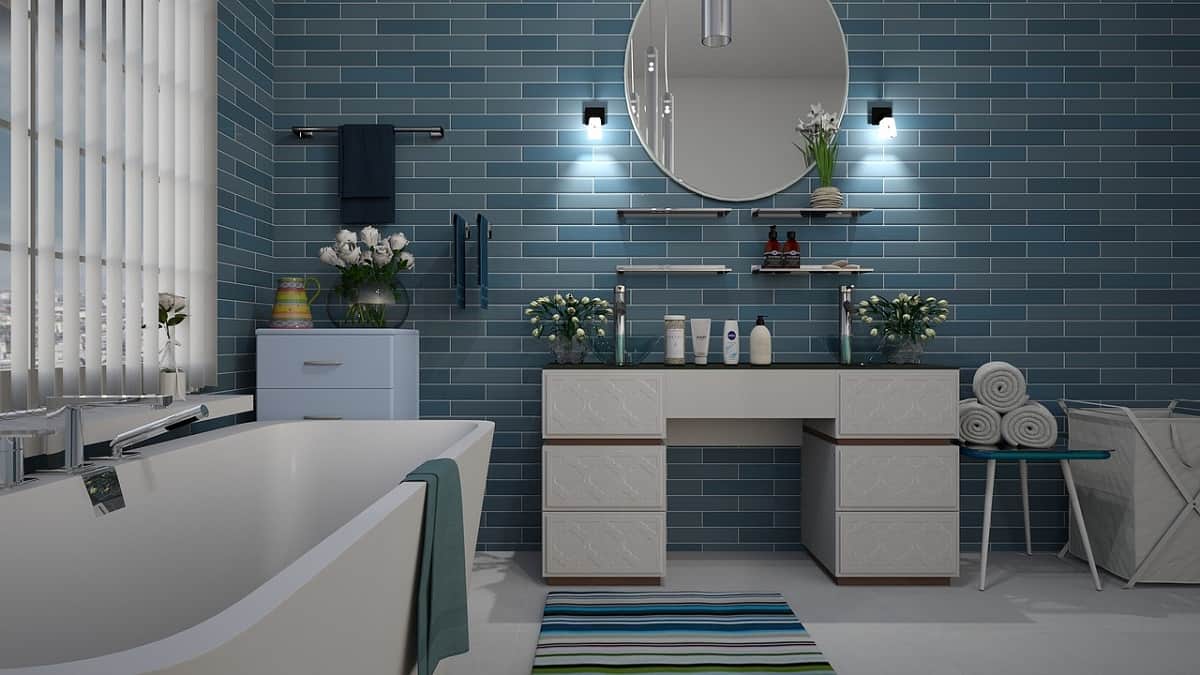
What Is the Return on Investment for a Bathroom Remodel?
(858) 413-2305 Request a quoteWhether you’re already thinking about putting your house on the market our you’re just considering how you can add value to your home, an up-to-date and thrifty bathroom renovation may be a perfect improvement. Earning some return on your investment is a somewhat difficult prospect when it comes to home renovations, but with careful consideration and planning, updating the design of your bathroom might be the perfect selling point when the time comes to sell.
That’s why we’ve laid out some of the options and key benefits of an effective bathroom remodel, as well as some things to watch out for to help your renovation run smoothly.
Getting Started
So, if you’ve decided that if you remodel a bathroom you will be brought closer to your goals, then the next thing to do is to decide on the theme and design of your bathroom. If you’re not sure about the direction that you want to take in the early stages of the renovation, then keeping it simple and investing in designs that have been proven to produce a solid return on investment is the way to go.
When housing markets are thriving, there is much more opportunity to get some of the funds you dedicate toward a renovation back. The bathroom might be the space that adds the most value to your home if your money is spent wisely. Bathrooms can be the most expensive spaces in a home and often become powerful selling points for a homeowner.
What Can Be Renovated?
Many homeowners are choosing to replace their tubs with walk-in showers in a bath remodel which seem to be the more efficient choice when it comes to time management and water control. A beautiful walk-in shower can replace an under-utilized tub as the most attractive part of a new bathroom. Many couples and prospective buyers still look for double sinks in the master bathroom, so thinking about adding another sink might help add some value to your house. Also, check out 8 other master bathroom remodel ideas for your dream remodel!
If you’re living in a home that only has one bathroom, rather than thinking about how you can renovate your only bathroom, it might be a better idea to invest in a new bathroom. If you end up putting your house on the market, you’re likely to have more interest in multiple bathrooms instead of only one.
If you are thinking about selling your home sometime soon, keep in mind that the look and design of your bathroom might be what makes the sale or what turns potential buyers away. Here are some tips to keep your bathroom remodel on track, as well as some trends that should be avoided. Many buyers today are seeking a renovated bathrooms and kitchens so making smart choices in how you invest in your bathroom might be what gets you into escrow.
What Materials Produce More ROI?
Another vital consideration during a bathroom remodel involves the types of materials that you have at your disposal. Some of these materials will produce a better return on your investment which is why knowing what design features are trendy and which are outdated will help you determine the best material choices for your remodel. If you don’t plan to move anytime soon, then you have the luxury of concentrating on what you will enjoy and what will work best for your lifestyle.
When choosing a theme for your bathroom and the look of your fixtures, choosing copper, gold, nickel, and gold can be safe bets when it comes to maintaining resale value. There are plenty of ways to materials into your bathroom design, and replacing fixtures can be a simple and quick way to spice up the look of your room. One material that might not produce the return on your investment that your expecting is a brass color-theme. This once very popular look is not as hip as it once was while prospective buyers are seeking a more modern look. Going with a brushed nickel or brushed copper look is another cost-effective way to start updating your bathroom. Get more information on color schemes in the article, “Master Bathroom Ideas to Enhance Your Space.”
Other fixtures you can think about matching can include a new towel rack or mirrors. These simple cosmetic changes might be all you need when it comes to stylizing your bathroom and maintaining a relevant look. New fixtures can also give the appearance of a more extensive remodel during open houses.
Saving Space During Renovations
One of the most important elements of an effective bathroom renovation involves the appropriate and efficient use of space in the room. You’ll want to plan wisely and leave plenty of space in your bathroom during your remodel. If you’re trying to decide whether you want to begin work on your one-and-a-half bathroom, it might be smarter to think about if you can dedicate those funds toward completing another full bathroom.
Most buyers will prefer multiple bathrooms over the newly-renovated one. If this is the only bathroom in the house then maximizing your space is that much more important. Replacing your vanity cabinet with a wall-mounted sink will save you a good amount of space in your bathroom. Other areas of your bathroom that you can think about improving include storage space, flooring and even shower seating.
Cost-Effective Renovations
Few homeowners are spending money remodeling their bathrooms if they don’t believe that they will see some sort of return on investment. And most prospective buyers will make a point of checking out the bathroom before deciding to buy. Although remodeling your bathroom can become pricey, it doesn’t have to be. There are some easy and cost-effective ways to update the design of your bathroom, so you can still keep up with the times without breaking the bank.
Earning a return on your investment can be tricky no matter how the housing market is doing, but in healthier markets, a new-looking bathroom might raise the value of your home to your target price range.
Implementing Natural Light
Opting to add some natural light to your bathroom is one way to achieve the appearance of space in your room. If you aren’t getting the natural light you’d like in your bathroom, then adding some recessed lighting can be an appropriate substitute– this type of lighting helps preserve the appearance of space in the room instead of the immediate and abrupt feeling that bright bathroom lights can give.
Other Lighting Options
If you’re feeling fancy and your ceilings are just high enough, you might even consider implementing a hanging light fixture in your bathroom. There are plenty of choices when it comes to hanging lights and chandeliers so be sure to stick with something that matches the other fixtures in your bathroom.
Pick and choose the elements you replace in your bathroom wisely– you may only end up changing your lighting and your toilet but still add a significant amount of value through the renovations. This is also a convenient way to save on time and other resources as well as avoid worrying about some of the more complicated parts of a full bathroom remodel.
Adding Glass Features
Frosted doors aren’t as sought-after as they’ve been in the past, which works out because plain glass doors are another way to give the feeling of more space in your bathroom. If you can afford to take on the project, changing out your tub for a glass, walk-in shower can be another way to save space and add the appearance of extra room in your bathroom all at the same time. Glass also maintains a modern look so you don’t have to worry about updating again in a few years,
Fresh Paint Job
Re-painting your bathroom is another example of a relatively simple project that can really update the feel of your bathroom at a reasonable price. Most buyers today are seeking clean looks and colors that bring in extra light. Adding some fresh color to your bathroom is one of the most efficient ways to update your room.
If you have trouble deciding on a new color, consider going with a neutral color paint that is more likely to stand the test of time than the color that is trending at the moment. This will help make sure that your bathroom doesn’t become dated-looking a few years down the line.
What Affects Return On Investments for Remodels?
Not every bathroom renovation will produce the same return on investment. It may be wise to speak with a broker while you do your research to find out more about what sells in your area and what buyers look for in a bathroom. Neighborhood and timing make a huge difference as far as the return on investment you should expect. Doing your homework based on your area will save you from spending more money than you need to on your renovations.
Location
The part of the country that you live in is another aspect that will impact the ROI that you see from any type of remodel. Changing tastes and varying markets can make it difficult to predict exactly what type of money you’ll get back from your renovation. If done right, a bathroom remodel can produce more than half of its value and depending on current trends it may yield more. That’s why it’s important you are aware of the latest bathroom remodel trends before getting started.
Timing
Timing is key when it comes to assessing the value of your bathroom renovations and the money you’ll get out of them. Most brokers explain that the longer you remain in your home, the greater your chances become of earning a better ROI– unfortunately, there are no guarantees when it comes to earning some of your investment back. Bathrooms styles can go in and out of fashion quickly, so if you’re not planning on selling soon, stick with some you’ll appreciate years from now and hopefully, that timeless look will still be appreciated when the time comes to put your house on the market.
When you’re deciding how you’re going to update your bathroom, make sure the finished product is still consistent with the look of the rest of your home. If your bathroom doesn’t mesh with the theme throughout the house, it might be a little jarring and deter a potential sale. Most buyers aren’t looking for uniquely eccentric design in their bathrooms, so choosing traditional materials and styles for your bathroom will help protect your investment.
Wrapping Up
There are many avenues to explore when it comes to how you can renovate your bathroom. Simple and cost-effective renovations might include simple fixture replacements or a fresh coat of paint on the walls. Other, more extensive renovations, such as a new toilet, tub, or cool shower design, might be necessary additions to a newly-remodeled bathroom, but these projects should be handled with caution if you want to keep your average cost down and give yourself the best chance of earning some sort of ROI. A renovated bathroom can add a real sense of comfort and elegance to your home if it matches the theme throughout. If you’re still lost on ideas, take the quiz, “What’s Your Ideal Bathroom Style?”
Latest Posts
The Kitchen And Bathroom Countertop Showdown: Quartz, Quartzite, Porcelain, Or Granite?
Kitchen Zones: How To Design A Kitchen Around The Way You Actually Cook
How to Make a Small Kitchen Feel Twice as Large
Get your in-home free estimate today!
Recently, granny flats have been popping up all over California due to leniency in the laws that generally limit homeowners’ ability to build them. Because they are so versatile, they can be adjusted to fit just about any property and are seen as a great asset to many property owners in San Diego for various reasons.
What Are Granny Flats?
What is a granny flat? A granny flat, also known as “accessory dwelling unit” is a self-contained unit that is typically constructed in addition to an original single family home on a residential property. The granny flat can either be constructed as an attachment to the main house or in the back or side yard. There are three different ways to implement a granny flat in a property. For instance, it can be attached, detached, or in the homes existing structure depending on its purpose and the allotted space the house offers. The granny flat may be constructed 1200 square feet in size or half the size of the original home; whichever is smaller. It typically is comprised of a single room, bathroom, kitchen, and small living area which makes it perfect for one or two people to live in.
What is it Used for?
So what is the granny flat best used for? Although granny flats can be used for numerous reasons, there are a few most popular and noteworthy. The best place to start is by thinking about your family’s current and future needs. Do you often host friends for long periods of time? Is your family outgrowing your current home? Do you have elderly family members who will soon need to live close to you?
Housing family/friends
Hence their name, granny flats are known for being the perfect living quarters for our elderly parents and grandparents in their retirement without sending them to a retirement home, which can be costly and lonely. Because they are structurally a separate unit from the main home, they allow enough privacy for our elderly loved-ones to live comfortably without being too far out of reach. Overall, granny flats are seen as a great way to keep relatives independent but close to the family and create a convenient, multi-generational living arrangement.
The granny flat can also be seen as a short-term haven. Another great use for the granny flat is finding a space for our children as they make their way through their teen years. A granny flat without a kitchen would be the best option for this because teens will be given their own private space, while the kitchen remains a common ground for families to come together.
Our college graduates are also perfect candidates for the granny flat as they make their transition into full-time jobs. This allows them to save money before buying their own place which can be hard to do especially in San Diego County. This way they are able to remain independent, but still close to home.
If you don’t find your family needing an extra space as your kids get older, think about the granny flat as a perfect to host family and friends when they travel into town for a quick visit. As common as it is to deploy the guest room in these times, understand that an accessory dwelling unit can be much more practical. An ADU can double as a casita or guest house. This way, guests and visiting family members have a separate living space to retreat to at night.
Earning Extra Income
Rental properties are great investments for homeowners looking for an additional steady income. However, purchasing a rental property, renovating it, filling it with tenants, and managing it can be a pretty difficult task for anyone who hasn’t done it before. Additionally, one of the best ways to earn an extra income is by renting out a space in your home. It can be significantly easier to manage the process of landlordship when the space you’re renting out is right under your nose. On the other hand, it is a much more cost-effective way to do things than purchasing a rental property and waiting for a positive ROI after factoring in an entirely new mortgage. Therefore, perhaps one of the best uses for an ADU is to rent it out to tenants.
California Granny Flat Law
California homeowners know that in the past it has been almost impossible to add a granny flat onto an existing home due to stringent granny flat regulations in San Diego that have been set in place to protect against overpopulation. Zoning laws in California were put into place on goodwill and were intended to preserve public health, safety, and welfare. For example, California granny flat laws required the homeowner to reside in the main property and provide proof that only a relative or family member lives in the granny flat. This made it impossible to build ADUs for rent. On the other hand, regulations included issues regarding restrictions on parking, fire sprinklers, buffers between property lines, and utility limitations.
Fortunately, due to the housing shortage in California, a series of laws took place to make the building of granny flats much more relaxed. The intent is to ease the stress of the housing crisis and high rents for low to middle-income workers quickly and in a cost-effective manner to create more affordable housing options. Fees that initially matched the cost of building a granny flat in the first place have been brought down drastically. The purpose of this is to encourage homeowners to take advantage of building one at this time. However, in order to eliminate the chance of accessory dwelling units being listed as a vacation rental, there is a minimum of 30 days lease agreement required.
Cost of Building a Granny Flat
Most people see a granny flat as more costly per square foot than a larger home. This is because it is much smaller than a typical home, but still requires most of the large ticket items that a single family home has. For instance, the cost of a dishwasher and stove is dispersed among far fewer surface area in a smaller home.
However, if you look at it more in depth, the cost of building an accessory dwelling unit is dependent on various aspects. The type of accessory dwelling unit and whether your home already has existing structures to support it are probably the most obvious factors to alter the price. However, it is also dependant on who you choose for your builder and their areas of expertise. Lastly, the cost of materials required to build the accessory dwelling unit can drastically alter the price alone. So depending on what structures your home already has set in place and what alterations your home requires, you will see a fluctuation in price.
Taking all these factors into consideration, it’s clear to see that it isn’t black and white to explain how much a granny flat will cost to build.
As for a general price range, detached granny flats are typically the most costly. Because they aren’t attached to any current structures in the home, you must factor in excavation and framework. You may also be required to run plumbing and electricity to an area in your yard that previously didn’t have it. However, the detached granny flat is one of the most cost effective ways to recoup the cost of the initial investment. How so? The detached granny flat is perhaps the easiest to rent out and can be put on the renters market at the highest price. Therefore, the higher the rent, the quicker the return on investment and the quicker the investment can be paid off.
At the lower end of the pricing spectrum, we can consider having the accessory dwelling unit above an existing garage. Because it falls on the less pricey side of the construction spectrum, building this type of ADU is great for elderly family members and growing families. This way, the increase in property value from the new space will help pay for the investment alone.
Building a Granny Flat vs. Buying a Larger Home
Whether the home you live in currently was your first starter home or is just too small to fit your lifestyle, it is natural for families to outgrow the space that they live in. Because of this, families tend to upgrade in home size to fit the demands of new babies and eventually teenagers. That said, going through the process of moving is stressful no matter which way you look at it. After having lenders assess what you can “afford” based on your monthly income, credit score, and current debt ratio, you’ll be left with a home loan that somewhat fits your budget. However, most people don’t take into account that a larger home comes with larger expenses all around. On the other hand, moving all your belongings, getting to know new neighbors, and settling into a new part of town is never an easy task. So, rest assured that no matter the reason you need an increase in square footage in your home, there are better options out there.
Accessory dwelling units are a great way to add square footage for a growing family without having to go through the hassle of purchasing an entirely new home. With the right building team, construction can take place on your property without disturbing your everyday life. You can also customize an accessory dwelling unit to fit your specific needs. For instance, you may want to leave out a washer and dryer, since the occupant is family and therefore will be sharing the laundry with the primary residence. You may also build a granny flat with a small kitchenette, but only incorporate a small fridge and no stove.
From a financial standpoint, a granny flat is a viable option for a homeowner who needs extra space for their teenagers. It can be used to house them until they eventually go off to college and find a place of their own. Then, with minimal updates, the granny flat can be rented out as a way to help pay for the expense of college. Whatever the needs of your family are, implementing a granny flat into your property can be a much better option that simply upgrading to a larger home.
Wrapping Up
Granny flats in San Diego have been popping up at a steady pace since recent legislation passed involving more lenient requirements for building. Due to the decrease in affordable housing, many San Diegans have chosen to rent them out as a way to earn extra income in the time of increasing rent prices. Therefore, accessory dwelling units are perhaps one of the least common yet best wealth building investments that most people shy away from. The granny flat is a tried and true way to adjust to an increasing family size or to house elderly family members who can no longer live on their own. Whether you choose to rent it out or build it to fit the needs of your dynamic family, the ADU is a viable option.
Latest Posts
The Kitchen And Bathroom Countertop Showdown: Quartz, Quartzite, Porcelain, Or Granite?
Kitchen Zones: How To Design A Kitchen Around The Way You Actually Cook
How to Make a Small Kitchen Feel Twice as Large
Get your in-home free estimate today!

If you’ve ever thought about building a granny flat, now is the time to do it. California granny flat law and city regulations in San Diego are making it easier and cheaper than ever before to add more space to your property by building a granny flat.
Although the laws are more flexible now, many homeowners panic when it’s time to do a home improvement project or add another structure to their property. The idea of navigating all of the rules and regulations can seem overwhelming. There are so many of them, and most aren’t written in the clearest language. It’s enough to make you want to give up on the idea of building one of the many granny flats in San Diego. However, you don’t have to give up on this home improvement goal – and you also don’t have to navigate the process alone.
The Remodel Works team has created an article to guide you through the city regulations in San Diego and the zoning laws in California to help you stay in compliance with them as you build. Not only will we walk you through the rules and regulations that govern building a granny flat, we’ll also tell you more about this type of structure, why you may want to add one to your property, and what to expect from the building process.
The Burning Question – What Is A Granny Flat?
As this type of housing grows in popularity, more people are throwing around the term “granny flat.” If you’re unsure what it means, you aren’t alone. The name can be a little misleading because it’s not just a dwelling for grandparents. Everyone from live-in nannies, to adult children, can live in these homes. Many property owners even turn granny flats into rental properties, providing the city with more affordable housing.
Granny flat isn’t the only term for this type of structure. You may also hear people call them accessory dwelling units (ADU), accessory apartments, carriage units, in-law suites, mother-in-law units, companion units, or granny pods. The first two terms are common in the building industry and the law, while the rest of them tend to be used by the general public.
All of these dwellings fit the following definition – a separate living area that is designed for one or two residents. They can also be classified as tiny homes. However, the similarities end there. There is a great deal of variation among accessory dwelling units.
For example, some of these structures are above the garage or attached to the primary single-family residence in some other way, while others are separate accessory buildings. The unit’s design, and amenities are also just as unique as the people who live in these residences. One granny flat may simply be a smaller version of the primary residence – complete with a full kitchen. However, another accessory unit may be more simple and modest with just a mini-fridge and a microwave.
Why are Granny Flats Becoming More Popular?
If you live in California, you know that there is a huge demand for affordable housing. You also know that a housing shortage has caused the price of rent and the cost of owning a home are sky-high. California’s median home price last year was a whopping $490,000, which is twice the national average. This might explain why homeownership is at a 70-year low among Californians.
There’s a good reason for all of this. The state’s population is growing rapidly. Over the last decade, 80,000 homes have been built each year. It might sound impressive, but builders would need to construct 100,000 more homes a year to keep up with California’s projected population growth.
Many homeowners see granny flats as the solution to the California housing crisis. These structures are versatile, which allows property owners to rent them to earn extra income each month. These modular homes are also ideal solutions for intergenerational housing. A young family can live in the primary residence and the grandparents can live in the accessory dwelling unit. It also works for young adults and college graduates who need to move back home for a while, but also need their own living quarters and privacy.
Why Build a Granny Flat?
People decide to build accessory dwelling units for many reasons, which is why granny flats are popping up all over the city of San Diego. Due to their versatility and popularity, a granny flat can make your home more appealing and do a lot to increase its resale value. Even if you aren’t looking to sell your home in the near future, you can realize many other benefits of building a granny flat right now.
The biggest and most obvious advantage is that it creates more living space on your property. You can rent this dwelling to give you a second income, which can help you cover your house payment and other expenses. You’ll just want to make sure that the laws in your city and county don’t prevent you from renting your granny flat. In San Diego, you can legally rent your accessory dwelling unit as long as it has a full kitchen.
You can also allow aging relatives or other family members to move in, creating a multigenerational family living arrangement. Although these family members may not be paying rent, there are still many benefits to this arrangement. For aging relatives, a granny flat can be more cost-effective than moving them to an assisted living facility. It can also help the family stay close and give the grandparents the social interaction they need to stay happy and healthy and provide long-term care. Moving family into a granny flat can also be a more affordable way to help with childcare than hiring a nanny.
What Are Granny Flat Regulations in San Diego?
If you’re thinking about building a granny flat, you’re in luck. Recent changes in California state laws have led to changes in San Diego’s granny flat regulations and zoning codes. Now, it’s easier and cheaper than ever before for san diegans to add an accessory dwelling units to single-family homes.
California law limits the ability of a local government or city council to regulate granny flats. Previously, each city and county had its own ordinances that covered everything from off-street parking, to the maximum size of an accessory dwelling unit. These rules often prevented homeowners from building granny flats. Now, cities and counties can only enact an ordinance to govern the building and permitting of granny flats if it is less strict than state law.
While San Diego zoning and building regulations regarding granny flats are online, they can be difficult to understand. To simplify things, here are some highlights that you should be aware of before you start planning to build a granny flat, or a companion unit, as it’s called in the San Diego Municipal Code.
Renting and Selling a Granny Flat
Homeowners are not allowed to sell or convey a granny flat separately from the primary residence. This means that you can’t build an accessory dwelling unit and then decide to sell it as a separate residence later. Your home and your granny flat must be sold at the same time.
Although selling an accessory dwelling unit isn’t allowed, you can rent one in San Diego. Just make sure that it has a full kitchen. This doesn’t mean that it has to be a fancy kitchen, it just needs to have more than a mini-fridge. For the most part, cities have implemented regulations against using these accessory dwellings as short-term rentals. To prevent these units from being used as short-term vacation rentals, homeowners are required to rent the unit attached to their single-family dwelling for a minimum of 30 days.
Maximum Size of a Granny Flat
Before this change in the law, the size of a granny flat could only be 30% of the primary residence. Now you can add more square footage to your lot as this percentage has been increased to 50%. However, the size of the granny flat living space cannot exceed 1200 square feet.
Converting an Existing Structure
It may be less expensive to convert an existing building like a garage into an accessory dwelling unit. Under San Diego regulations, a homeowner can maintain the existing setbacks as long as they are in compliance with the California Building Code and California Fire Code. The structure must be compliant at the time of conversion.
Complying with Parking Regulations
Under the old laws, the number of parking spaces was a big deal. In fact, not having enough parking could prevent you from building a granny flat on your property. San Diego County and the state of California only require that there is one parking space for each accessory dwelling unit or bedroom, so no need to worry about another two-car garage.
San Diego also makes certain exceptions that make this law even more relaxed. If an accessory dwelling unit meets certain requirements, it can be exempt from the minimum parking requirements. This includes granny flats that are 500 square feet or less, in a historical resource area, located in a transit area, or already part of the primary residence.
Connecting Utilities
The issue of connecting utilities for an accessory dwelling unit was once an issue, but the new laws change all of that. Granny flats that are part of an existing structure are not considered a new residence when it comes to calculating connection fees and capacity charges. However, local governments can charge for separate utility connections for units that are separate from an existing structure. These charges must not exceed the burden that the dwelling will put on the water and sewer systems.
The Application Process
When a property owner submits an application to build an accessory dwelling unit, the city of San Diego must approve or deny it within 120 days. The goal of this rule is to speed up the approval process for homeowners.
This review involves looking at specific criteria to make sure that the granny flat will conform to the applicable laws and regulations. The government employees can only deny an application if the accessory dwelling unit would not comply with the law.
These New Laws Have Limits
The changes in California law and San Diego regulations apply to planning and zoning, but not to building codes. Planning and zoning refers to how an owner can use the property, while building codes regulate construction and safety. Before you begin building a granny flat, you will want to make sure that your project is in compliance with all of these laws and regulations.
What to Know About Building a Granny Flat
Before you start the process of designing and building a granny flat, it’s important to know what is involved in the process, including the time and cost to construct one. Although no project is exactly the same, building an accessory dwelling unit costs an average of $250 per square foot. This is the equivalent of $125,000 for a 500 square foot granny flat.
As for how long the project will take, this varies a bit more. Many factors can influence the length of a granny flat build, including the weather, permitting, and how involved the project is. A large accessory dwelling unit with an elaborate design will take longer than a smaller and simpler granny flat.
In addition to thinking about the applicable regulations and the time and cost investment, you’ll also want to consider several things before you build your accessory dwelling unit:
- Where will you build the granny flat? For example, will you be adding onto your home, building above your garage, or building a new structure in the backyard?
- Do you have all of the right permits? Not having the appropriate building permit and approval to build can cause problems later down the road.
- What are your financing options? Most homeowners don’t have the extra cash to cover the entire cost of building a granny flat, so consider looking into financing options.
- What are your wants and needs? Be sure to consider your goals for the project and design preferences.
- Who will you work with? Professionals with experience building granny flats in San Diego can make the building process simple and seamless. Remodel Works has been helping homeowners improve and expand their homes for three decades.
With this information and insight from the Remodel Works team, you can stay in compliance with granny flat regulations in San Diego while adding more living space to your property.
For more information about granny flats, check out our articles on zoning laws in California and what is a granny flat?
Latest Posts
The Kitchen And Bathroom Countertop Showdown: Quartz, Quartzite, Porcelain, Or Granite?
Kitchen Zones: How To Design A Kitchen Around The Way You Actually Cook
How to Make a Small Kitchen Feel Twice as Large
Get your in-home free estimate today!

Most of us would love to have more living space in our homes, but there’s a lot to think about before you decide to add a home extension or build a granny flat. Not only do you need to think about the size of your property and how much you have to spend on the project, you need to think about what type of home extension will work for your lifestyle and unique situation.
You also need to consider the legal and regulatory aspects of adding onto your home. Although California recently implemented laws that make building an accessory dwelling unit (ADU) easier and more affordable, there’s still a lot to learn about California granny flat law.
Our team is here to guide you through zoning laws in California to help you stay in compliance with every zoning ordinance as you add space and value to your home. We’ll also help you gain a better understanding of what a granny flat is and the many advantages of adding one to your property. By the time you finish this article, you’ll be an expert on the subject – and ready to tackle this home improvement project with help from experienced contractors.
Answering the Big Question – What Is A Granny Flat?
Anyone who lives in California knows that the demand for housing is growing. 80,000 homes have been built each year during the last decade, but that’s still 100,000 a year too few to keep up with the state’s population growth. The result is sky-high rent and housing prices. The median home price in California last year was nearly $500,000, which is double the national average. It’s no wonder that homeownership is at a 70-year low in the state.
All of these factors have led to the rise of granny flats among homeowners who are looking to rent space on their properties for extra income. They are also popular for families who want to move grandparents or other family members into their properties to save money. They can even provide extra space for a home-based business.
Although granny flats are popular housing arrangements for grandparents, anyone can live in these homes. For this reason, there are many other terms to describe a granny flat, including an accessory apartment, an accessory dwelling unit (ADU), an in-law apartment, a mother-in-law unit, a granny pod and a carriage unit.
The basic definition of a granny flat is a separate living area that can comfortably house one or two people. Most of these flats fit into the tiny house category. They can be attached to the primary home or separate for added privacy, which is ideal for rental properties.
The size and general plan of each granny flat vary, as do the amenities. Some homeowners may build a dwelling that truly is a miniature version of the main home. Others may have limited space or funds, so they may opt for a smaller and more-basic setup. Either way, most granny flats are smaller than the majority of homes, so people who are coming from a larger living space will need to do some downsizing before they move in.
The Benefits of a Granny Flat
With housing prices on the rise and more families embracing multigenerational housing, granny flats in San Diego County are growing in popularity. Many realtors say that a granny flat is a wonderful selling point for a home – and there’s a good reason why homeowners love them. Let’s explore some of the benefits of adding one of these structures to your property.
The Benefits of Adding a Granny Flat
Adding a granny flat to your home can create more living space and many new possibilities. What you do with this extra space is entirely up to you, but two of the most popular options include renting the flat for extra income and moving in grandparents or extended family.
Because housing and living expenses in California are not cheap, many people are looking for ways to earn extra cash. By renting a granny flat to tenants, you can earn a regular income. Many people count on these monthly rent checks to cover their living expenses or house payment. However, before you become a granny flat landlord, it’s important to review laws and deed restrictions for any bans on renting such a dwelling.
The financial benefits of adding a granny flat continue if and when you decide to sell your home. Adding a granny flat to your property adds extra space to your home and boosts its resale value.
A granny flat can also provide a safe and comfortable place for grandparents or other family members to live. Homeowners with aging parents can move them into the granny flat to keep an eye on them instead of incurring the cost of moving them into a nursing home or assisted living community. These flats can also be great for young adults who need to move back home after college. They can have privacy and their own space as they gain financial stability.
Building a granny flat can also help parents who need childcare, but cannot afford a live-in nanny. Grandparents or another family member can move into the dwelling and help care for the children when the homeowner needs some help.
This arrangement not only helps the parents with childcare, it is also beneficial for the grandparents and grandchildren. Social connections enhance the mental and physical health of seniors – and grandparents love to spend time with their grandchildren. Moving into a granny flat on the property allows grandparents to be in close proximity to the people they love and experience all of these benefits.
A Look at the New California Granny Flat Laws
Until recently, it could be quite challenging to add a granny flat to your property in California. Homeowners had to contend with strict regulations that varied widely from city to city. However, the state realized the severity of its housing crisis and the role that granny flats could play in solving it, so it enacted some new legislation about a year and a half ago. It is now easier than ever before to build an accessory dwelling unit.
The laws define what the state considers to be an accessory dwelling unit versus short-term rentals. In the past, many terms were used to describe these buildings. According to the state of California, an accessory dwelling unit is “an attached or detached residential dwelling unit, which provides completely independent living facilities for one or more persons. It includes permanent provisions for living, sleeping, eating, cooking, and sanitation on the same parcel as the single-family dwelling is situated.” This definition also covers efficiency units and manufactured homes.
Even more important than the definition, these comprehensive new laws limit the ability of local governments to regulate granny flats. In the past, local ordinances included standards about setbacks, off-street parking, lot coverage, zones and construction that often served as barriers to the construction of granny flats.
The law doesn’t forbid local governments from enacting a specific ordinance to govern the building and permitting of granny flats, but local governments cannot have stricter requirements than those imposed by state law. This basically means that state law is now king when it comes to California granny flat law. So, let’s take a look at what the laws say.
Application Approval Process
Only the property owner can submit an application to build a granny flat. If you submit an application to construct a granny flat, it must be approved or denied within 120 days of its receipt. The review can only be ministerial, which means that the public agency can only deny an application if it doesn’t comply with the applicable laws and regulations.
Permitted Size of the Unit
The laws increased the maximum, permitted size of an accessory dwelling unit. In the past, a granny flat’s size could only be 30% of the existing living area. It can now be 50% of the existing living area, but not to exceed 1200 square ft.
All accessory dwelling units must still be consistent with existing zoning laws and the general plans that regulate the density of lot development. As a result, it is important to check with the zoning regulations and laws in your city to make sure that you are in compliance with them before you invest time and money into building a granny flat on your property.
Parking Regulations
The number of parking spaces could once make or break whether you could build a granny flat on your property. However, the new laws change that by only requiring one space per accessory dwelling unit or bedroom. The requirement for off-street parking can be met by tandem parking or setback spaces. The only exception is if the parking interferes with fire or safety regulations.
The laws also state that local agencies cannot impose parking rules for certain granny flats. These include those that are within a half-mile of public transit, in a historic district, part of the existing primary residence, in an area that requires permit parking, or located within a block of a car share area.
Grandfathering Existing Structures
Homeowners who built a granny flat before the new laws were passed can still get their unit approved, as long as it meets certain requirements. First of all, the structure must be within the existing space of a single-family residence or accessory structure. Secondly, the property must be zoned for single-family residential use. Thirdly, the dwelling must have exterior access that is separate from the existing residence. Finally, the building must have sufficient side and rear setbacks for fire safety.
Utility Connections
When an accessory dwelling unit is within an existing structure, it should not be considered a new residence for purposes of calculating connection fees or capacity charges. If it is not within an existing structure, the local government can require separate utility connections. However, the charges must be proportionate to the burden of the dwelling on the water and sewer systems.
The Limits of the New Laws
These new laws govern planning and zoning issues, but they don’t address building codes. Many people don’t realize that these are two very different things. Planning and zoning regulate how owners can use land and property, while building regulates construction and code compliance for home improvement and additions.
Getting Help to Build a Granny Flat
Preparing to undertake any home improvement project can be overwhelming, especially when it involves adding another structure to your single-family home. However, you don’t have to – and you shouldn’t – do it alone. A team of professionals with experience building granny flats in California can help make the process a breeze.
Remodel Works is a building company based in San Diego. We use our three decades of knowledge and experience to create a meticulous plan that will set your building project up for success. We consider every detail of a project, starting with the initial idea through construction.
We know that our customers have better things to do than wonder when their home improvement project is going to be finished, so our contractors will keep you informed through every step of the process. We know that your time and money are precious, so we are committed to staying on schedule and within the agreed-upon budget.
Our customers love that we have been in California for decades, so we understand the ins and outs of the state’s granny flat laws. You can rest easy knowing that your project will be in compliance with the law and you won’t have to worry about problems later. You can also feel confident that we build structures that are designed to last. We want you and your family to enjoy our work for years to come.
Now that you understand zoning laws in California, you are armed with the knowledge you need to take the first steps to build a granny flat.
For more information about granny flats, check out our articles on what is a granny flat and granny flat regulations in San Diego.
Latest Posts
The Kitchen And Bathroom Countertop Showdown: Quartz, Quartzite, Porcelain, Or Granite?
Kitchen Zones: How To Design A Kitchen Around The Way You Actually Cook
How to Make a Small Kitchen Feel Twice as Large
Get your in-home free estimate today!
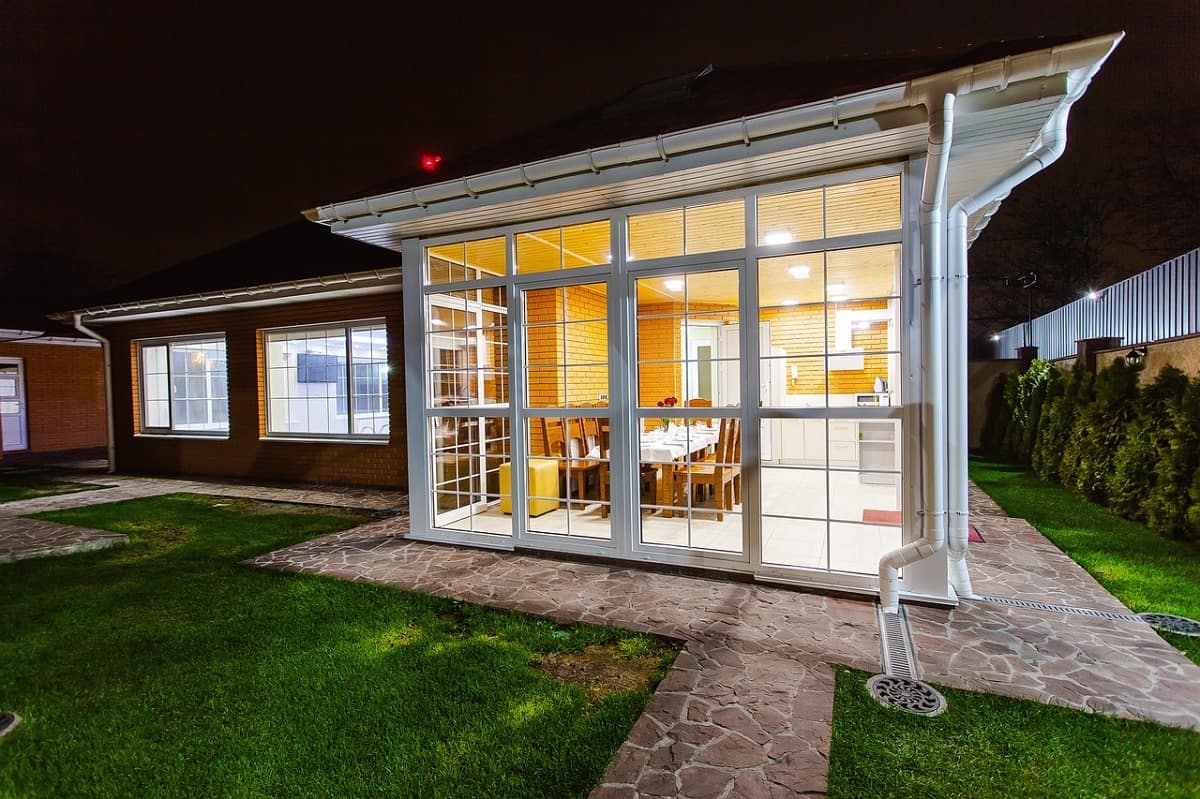
You aren’t alone if you’re asking yourself the question, “What is a granny flat?” With the demand for housing growing around the United States – and especially in California – more people are talking about adding a granny flat to their home as a way to expand their living space and make room for extended family or renters. This type of secondary dwelling gets its name because it is a popular way for families to house and care for aging family members like grandparents. However, anyone can live in this type of dwelling.
There is a lot to learn and consider before you add a granny flat to your home. It’s important to know what this type of dwelling can offer and how it can work for you. It’s even more critical that you understand cost factors and permitting issues when you are considering building a granny flat.
To help you decide if adding a granny flat to your home is right for you, we are discussing what a granny flat is and the amenities one can include as well as the advantages and disadvantages of this type of dwelling for homeowners. We’re also reviewing California granny flat law to help you understand permitting and how a company like Remodel Works can help you avoid the dangers of working with an unqualified general contractor on this type of home improvement project.
What Is A Granny Flat?
A granny flat is a self-contained living area located on the property of a single-family home. It is designed for one or two people. Although some granny flats can be 1,200 square feet, many of these structures can be classified as tiny houses due to their size. Such a flat can be attached to the home, which is perfect for smaller properties and homeowners who want easy access between the home and the granny flat. This type of building can also be detached from the primary dwelling for more privacy.
The amenities in a granny flat vary depending on the preferences of the homeowner and the size. For example, some granny flats are simply smaller versions of a full-sized home. Others may have a more-simple setup that includes a mini-fridge and a microwave on a countertop instead of a full kitchen. Regardless of the amenities, most granny flats are smaller than the typical home, so family members who move into them will need to downsize.
The building industry often calls a granny flat an accessory apartment or an accessory dwelling unit (ADU). People outside of the industry might refer to this type of home as a mother-in-law unit, an in-law apartment, a carriage unit, or a granny pod, or any other popular name.
As more families are embracing multigenerational housing and the Baby Boomers are continuing to age, granny flats in San Diego and around the country are becoming more prevalent. In fact, many realtors and builders have said that having one of these accessory dwelling units is an excellent selling point for a home.
Although some homeowners use granny flats as rental units to earn additional income, not every city allows this. As a result, it is important to check the zoning laws in California and review any deed restrictions to make sure that there is nothing that bans renting a granny flat.
Advantages and Disadvantages of a Granny Flat
As with all things in life, granny flats have their advantages and disadvantages. Deciding if one is a good fit for you and your home will involve weighing these pros and cons. To help make your decision a little easier, we’ve compiled some of the most common advantages and disadvantages of adding one of these dwellings to your property.
Advantages of Adding a Granny Flat
One of the advantages of adding a granny flat is the resale value that the additional space adds to your home. Again, with an aging population and an interest in intergenerational living situations, granny flats are growing in popularity among home buyers. Having such a dwelling can make your home more desirable and valuable.
Families who build a granny flat to house aging family members often find there are many benefits for everyone in the family. Research shows that seniors have better mental and physical health when they have social contacts, which living in a granny flat near a younger family can provide. Living in close proximity to aging family members also allows homeowners to monitor their health and wellness. Another benefit of a granny flat for grandparents is that they are able to spend more time with their grandchildren.
Having another person living on the property, regardless of whether or not they are family, can provide some other advantages. For example, having another tenant on the property can provide more security, especially if the granny flat is facing the side or back of the lot. Additionally, tenants may share amenities and chores with each other. This may mean that tenants can split childcare and home maintenance tasks. If your city allows you to rent a granny flat, the additional income is another bonus of adding this type of building to your property.
Disadvantages of Adding a Granny Flat
Although adding a granny flat to a property comes with many wonderful benefits, it also has some disadvantages. One of the biggest issues for homeowners is the cost of constructing such a dwelling. New construction comes with certain costs. From the costs that come to mind first like supplies and labor, to the ones that are less obvious like connecting utilities and permits, it can be an expensive endeavor in some situations.
Another disadvantage of constructing a granny flat are the regulatory and legal barriers. Before you begin building, you need to consider the local laws, zoning regulations, building restrictions, and deed restrictions. These rules and regulations may limit or prevent you from building a granny flat on your property. However, California recently made it easier to build granny flats.
Some homeowners may decide to ignore or work around any regulations by converting a garage or some other structure on the property, without getting approval first. We do not recommend trying to ignore or circumvent the law because it turn out to be a costly mistake.
A Look at California Granny Flat Law
It’s no secret that California is experiencing a major housing shortage. Over the past ten years, the state has seen 80,000 homes built each year. However, that’s 100,000 homes less than what is needed to keep up with the projected population growth through 2025.
This is one of the reasons why the cost of living in California is so high. In fact, the median home value in California in 2017 was about $490,000, which is more than twice the national average. As a result, homeownership in California is at a 70-year low.
With more Californians moving in together to share a room or a home, more people have been choosing to add an accessory unit such as a granny flat to their main residence. While some of these people are families looking to save money by living on the same property, others are people who are renting properties. Luckily, California law has recently changed to accommodate more of these types of dwellings and support more affordable housing.
In September 2016, California revoked all city-level ordinances for granny flats. This included everything from parking restrictions, to requirements for fire sprinklers. In its place, lawmakers established a much more lenient criteria for approving a granny flat. This has made it easier and less expensive to build granny flats throughout the state of California.
Under California granny flat law, water and sewer agencies cannot charge hookup fees for structures built within an existing structure or an existing detached unit on the same lot. The granny flat also does not need its own electrical hookup from a utility provider. These changes in the law remove some of the financial obstacles of adding a granny flat.
The law also states that local agencies are not permitted to impose parking rules for certain granny flats. These include those within a half-mile of public transit or that are part of the existing primary residence. This means that city officials cannot tell a homeowner in these situations that they cannot add a granny flat to their property due to lack of street parking.
To help expedite the process of building a granny flat, California law states that cities must approve granny flat applications within 90 days. Additionally, a city can only deny an application for a granny flat if the project will not comply with the law.
Granny Flat Building Tips
Many homeowners are a bit overwhelmed when they make the decision to build a granny flat on their property. However, with the right team of granny flat builders and proper guidance, the process can be seamless and stress-free.
It’s not uncommon for homeowners to think they’re saving money by hiring a general contractor who provides a low estimate or trying to build a granny flat themselves. The people who try to build on their own often find themselves overwhelmed and over-budget on their building project. As for those who partner with a general contractor who promises to build it for less, they often find the arrangement to be lacking. For your project, you want a company that understands granny flat construction projects and knows how to build a high-quality structure.
Before selecting a granny flat builder, you should ask a few important questions.
- Ask the company if they are licensed and request to see their license number. Working with a licensed company is important for projects – both big and small.
- Request a list of references and completed projects. If you ask, you may even be able to walk through a completed granny flat project to assess the quality.
- Review the company’s website to make sure it is professional and helpful. A professional website suggests that a company will be professional in other ways.
- Receive a quote and find out what is included. Some companies may only quote the price for basics and leave out certain services to make their quote look cheaper than the competitors. Make sure you know what the final price will be for your project.
Design Tips for Inside and Outside
The finishing touches on the granny flat are also very important. On the outside, you may want to create a seamless connection between the main house and the granny flat. You can accomplish this by using similar building materials and adding a path between the two dwellings. You can also add garden areas surrounding the path to enhance the beauty of the outdoor space.
As for the inside, some simple touches and design elements can make the space feel like a home. An L-shaped kitchen can help you make the most of a small space by storing everything you need in one convenient space that is open to the living room. Also consider adding windows on all sides of the floorplan to help fill the space with beautiful natural lighting.
Why Remodel Works?
As a San Diego-based building company, Remodel Works has the experience to make every home project a success. When our team starts any project, we create a meticulous plan that includes all aspects involved in building out your space. From flooring to roofing, we make sure that everything is included, from the initial idea through construction.
For the last three decades, we’ve been helping homeowners remodel and expand their living spaces. When it comes to building home extensions and granny flats, our knowledgeable and diligent contractors handle every step and keep you informed throughout the process. We know that your time and money are precious, so we never waste them.
Because we are based in California, we understand the state’s granny flat laws and regulations. This allows us to make sure that every project stays in compliance, so you don’t experience any legal or regulatory problems later. We also have experience building high-quality dwellings that are built to last.
Using the information in this article and the experience of the Remodel Works team, you can take advantage of the many benefits of adding a granny flat to your property.
For more information about granny flats, check out our articles on the zoning laws in California and granny flat regulations in San Diego.