
Kitchen remodels and renovations are one of the best ways you can improve the value of your home. But since no kitchen is created equal, you will have to decide which type of layout is best for the available space in addition to what features you would like for your new kitchen to have.
One of the more popular kitchen layouts is the L-shaped island. In this post, we’re going to dive into the many benefits of an L-shaped kitchen island, including how an L-shaped island can help make a space more attractive, improve traffic flow, and more. Of course, no yin is complete without its yang, so we will also cover the potential cons of an L-shaped island, such as cost efficiency, storage inadequacies, and spacing issues. By the end of this article, you’ll have lots of inspiration for different kitchen layouts with island and peninsula additions.
Whether or not each pro and con applies to you will be according to your individual circumstances, so make sure to read through carefully, consider your available space, and match it with whether or not an L-shaped island matches up with your vision for your new dream kitchen. If it doesn’t, we’ll even throw in a little bonus for you and summarize some other island designs that may be better suited for different kitchen layouts.
Since we have a lot of ground to cover, let’s get right to it!
What is an L-shaped Island?
No better place to start than this! What exactly is an L-shaped island kitchen, anyway?

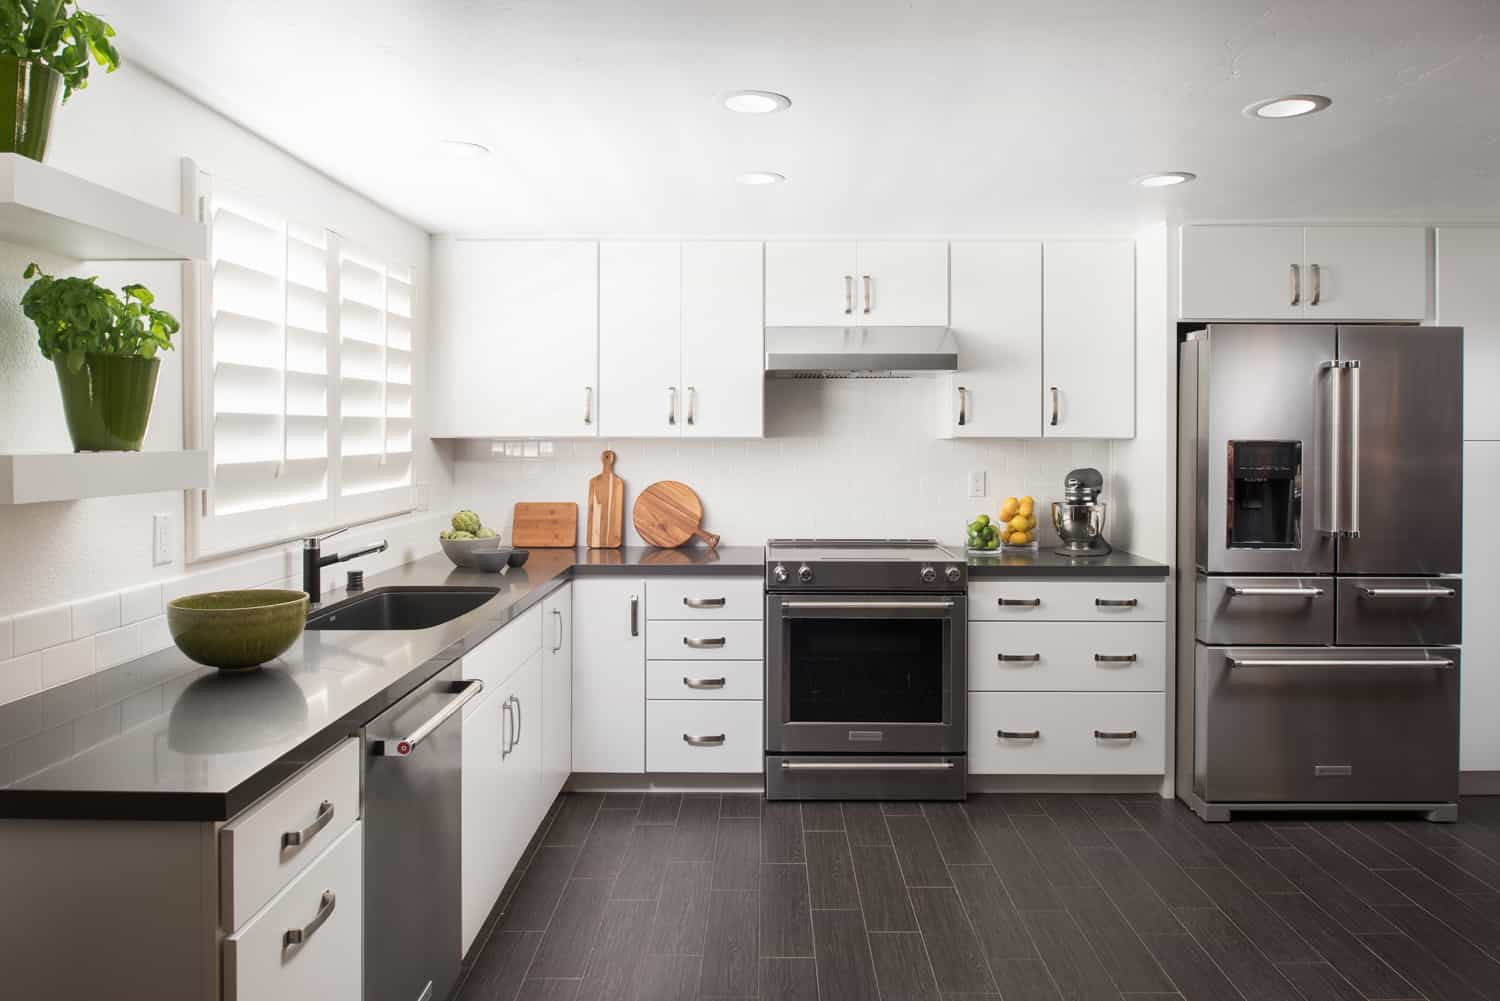
Standard L-shaped kitchens consist of two adjoining, perpendicular walls of cabinets that form the L shape that gives the style its name. These walls are commonly referred to as the “arms” or “legs” of the kitchen, depending who you ask.
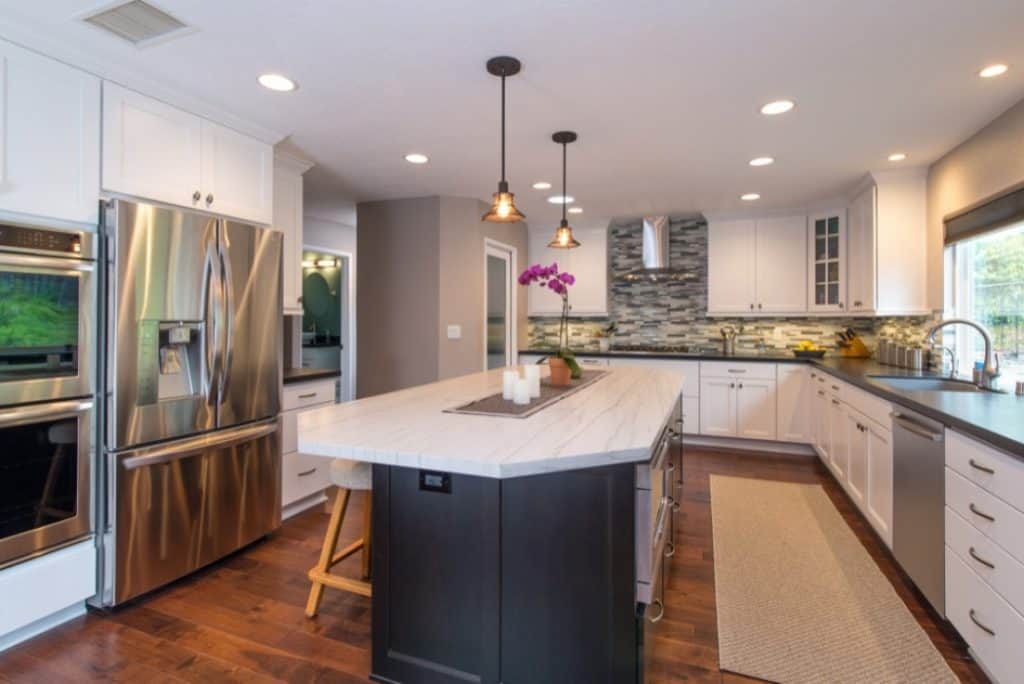
Most often, one section of the L is designed to be used as a clean-up zone, likely including the sink. The other section will incorporate the kitchen appliances, such as your stove, microwave, refrigerator, etc. The island then sits in the middle of the open L with spacing in between. This layout helps to separate the clean-up and cooking areas, creating a more optimized kitchen layout.
The highly-functional L-shaped layout seems to be created specifically for open-living floor plans, which is a very popular feature among today’s homeowners. For instance, this layout is great if you want to open up your kitchen to your dining room, The L sections can vary in length depending on the dimensions of the room and are able to fit well into both small and large spaces.
As you can see, we’ve started singing the L-shaped island’s praises before we even began to really get into the pros, but there are many more to come.
5 Pros of L-shaped Island Kitchens
1. Great Picks for Open Floor Plans
As we just mentioned above, L-shaped island kitchens are a great fit if you want an open-concept kitchen plan. The perpendicular walls of the L-shaped kitchen style give homeowners great flexibility when it comes to setting boundaries between living spaces in a way that seamlessly blends them together. A kitchen can clearly be the kitchen next to the living room without any physical walls needed to mark the lines.
The L-shaped island, therefore, fits perfectly into the spirit of “open” living. The great flexibility offered by an L-shaped island allows you to get your appliances in a row and line up your kitchen and dining area.
2. Versatility
The L-shaped kitchen island is so popular because of its versatility. In fact, the L-shaped island kitchen is thought to be the most versatile of all kitchen remodel layouts. Its adaptability to fit into any room allows you to maximize your existing space and create a functional kitchen in which you can easily walk around in. This gives you a kitchen that seems much more spacious than it actually is.
The versatility extends to the work zones as well. Since one leg or arm of the L will be devoted to clean up, while the other will house your stove, oven, and microwave, your cooking and cleaning zones will be separated. This is part of the reason there are so many popular L-shaped kitchen plans today.
You can even choose to set your cooktop and oven in your island (called a double L), keeping your wall space mainly for storage. Or you can use the island for storage, prep, or as your dining counter. The L-shaped island provides you with many options for how you would like your kitchen to function.
3. Improved Traffic and Workflow
L-shaped kitchen island layouts are typically much more functional than other designs. You will be able to easily move between your sink, oven, stove, and refrigerator, as well as your food prep area. No matter how you choose to lay out your kitchen, the work triangle functionality makes it easy for you to move from station to station.
This creates a much more cohesive kitchen, giving even the most ambitious home chefs a harmonious environment in which to create their culinary masterpieces, all while staying open to the rest of the home and engaging with friends and family.
4. Optimized Storage Solutions
Space can often be at a premium in your kitchen, forcing you to get creative with how to fit all of your kitchen items into your available cabinet space so you aren’t left with a bunch of counter clutter. L-shaped kitchen layouts provide further versatility by being flexible to some particularly trendy corner storage options, such as magic corner units, Le Mans pullout units, or even carousel units.
By using your corner space for storage, you will maximize the functionality of your kitchen and make the most of your corner spaces. Anything you store in these corner areas will be easy to access, and the different options provide you with as much storage space as you require. You can then use the majority of your kitchen space for cooking and cleaning.
5. Perfect for Smaller Spaces
As you may have guessed, the L-shaped design is well-suited for homes that don’t have much square footage to use for the kitchen. As the layout of an L-shaped kitchen island only requires two adjacent walls, it makes them perfect for small and medium-sized spaces. For those smaller homes with a galley kitchen, the L-shaped design offers a worthy upgrade to optimize the available space and open up the room.
You’ll essentially free up a wall and allow you and your family to move around your kitchen easier. It will also make the room feel more spacious. So if you’ve got two walls and are looking to upgrade — the L-shaped kitchen island is for you!
5 Cons of L-shaped Island Kitchens
Of course, no kitchen style or layout is without its flaws. Here are a few potential cons of the L-shaped kitchen island.
1. Reduced Efficiency in an Open Floor Plan
In some cases, the L-shaped design can actually lead to spacing issues and make cooking more of a chore than it needs to be. While the L-shape can create tons of space, that may actually end up becoming a problem, as the appliances and workspaces become too spread out. While some homeowners may like this spacing, others may not want to have to walk back and forth so much between appliances, prep counter, and sink, causing their kitchen to be less efficient.
To best optimize the L-shaped layout, the cabinet and counter area should not span the entire length of the walls, otherwise, things will be far too spread apart. Often, the island in this design is used to help deal with some of these spacing issues. Of course, this depends on how much space you have to work with.
2. Best-suited for Single Cooks
Ever hear the expression “too many cooks in the kitchen?” Well, with an L-shaped island, “too many” refers to any more than one. This is especially true the smaller the space is that you have to work with.
The perpendicular layout of the kitchen simply isn’t suited for multiple cooks and creates a restricted space. If your family enjoys working together to create meals, the L-shaped design may not be your best option. However, with the island, you can keep family members close while seated at the island and be able to converse easily while you work your magic in the kitchen.
3. Corner Issues
Obviously having cabinets in a corner can have some disadvantages. Picture cabinets slamming into each other or small counter appliances scrunched together to leave space for food prep. Sometimes, items in these corner cabinets can also be difficult to reach.
There are solutions available for these issues, such as the carousel corner, magic corner units, or Le Mans corner units that help enhance the functionality of your corner cabinets. The island can also be used for easier storage for those items you use often.
4. Not Well-suited for Large Kitchens
As we mentioned above, having too much space can also be a bad thing. Too much counter space will spread your appliances out too far and leave you with a less-efficient kitchen. The flow of your work triangle will be compromised. For these reasons, the L-shaped island kitchen is not recommended for large kitchen designs.
Things will simply be too spread out. The L-shaped island will work best in kitchens that open to another room and have a limited area to work with. If you try to extend the L shape down longer walls, it will end up looking awkward and be difficult to manage.
5. Cost
A possible hangup for the L-shaped island is the price. An L-shaped island kitchen falls in the mid-range of kitchen layouts prices and can be customized different ways to raise or lower the price point. However, it is not the least expensive options for those on a tight budget. Using free-standing appliances can help cut down costs.
Other Kitchen Layout & Design Options
The L-shaped island design is not the only kitchen layout available to choose from. In fact, there are a couple of stages of planning you should go through when choosing your kitchen renovation.
Island vs. Peninsula
The simple difference between the kitchen island and peninsula layout is that an island is free standing on all four sides, while a peninsula is attached to a wall or other structure on one side and open on the other three. The peninsula is an extension of the kitchen while the island will stand alone.
Each option can offer advantages for storage, functionality, and counter and seating space, so the one that best suits your kitchen will likely come down to your available space.
Islands require more space for people to pass by on all sides while keeping the kitchen work triangle open. If the island disrupts the workflow in the kitchen, then it would be best to leave it out. Likewise, if there isn’t enough space for people to comfortably pass by on all sides, then stick with the peninsula design. A peninsula will offer a better alternative if the island does not compliment your space.
U-Shape
The U-shape kitchen design is perhaps the most versatile layout of all, and suitable for both large and small kitchens. In a U-shape design, the cook is surrounded on all sides and provides an efficient work triangle. There is a large amount of storage and counter space and provides a barrier between the cooking and dining areas.
G-Shape
A variation of the U-shape, the G-Shape design adds a peninsula or a partial fourth wall. This extra space can be used for extra countertop, storage space, or both. Those with larger kitchens and more needs can even add a second sink or range, creating two separate work triangles.
Single Wall
Best-suited for small condos and homes, the single-wall kitchen places the sink between the range and refrigerator, allowing maximum efficiency within limited space. The refrigerator door should open away from the sink to reduce interruption.
Galley
The galley kitchen consists of two workspaces along adjacent walls that is well-suited for kitchens with a narrow space. The sink is often on one wall while the refrigerator and cooktop are on the opposite side.
Summary
A renovated kitchen home improvement project can increase your home value and greatly improve the overall flow and layout of your home, but it takes careful evaluation to decide which kitchen layout will be best for your space. If you need some help, our San Diego home renovation experts at Remodel Works will be happy to help you create the most efficient kitchen for your available space. Contact a specialist today.
Sources:
https://inspiredkitchendesign.com/designer-tips-pros-and-cons-of-an-l-shaped-ikea-kitchen
https://gharpedia.com/pros-cons-l-shaped-kitchen-arrangements
https://www.houzz.in/ideabooks/89052003/list/the-pros-and-cons-of-l-shaped-kitchens
https://www.sandyspringbuilders.com/blog/kitchen-design-island-or-peninsula

Latest Posts
The Kitchen And Bathroom Countertop Showdown: Quartz, Quartzite, Porcelain, Or Granite?
Kitchen Zones: How To Design A Kitchen Around The Way You Actually Cook
How to Make a Small Kitchen Feel Twice as Large
Get your in-home free estimate today!
How New Trade Tariffs Can Affect Your House Construction Cost
(858) 413-2305 Request a quoteBy now you’ve likely heard that we are in a bit of a trade war with China.
President Trump has put massive tariffs on goods that come from China not once, but now twice, escalating an already tense situation, and taking advantage of the situation while the American economy is on the upswing, and China is embroiled in a bit of a downturn. While these tariffs have had a profound effect on a myriad of industries that rely on imported goods, it has particularly impacted the residential construction industry, as the new tariffs on construction materials have caused construction costs to skyrocket in 2018.
If you’re hoping to build a home or plan a remodel, the new tariffs will likely have an effect on your house construction costs. In this post, we’re going to take a look at how these tariffs could affect the average cost of building a house.
The Original Tariffs
The construction industry is no stranger to import taxes on goods.
Back on March 8, 2018, President Trump signed an order that placed a 25 percent tariff on imported steel and a 10 percent tariff on imported aluminum. This tariff went into effect on March 23rd.
This tariff put the U.S. housing industry in a state of panic, as steel and aluminum are materials that are often used in housing projects. Several trade associations, including the National Association of Homebuilders, spoke out against the tariffs.
“This announcement by the president could not have come at a worse time,” said Randy Noel, chairman of the National Association of Home Builders (NAHB) and a home builder and real-estate developer in Louisiana. “Tariffs hurt consumers and harm housing affordability.”
And he wasn’t wrong. The costs for goods went up for the NAHB members, and in turn raised prices for homebuyers.
A year before those tariffs, President Trump put import taxes on five Canadian lumber companies that ranged between three and 24 percent. These tariffs were in retaliation for Canada’s move to restrict the import of U.S. dairy products. Since then, lumber prices have gone up 31 percent. These more recent tariffs added higher costs for steel to the construction cost mix.
Combined, this unfortunately led to cities being unable to meet demand for housing, leading to a shortage of affordable housing in several major cities. New residential construction also reached a 10-year high last year. Given that those building a home are using wood from Canada that has up to 20 percent tariffs in addition to elevated prices for other materials, it is creating a difficult market to build new homes.
While the March 2018 tariff on steel had more effect on commercial builds than residential buildings, the latest tariffs against China could become more of an issue for construction companies and those who wish to build a new home.
The New Tariffs On Goods Coming from China
In mid-September, President Trump announced that the U.S. would place an additional $200 billion in tariffs on Chinese goods and would tax all imports. This was in addition to $50 billion worth of goods Trump already taxed earlier in the year. This means roughly half of all Chinese imports into the U.S. will face import taxes.
The first found of tariffs had a minimal impact on American consumers, but this latest wave of tariffs, which were intended to hurt China, may actually impact American consumers, specifically home buyers. Prices on building materials and housewares could be on the rise.
While home renovation demand continues to soar, the building costs associated with the projects are rising along with it, thanks to these new tariffs. According to the National Association of Home Builders, this new round of tariffs will include around $10 billion worth of Chinese products that are exclusive to the homebuilding and remodeling sector. The tariff will start at 10 percent, but could rise to as much as 25 percent by the end of the year. This would amount to a $2.5 billion tax increase on the home building and remodeling industry alone.
The tax would also cause construction material price increases, which will be tacked onto the price of a home build or home remodel.
The Tariff Impact on House Construction
Even if the tariffs have a minimal effect on housing, homebuilders will face other pressures.
Land and labor costs continue to rise, creating barriers to new construction. The affordable housing shortage has also created fierce competition among homebuyers in many cities, leading many to become embroiled in bidding wars on houses they have never even seen. Mortgage rates are also rising, showing that even a minor hike in home prices because of tariffs will have a trickle-down effect.
Raised Prices on Construction Materials
Several massive companies, such as Walmart, Gap, Coca-Cola, and General Motors have made announcements that these tariffs would force them to raise prices. The tariffs will also affect certain construction materials, which will cause the overall price on houses to rise in price, on top of the estimated $9,000 already added to a single family home by the Canadian lumber tariffs.
For home builds and remodeling projects, these tariffs are even forcing contractors to add in escalation clauses for projects that are being scheduled for next year, because they don’t know how high prices are going to rise. Home values have risen in recent years, which has given homeowners the cash to improve their investment by renovating their home through a general contractor.
This estimate spike in prices and potential for more to come has caused homeowners to want their projects done faster, before any escalation clauses can increase their budget. The tariffs are therefore putting pressure on the industry to work quickly and find other means of cutting building costs to remain within budget.
Adding to the tariffs on Canadian lumber, imported steel and aluminum, this new round of tariffs on Chinese goods will include wall material, floorboards, light fixtures, cabinets and counterops, heating and cooling equipment, tile for bathrooms and backsplashes, and more. Most mosaic, glass and patterned tile are not made in the U.S., as well as the cost of ceramic, natural stone, glass materials, and more. Industry experts estimate that import duties on these items will go up at least 15 to 20 percent, which will in turn force costs on them all to follow suit.
Quartz & Other Materials
Materials like marble, granite, and especially quartz used for countertops will also be impacted by the tariffs. In fact, the U.S. Commerce Department recently announced its findings in an investigation over illegal dumping of Chinese quartz into the U.S. It found “that exporters received countervailable subsidies ranging from 34.38 to 178.45 percent, according to a press release. Because of this finding, the U.S. Commerce Department will impose duties on the course on top of the new tariffs.
Just last year, the U.S. imported $460 million worth of quartz surface products from China. The price of quartz has actually already gone up in anticipation of these imposed duties and will get worse with the pending tariffs. This move will benefit U.S. quartz marker Cambria, which actually filed the complaint to the Commerce Department, however other companies will struggle to match the color and quality of the stone and meet demand. For many, the prices will simply be too high.
Chinese tile is cheaper than domestically-produced tile, so the hope is that the tariffs will level the playing field for U.S. tile makers in the “America first” economy. However, this will still raise prices for consumers.
Lumber & Steel Tariffs Add to Costs
The trade war between the U.S. and China has had some negative effect on several other industries, including the hard-hit farmers in the agriculture industry, business investments, and fading tax gains. Of course, our point of concern here is higher housing costs.
While vehicles may cost thousands more with the tariffs on steel, housing costs are harder to pinpoint. What is known is that the combined tariffs on everything from building materials to appliances will increase the overall cost of new homes. The true impact of this tariff won’t be seen until the next wave of home construction begins next year, when builders will be forced to pay for the higher material costs of Canadian lumber for construction jobs that are already contracted.
The steel and aluminum tariffs will affect new home prices if the cost of those materials increases within the U.S. This effect will be more muted, since homes are typically built more with wood than metal. Lumber accounts for one-third of the average cost of building a new home, while steel and aluminum contribute just 0.5 percent to one percent of the home’s total cost.
With the new and existing tariffs, apartment buildings and condos will feel the hurt the most because they require significantly more steel than single-family homes. Unfortunately, these material costs may have to be absorbed by buyers and renters.
Tariffs Come at a Time When There is Increased Demand for Housing
Adding to the difficult situation is the fact that home-building activity had picked up in the months before the tariffs were announced. With contracts already begun, construction companies have to move forward and pay the higher prices for materials. Making the actual cost of construction higher will make it more difficult for companies to offer affordable price points.
The lumber tariffs on Canada have had a bigger impact than tariffs on steel and other goods from China. When the Department of Commerce imposed a 20.83 percent tariff on shipments of softwood lumber from Canada last November, the move was intended to create new jobs and spur domestic lumber production. What it also did was cause the price of lumber to increase nearly 15 percent, costs which have largely been passed on to home buyers.
This tariff added an average of $6,000 to $10,000 to the total cost of a median-priced home. In response to the tariffs, the Canadian lumber duty was projected to reduce investment in single-family structures by $1.1 billion. If this reduction were to actually occur, new home building would slow because there might not be enough lumber available, or because of prices being too high.
Summary
Overall, the tariffs aim to strengthen the American economy by forcing construction companies to use American goods rather than foreign imports, however this has also raised the actual cost of building a house. This may cause new home construction to plummet in the coming year and fewer renovation projects like kitchen and bathroom remodels as well, but it remains to be seen.
Sources:
https://www.businessinsider.com/donald-trump-tariff-impact-on-housing-and-construction-2018-3
https://www.nytimes.com/2018/09/17/us/politics/trump-china-tariffs-trade.html
https://www.cnbc.com/2018/09/24/new-chinese-tariffs-make-home-renovations-more-expensive.html
https://www.nytimes.com/2018/06/11/business/dealbook/trump-tariffs-canada-lumber.html
Latest Posts
The Kitchen And Bathroom Countertop Showdown: Quartz, Quartzite, Porcelain, Or Granite?
Kitchen Zones: How To Design A Kitchen Around The Way You Actually Cook
How to Make a Small Kitchen Feel Twice as Large
Get your in-home free estimate today!

Construction Industry News: Why Your Home Renovation May Cost More In 2018
(858) 413-2305 Request a quoteThe construction industry has been abuzz lately with the news that President Trump has announced another massive tariff on goods imported from China. This time, $200 billion worth of Chinese goods will face import taxes, with much of the goods being used specifically on construction projects.
This new tariff comes in the wake of a $50 billion tariff on Chinese goods earlier this year and additional tariffs on foreign steel and aluminum as well as Canadian lumber. These extra import taxes are putting pressure on construction companies to find ways to reduce costs, or else they will have to start charging higher prices for home remodels and builds.
In this post we’re going to dig into some of these rising challenges in the construction industry. We will also cover some of the top renovation trends of 2018 and tell you how the past and pending tariffs will affect any planned home renovation projects you have for 2019.
First, let’s give you a recap of the tariffs in regards to the latest construction industry news.
The Trump Tariffs on Imported Goods
During the Trump administration, the construction industry has become quite familiar with tariffs on imported goods.
During his “America first” initiative, aimed to promote American companies, jobs, and materials over foreign products, tariffs have been placed on goods used in the construction industry such as lumber, steel and aluminum, and dozens of others in recent tariffs imposed upon China.
The first domino to fall in this tariff frenzy was when the Department of Commerce placed import taxes on five Canadian lumber companies in March of 2017. This tariff ranged between three and 24 percent (an average of 20.83 percent) on all Canadian soft lumber and was placed in response to Canada’s import restriction of U.S. dairy products. The move was made to increase American lumber production and create jobs, but instead, it has caused lumber prices to go up 31 percent. These added costs are often absorbed by the home buyer.
A year later on March 8, 2018, President Trump placed a 25 percent tariff on imported steel and a 10 percent tariff on imported aluminum. This order went into effect on March 23, and put the U.S. housing industry on notice, now that the majority of the main materials used in housing projects were having their prices raised. Trade organizations like the National Association of Homebuilders spoke out against the tariffs, claiming they could not have come at a worse time for the U.S. housing market.
This is because new home builds and home renovation projects were rapidly on the rise prior to the tariffs being passed. Home values were reaching all-time highs, making it a great time for homeowners to use the extra cash to boost their home’s value even further through a new kitchen, bathroom, addition, or other renovation.
These tariffs combined already hiked up prices on home construction projects for construction companies and consumers alike. Projects that were already signed into a contract before still need to be honored, with construction companies having to eat the extra costs of lumber and goods. Moving forward, this has forced many companies to place “escalation clauses” into their contracts, which allow for home renovation estimating costs to change should the price of materials go up when they are needed.
The cost of steel and aluminum is expected to rise but has less of an impact on residential housing than does the tariff on lumber, as most single-family homes are primarily built with wood. Steel and aluminum account for just 0.5 percent to one percent of a home builder’s entire cost. Meanwhile, lumber is one-third or more of the cost of building a new home.
Where the tariffs on steel and aluminum will be felt the most is in construction projects to build apartment or condo complexes because these will use far more steel than a single-family home. Some of these extra costs may eventually be absorbed by the renters and buyers of these apartments and condos.
The combination of lumber and steel and aluminum tariffs will increase the cost of new homes. When you factor in other building materials and heating and cooling systems, you can see how the tariffs will really be adding expenses everywhere.
What is known is that the combined tariffs on everything from building materials to appliances will increase the overall cost of new homes. The true impact of this tariff won’t be seen until the next wave of home construction begins next year, when builders will be forced to pay for the higher material costs of Canadian lumber for construction jobs that are already contracted.
Cities also are having a tough time meeting demand for housing, because the tariffs on materials are sending the prices skyrocketing. This has caused a shortage of affordable housing in major cities across the country as companies either aren’t able to meet demand with their supply or can’t afford the material due to the new prices.
New residential construction also reached a 10-year high in 2017, showing that people are eager to build homes. However, the tariff on Canadian lumber has created a difficult market to build new homes given the extra costs associated. For example, the tariff on Canadian lumber added an average of $6,000 to $10,000 on top of the cost of a median-priced home.
The Canadian lumber duty is also projected to reduce its investment in American single-family homes by $1.1 billion. If this big of a reduction actually occurs, new homeowners would have to wait longer than usual for their homes to be built, as prices of lumber may be too high.
While the lumber tariff has more of an effect on home builds and renovations, the steel and aluminum tariff is raising prices in the commercial arena, plus for apartment buildings and multi-family condo communities. The tariffs against China, however, will affect construction projects of all kinds, but especially those to build a new home.
The Chinese Tariffs
Recently, President Trump announced tariffs on $200 billion worth of Chinese goods and said he would place an additional tax on all imports. This was on top of the previous $50 billion tariff he had already placed earlier in 2018. At this point, roughly half of all Chinese imports to the U.S. face import taxes. Trump is calling for taxes on all of them.
While the first round of tariffs did not have a large impact on American consumers or construction companies, this second wave will end up raising prices, especially for home buyers. All building materials and housewares should see their prices rise.
Impact on Home Renovation Costs
Because of these tariffs, home renovation prices will rise at a time when renovation projects are in high demand. The latest round of tariffs includes roughly $10 billion worth of Chinese products that are exclusive to the homebuilding and renovation industry, according to the National Association of Home Builders.
The tariff on these goods will begin at 10 percent but may reach 25 percent by the end of 2019. This would add up to a $2.5 billion tax increase in the industry. This tax would cause prices on construction materials to increase, which would of course be added to the price of homes or home renovation projects.
While putting it in numbers gives you an idea of the total price hike the country will be dividing up for renovation projects, it puts things further in perspective when you consider the types of materials that will soon have an increase in price. The Chinese goods that will now be taxed include walls, floorboards, cabinets, light fixtures, heat and cooling equipment, ceramic, natural stone, glass, tile, marble, granite, and quartz, among others.
Taking quick stock and you’ll see what kinds of projects can expect to see higher prices. If you are tearing up your carpet and putting doing a hardwood floor remodel, you can expect the prices to be higher. Simple renovations to update to LED lighting will have more expensive fixtures. The ever-important central air or modern heating unit will come at a heftier price as well.
Remodeling the kitchen, often one of the best renovation projects to boost the value of a home, will be much more of an investment since cabinets, tile for flooring and backsplash, and materials used for countertops are all under the tariff. Likewise, bathroom remodels will be more expensive thanks to import taxes on ceramics and tile.
Industry experts predict that the import duties on these items will rise at least 15 to 20 percent. With the costs of these materials that are often used in home renovation costs going up, so too will home renovation estimating costs, and the price for the completed job.
Effect on Current Home Renovation Trends
Many of these newly-taxed goods are involved in some of the more popular home renovation trends of the moment.
For example, bold-colored cabinets have become more popular to give a more modern look to the kitchen with a blast of color. Kitchen remodels are also proven to be one of the most impactful home improvements you can make to your home’s overall value. When you add in the price of tile and countertops to the cabinets, homeowners may think twice about investing so much money for the remodel, since they might not get as much of a return to their value given the elevated cost of goods.
Likewise, waterfall countertops have become very fashionable, but now will be much more expensive to install. Colorful or patterned bathroom floor tile also will now come with an added cost.
Summary
All of this is to say that home renovations will come at a higher cost for the remainder of 2018 and even more so in 2019. As the trade war rages on, each tariff seems to cause more and more damage to the wallet of consumers, rather than protect the American people as intended.
Sources:
https://www.nytimes.com/2018/06/11/business/dealbook/trump-tariffs-canada-lumber.html
https://www.cnbc.com/2018/09/24/new-chinese-tariffs-make-home-renovations-more-expensive.html
https://longroofing.com/blog/the-top-2018-home-trends-in-renovation-and-design
Latest Posts
The Kitchen And Bathroom Countertop Showdown: Quartz, Quartzite, Porcelain, Or Granite?
Kitchen Zones: How To Design A Kitchen Around The Way You Actually Cook
How to Make a Small Kitchen Feel Twice as Large
Get your in-home free estimate today!
For millennia, craftsmen, builders and artisans have viewed marble as the consummate building medium. From Michelangelo’s Carrera Marble David, to Bernini’s massive marble colonnade at St Peter’s Square, marble has been venerated and cherished because of its brilliance, beauty and malleability. Two things specifically distinguished marble from other stones: the way in which it’s stunning white or blue-grey hues were able to capture and reflect light, and then, marble’s distinct offsetting veins. The Italians would say about a stunning block of Carrara marble, “Il marmo canta,” the Marble sings.
Five hundred years later and not all that much has changed with the way humans regard marble, be they architects, interior designers or consumers. Although the custom usage for marble has changed, it has become one of the most popular choices for kitchens, countertops and bathrooms. Today especially, marble is widely considered to be a status symbol of luxury, elegance and wealth.
While no one denies the stunning beauty of gleaming marble countertops, what many bemoan is its fickle nature and how readily it shows wear and tear: blemishes, discolorations, blots, soils, and spots. Some love the fact that marble wears its scars like tattoos, its surface marred and indelibly marked by past use, each stain or scratch a memory of a meal prepared or drink shared. Others, however, prefer for surfaces to be clean and pristine with nothing detracting from the marbles exquisiteness. As a result, they spend a lot of time, money and attention on upkeep of their marble surfaces.
If you are considering having marble installed in a new house or in a kitchen remodel, you will likely ask friends their advice on whether or not you should. Depending on which type of person you ask, you may receive conflicting stories or advice. They might say they love the way it looks and how pretty it makes the kitchen, but on the flip side, they might relay their annoyance with its durability and how easily the surfaces gets dirty. As mentioned, some really don’t mind marble aging, others will give your horror stories that push the message that it is not worth the cost or the hassle. While it is wise to speak to others about their past experience and take their advice into account, do not let that detract from your desire for marble countertops or bathrooms. Rather, simply take these things into consideration, know what you are getting in for, prepare for it and take preventative measures. If you do not let these problems catch you off guard, if you nip stains or blemishes in the bud, you can have beautiful marble and keep it immaculate without breaking the bank.
What Is Marble?
One of the more underrated aspects of marble is its texture and feel, cold to the touch, whether polished or honed, and how austere it is in its age. In order to treat and upkeep marble, and in order to choose the right cleaning products and utensils, it is important to fully understand what Marble is and why it reacts to substances the way it does. There are two general categories into which natural stone is classified: calcareous stone and siliceous.
Siliceous stone is predominantly made up of silica or quartz-ish particles. As a result of its chemical make up, Siliceous stone is strong, durable and quite easy to treat with mildly acidic cleaning solutions. Your typical siliceous stone found in a home would be sandstone, brownstone, bluestone, granite, slate and quartzite. Calcareous stones are predominantly comprised of the mineral calcium carbonate. Calcareous stones are sensitive to acidic solutions and require different treatments than Siliceous. Examples of Calcareous stone being, limestone, onyx, travertine and of course, marble.
Marble, specifically, is very porous on a micro level, which means it absorbs liquids quite easily and can be damaged by spilling acidic substances on it. Common acidic items you might find in the house being things such as, wine, lemon juice, tomato juice, sodas or milk. One spill from these acidic substances can damage the marble, leaving an enduring scar. The damage occurred in the reaction between acid and calcium carbonate is known as etching. Calcareous stones are not recommended for kitchen countertops because of how common acidic substances are in day-to-day life. Even water can stain a marble countertop, so you can imagine if you use your kitchen regularly how easily the marble could wear or accumulate imperfections. There are two important steps to take when dealing with marble in your home: prevention and maintenance.
Sealing Marble Countertops
Sealing your countertops falls into the preventative side of protecting the marble’s long-term aesthetic. Because of marble’s porous nature, the stone must be sealed in order to help protect the marble from undesired blemishes or etchings. A sealant can prevent spills and stains from digging deep into the stone and give you more opportunity to clean up any spill.
Before we continue it should be noted that many are under the understandable false perception that a sealer provides an impermeable shield. In reality, a sealant simply slows down the natural absorption rate of liquid in the stone. A good sealant gives you precious extra seconds to clean the spill and keep the stain close to the surface, so it can be removed far easier. The deeper a substance stains, the harder it is to get out.
Before you do seal marble surfaces, be sure to consider these various factors and more to determine which sealant to use. Is the marble expected to be in common contact with acidic substances? How porous is it? How fast does it absorb liquid? What is the finish of the surface? A honed surface is less resistance to stains than a polished one. Will the sealant change or alter the color or aesthetics of the marble?
Some marbles also do not need sealing or would react poorly with them, damaging the stone even more. If you do not know how to find the answers, speak to professionals or hire them to do it on your behalf. They have years of experience working with this delicate stone and if you are already investing in the marble, it could be cheaper, in the long run, to make sure it is done the right way.
For those of you who want to save money and do it on your own, it is fairly easy to do and the small cost and time drain are worth the long-term benefits to the health and quality of the stone. Before we begin, if you are sealing marble for the first time, multiple coats may be required in order to successfully seal the pores.
How many times you may need to reapply sealant depends on several things: the porousness of the stone, the quality of the application and the quality of the sealant. Contingent upon these factors, the effectiveness of the sealant could last anywhere from a few months to a couple of years. Darker colored marble will need to be re-sealed less often than white marbles, which wear their scars far more visibly.
There are five easy steps when it comes to sealing marble counter-tops:
- Step 1 – Selecting the sealant: It would prudent to select a high quality sealant, they last longer and are less likely to react bizarrely with your countertops. It is also important to know the difference between Topical Sealers and Impregnators. According to the Marble Institute: “Topical Sealers are coatings (film formers) designed to protect the surface of the stone against water, oil, and other contaminants. They are formulated from natural wax, acrylic, and other plastic compounds. When a topical sealer is applied, the maintenance program often shifts from a program focused on stone care to a program focused on the maintenance of the sealer (for example: stripping and reapplication). Impregnators are water- or solvent-based solutions that penetrate below the surface and become repellents. They are generally hydrophobic (water-repelling), but are also oleophobic (oil-repelling). Impregnators keep contaminants out, but do not stop the interior moisture from escaping. These products are considered “breathable,” meaning they have vapor transmission.”
If you need help, ask for assistance at the hardware store when purchasing.
- Step 2 – Cleaning Off the Countertop: Remove everything from the marble counters, including cookware, food, appliances etc. Use a soft rag to remove any crumbs, dust or other substances from the countertop. Once cleared, clean the surfaces thoroughly with a cleaner made for marble and let it sit for at least a minute.
Remove everything off of the top of the counter-top including all appliances, spices, and everything else. Next, using a soft clean rag and remove all of the dust and crumbs that might still be on the counter-top. After sitting for the appropriate time, dry off the countertops with a clean towel.
- Step 3 – Sealing the Countertop: It is up to your discretion whether to apply the sealer with clean cloth or a brush, either will do the trick. Carefully go over the entire countertop with a thin and even layer of sealant. Repeat if needed. Once you have finished, let the sealant dry for roughly five minutes. It is advised to do this in sections. After at least two levels of sealant, once again let the countertop dry before putting anything on the surface. It is better to err on the side of caution, so you do not need to re-do anything.
- Step 4 – Surface Dressing: Once sealed, a topical polish or shine enhancer can also be applied, providing a thin extra layer of protection while helping the stone really shine and sing.
- Step 5 – Reseal when necessary: In order to help your marble last longer and keep looking great, countertops should likely be re-sealed on an annual basis. Again, it’s a little bit of money and time in the short run that will pay off big time in the long run.
Marble Countertop Maintenance Do’s and Don’ts
- Do- Clean spills posthaste: Even with a proper sealant, Marble is very sensitive to acidic products and will absorb them rapidly. To avoid etching, clean any type of spill, oil or liquid, as soon as possible. The longer you wait, the deeper the solution can sink in.
- Do not – Use the wrong type of cleaner: Because of marble’s reaction to acidic compounds, use mild or neutral pH detergent or stone soap when cleaning the countertops. The vast majority of common household, name-brand cleaners are too harsh on marble and will damage it in the long run. Avoid using abrasive cleaners such as alkaline cleaners, acidic cleaners (lemon juice, vinegar), ammonia or bleach. Consistent use of cleaning solutions will dull the marble’s luster so it is wise to use hot water when cleaning regularly and be sure to buff dry with a soft cotton cloth or chamois. You likely paid a hefty price for the marble, do not scrimp by using a cheap or universal cleaner. In the long run the price you will play on maintenance, repairs or restoration is not worth the couple of dollars saved.
- Do- Take preventative measures to avoid spills: Put glasses on coasters, and coasters on table settings or napkins. The vast majority of drinks we consume are acidic in nature, juice, soda, and alcohol; all of these can harm marble or cause it to etch.
Work on cutting boards. They protect marble from scratching and marring and prevent any acidic juices from the food that could lead to etching.
Place silverware and other kitchen items on placemats to also avoid scraping.
Heats absorbing pads or trivets are recommended for hot dishes. Placing them directly on the countertop could damage the marble.
For marble floor tiles, rugs or doormats placed at entryways can help prevent, dirt, mud, sand or grit from accumulating.
- Do not- Treat your countertops like you would other surfaces: Marble is not durable. It is soft so you should never use it as a workbench, tools can scratch or gouge the marble and pressure can cause it to break. Do not stand or sit on marble countertops, they are not flexible and generally do not have plywood backing beneath. As a result, too much pressure or weight can lead to cracks.
If you treat your marble with the respect it needs and deserves, you can extend the life and quality of your countertops for years. Simple maintenance tasks and preventative measures such as sealing can make or break the longevity of your marble and save you money in the long run.
Latest Posts
The Kitchen And Bathroom Countertop Showdown: Quartz, Quartzite, Porcelain, Or Granite?
Kitchen Zones: How To Design A Kitchen Around The Way You Actually Cook
How to Make a Small Kitchen Feel Twice as Large
Get your in-home free estimate today!

Did you know that it’s illegal to hire an unlicensed contractor in the state of California? It’s true! And yet it happens all the time.
California’s “underground economy” is booming, and lawmakers have taken notice. In response, they have put legislation in place to protect both state homeowners as well as licensed construction and trade workers.
In this post, we’ll dive into the laws that exist to help protect homeowners against unlicensed contractors in California, as well as covering the potential penalties that contractors face for operating in the state without a license.
Is Hiring an Unlicensed Contractor In California Illegal?
The homeowner assumes many risks when they hire an unlicensed contractor, but the contractors themselves are sharing some of the burden. This is because it is technically illegal to hire an unlicensed contractor in California.
Many contracting jobs in the state of California will require the contract to have a currently valid license given through the Contractors State Licensing Board (CSLB). More specifically, all contracting jobs that cost $500 or more in labor and materials require that the contractor has a license. The contractor must provide their license number on any construction contract.
Homeowners continue to hire unlicensed contractors in California because they are either unaware of the risks involved, or are willing to take the risks to get a lower rate. Unlicensed contractors are often able to charge much less than their licensed counterparts because they don’t have many of the overhead fees that come along with working as a licensed contractor.
Hiring a licensed contractor does not necessarily guarantee that the work will be better than an unlicensed contractor, but having a license will protect you against problems that might come up, leaving you, the homeowner, liable for some major financial risks when hiring an unlicensed contractor.
However, despite the risks, that low rate keeps unlicensed contractors working in California.
What are the Advantages of Hiring an Unlicensed Contractor?
Well, there is really only one advantage to hiring an unlicensed contractor, and that is the price. Hiring an unlicensed contractor in California is typically much cheaper because they don’t have to pay many of the fees that go along with doing a job up to code, with a license.
Getting a contracting license in the first place is expensive for these trade workers, who then have to pay annual fees to keep their license active. They then need to acquire the necessary permits for certain jobs and make sure their work is up to code. They also need liability and workers compensation insurance to protect themselves and their employees.
Unlicensed contractors don’t have any of these financial burdens. They are uninsured, are not able to require permits, and may not even do the work to code specifications. More risk is involved, but there is much less overhead they need to pay, which enable them to charge a much lower rate.
An unlicensed contractor may be someone you found online, but is often a referral through a friend, family member, or neighbor. Someone “knows a guy” who can do the work for you for much cheaper, and the desire to help a friend while also getting a lower rate often leads to the unlicensed contractor being hired.
Maintaining, updating, and repairing a home is expensive enough, so it makes sense to want to find the lowest price to get the job done. However, when you consider the financial risks you are taking by using an unlicensed contractor vs. a licensed contractor who has no workers compensation or liability coverage, you may find that if something goes wrong, it isn’t cheaper at all in the long run.
Protecting Homeowners: The California Contractors’ State License Law
The California Contractors’ State License Law (“License Law”) was created to protect homeowners and the general public from incompetence and dishonesty by those who provide construction services in the state. According to the Law, all contractors who do business in California must possess a valid contractor’s license unless that are able to meet a few narrow statutory exceptions.
There are more than 40 types of licenses that are recognized under this law. These licenses primarily cover electrical, roofing, and plumbing contractors. Any contractor working on these types of projects must have the appropriate license in order to legally complete the work. The licenses are specific to certain types of work, so one license cannot be used for another activity that requires a different license.
Within the law, a “contractor” is a broadly defined entity, more determined by the conduct, activity, and work that the person offers to undertake. To find out if a contractor is licensed to take on your renovation project, you can file a simple inquiry with the Contractors State License Board to confirm whether or not they are appropriately licensed.
Which Contractors Must Be Licensed Under The California Contractors’ State License Law?
The “License Law” also applies to the provision of so-called “home improvement goods,” which are goods that are used in a construction project and affixed to the real property in a way that they become a permanent part of the home. Some examples of these goods include carpeting, fencing, heating and air conditioning equipment, and more. Even certain pest exterminations fit under this provision.
The License Law also applies to workers such as gardeners or tree trimmers, interior decorators, painters, and sprinkler system installers. This shows that the Law is not limited to the structure of the home itself, extending out to the driveway, yard, pool, hot tub, porch, garage, gazebo, or anything else adjacent to the home that is part of a homeowner’s property.
What Workers or Situations Do Not Need to Be Licensed?
However, the Law does not apply to any construction, alteration, improvements, or repair made to personal property. For example, this would include the repair of your TV or computer. Any contractor who does this work for you does not need a license.
The Law also does not apply to the sale or installation of any items that are already finished products, materials, or merchandise that will not become a fixed part of the home. Therefore, a supplier who delivers finished cabinets to your home but does not perform the installation is not required to have a license. Likewise, anyone who sells a patented prefabricated kitchen to you does not need a license either.
Finally, those who perform cleaning work, such as house cleaners or chimney sweepers, also do not need to be licensed.
What is the Penalty for Contractors Who Are Caught Operating Without a License?
Every year, hundreds of workers are arrested for contracting without a license in California. This is a criminal charge that can even come with a potential jail sentence.
The License Law states that no person in the State of California may perform any construction services billed over $500. This applies to smaller handyman fix-it services all the way up to building a house. The Law penalizes those who are caught operating without a license as well as those who are licensed for one classification, but bid on or work on a job in another classification in which they do not have a license. (For example, an electrician working on a roofing job.)
Getting caught contracting without a state license is typically a misdemeanor that comes with a maximum sentence of six months in jail and/or a $500 fine. A conviction may also carry with it some administrative fines of up to $15,000. Repeat offenders are subject to a mandatory 90-day jail sentence plus steep fines.
The offense for operating a license can become a felony if the offender uses someone else’s contractor license when they bid for a job or attempt to falsely represent in any other way that they have a contractor license. The offender could even be charged with identity theft if they are using someone’s contractor license number without the actual contractor’s knowledge. This conviction could lead to a lengthy stay in state prison.
There are also very serious charges for those who take advantage of the elderly. If the customer is over 65 years of age and the prosecution finds that the unlicensed contractor took advantage of them financially, then the offender could be facing more jail time and stiffer fines.
How Are Unlicensed Contractors Caught?
California state authorities will often conduct sting operations to catch unlicensed contractors. A typical sting will involve soliciting bids for construction or handyman work and then arresting everyone who is unlicensed and puts in a bid over $500. In the sting, this will be every unlicensed bid they receive, as the nature of the work will purposely call for a high price.
Authorities may also scan through online ads on sites like Craigslist and look for people advertising their services as handymen, plumbers, painters, etc. The authorities will then call the creators of the ads and get a bid for work that they know will be over $500. On top of the charge for operating without a license, these offenders may be on the hook for illegal advertising charges if their ad did not explicitly state that they are unlicensed.
The illegal advertising charge is an additional misdemeanor and applies to any job, even if it is under $500, as state law requires that any unlicensed person who advertises for a service that requires a contractor license must state that they are unlicensed. Unlicensed contractors are allowed to perform jobs under $500, but must state in their advertising that they are unlicensed.
The specific codes for these infractions are as follows:
Business and Professions Code section 7028 – contracting without a license. Penalty is up to six months in jail and/or a fine up to $5,000.
Business and Professions Code section 7027.1 – illegal advertising. Penalty of a fine from $700 to $1,000.
If this all wasn’t cause for alarm enough to any contractor operating without a license, perhaps the next bit of law will be…
Unlicensed Contractors Have No Legal Recourse To Enforce Work Contracts
A big part of this growing issue with unlicensed contractors is that many unlicensed contractors are unaware that operating without a license in California is a misdemeanor. However, those who do may be shocked to learn that they cannot legally recover any damages that they may have incurred as part of a contract for work that requires a license.
In layman’s terms, this means that a homeowner is under no legal obligation to pay an unlicensed contractor. The homeowner can even sue the unlicensed contractor for all payments made, and the unlicensed contractor will have no legal recourse. So no contract between an unlicensed contractor and a homeowner is legally enforceable from the contractor’s perspective, however, the customer still has the right to sue for any and all payments made even if the work was performed in accordance with the contract.
This might seem a bit messed up, but it shows how serious California is about having contractors operate with a license and not operate in the “underground economy.”
Not only is operating as an unlicensed contractor illegal for any project over $500, but the contractor can do all of the work, and then the customer can refuse payment, and there is nothing the unlicensed contractor can do about it.
Latest Posts
The Kitchen And Bathroom Countertop Showdown: Quartz, Quartzite, Porcelain, Or Granite?
Kitchen Zones: How To Design A Kitchen Around The Way You Actually Cook
How to Make a Small Kitchen Feel Twice as Large
Get your in-home free estimate today!

A guest house, regularly referred to as an ADU (accessory dwelling unit), is a secondary housing unit on a single-family residential lot. Generally, a guest house is completely detached from the main house, although that is not always the case. In the last decade, building guest houses or granny flats on a property has become a more common trend in the country. What with seemingly ever-rising housing and rental rates, many have found it convenient to create a space on their property for their elderly parents, children out of college, visiting friends, or as a rental unit.
In January of 2016, California enacted granny flat laws that were intended to make it simpler and more cost effective to build a guest house on their land or to convert an illegal additional dwelling unit into a one that is now legal. The three bills were:
- Senate Bill 1069 which decreases or eliminates parking requirements and utility hook-up fees, and quickens the approval process for second units attached to a primary residence.
- Assembly Bill 2299 requires local second-unit ordinances to include ministerial, non-discretionary approval for any second unit that meets city requirements.
- Assembly Bill 2406 streamlines the process for homeowners converting an existing bedroom into an attached studio living unit.
Homeowners will still need to hire a contractor and obey local building codes, but these new regulations make it better for those who wish to build a guest house no bigger than 1,200 square feet. Although building a new detached guest house can be quite an expensive undertaking, there also may be opportunities to save money by converting a pre-existing structure into a legal permitted guesthouse at a much lower cost than an entirely new dwelling. Regardless, if you are looking to add a guest house to your backyard, you should know the types of ADU’s, the guest house costs to build, and the benefits of building a guest house.
Types of Guest Houses
If you are wondering how much it costs to build a guest house, much of that will have to do with the structure you chose. Although one might typically think of a guest house as an entirely separate unit, there are a variety of additional dwelling unit designs and concepts, depending on your property, budget, and existing home. It is important to note that the secondary housing unit is what really defines a guest house, at least more so than its specific structure. That said, some features that help define guesthouses are:
- Guest houses are add-ons and or adjacent to the central housing unit.
- Guest houses are considerably smaller in size than the average home in the states. As mentioned, in California they may be no bigger than 1200 square feet.
- Guest houses are generally developed at a later point than the original construction of the primary residence
Types of guesthouses include:
- Detached new construction guest houses – Often referred to as granny flats, casitas, backyard cottages or laneway houses. Detached guest houses are the most common type of ADU. They are stand-alone structures that, as their name implies, are entirely apart from the primary residence. They can be constructed over an existing building, like a detached garage, or built separately. The cost of building a granny flat or guest house is typically more expensive than other builds since you are going from scratch and not utilizing any pre-existing structures.
- Garage conversion guest houses – Some homeowners decide that they do not utilize their garage space enough, or just fill it with junk. In such cases, the garage area may be remodeled into a new attached guesthouse.
- Above garage or workshop guest houses – Sometimes referred to as carriage houses or garage apartments, these guesthouses are commonly built above a detached garage although in some cases it may be attached to the primary residence.
- Bump out guest houses – Some homeowners find it more convenient to add additional space to their already existing home. This add-on or bump-out will often still have its own private entryway and kitchen or kitchenette.
- Modular guest houses – With modular guest homes, the vast majority of the construction occurs in a factory, and only the finishing work and foundation work is done on site. These types of guest houses are popular since they are far less expensive and take less time to install. Typically, the average modular guest house that is approximately 1,200 square feet would cost $65,000 to build and install.
What Size Guest House Should You Build?
When estimating the likely average cost of your guest house, it is important to remember that they are more expensive per square foot than building a primary residence. This is because a much more significant percentage of the house’s blueprint is meant for features that cost more, like a kitchen or a bathroom. One also has to figure in the average cost of permits, fees, utility hookup, hardscaping, and landscaping. In California, where building is expensive, the cost of a guest house build can be anywhere from $200 to $500 per square foot in addition to all those fees mentioned above. Therefore, a 1,200 square foot guest house that costs $200 per square foot would end up being north of a quarter million dollars. Even if this is within your budget range, you also need to consider that a 1,200 square foot guest house may be too large for your property and might dominate the extra space. If you do not have a big backyard, you have to weigh how much of that space you are willing to sacrifice for this new guesthouse.
Before you ever break ground, you should have a good idea of what the purpose of the guest house is for, and who is planning on using it. If it is for older in-laws, you may need features that accommodate elderly with disabilities such as ramps, wide doors, or special bathrooms. If it is a rental, it should have all the features and amenities of a house, but just on a smaller scale. If it is for personal use and occasionally for guests, then that guesthouse likely does not need its own kitchen. By having a solid grasp of your intentions behind building the guest house, it is easier to decide what features you want to be installed and how large you want to make it.
The Benefits of Building a Guest House
When weighing the potential costs of building a guest house, it is crucial to keep in mind the potential benefits that might outweigh the costs of construction. They include:
- Additional space – The most obvious benefit of adding a guest house is the fact that you have extra space for either family members, in-laws, guests, renters, or yourself. For those who will only occasionally use it for housing, a guest house is a perfect space to utilize as an office, music studio, or an adult clubhouse.
- Additional income – If you decide to use this space as a rental, a guest house can generate extra income for your household. The great thing about the guest house is that most of the cost is upfront. Once it is built, the additional $10,000-$30,000 of annual rent money comes to you without much effort or cost at all. This piece of space that was previously just sitting there can now be used to help you increase your wealth.
- Hardscaping and landscaping upgrades – Often times, it takes a large project such as constructing a guesthouse to get around to addressing your out-of-date hardscape or landscape. Maybe you want to remove your lawn because of the cost of upkeep, or you want to fix your driveway that is cracked. A guest house gives you the opportunity to make alterations to the exterior of your property that you otherwise would not address.
- Future non-rental use – There may reach a point when you no longer need all the space of your current residence. The kids are grown up and out of the house, so now you are not utilizing your home as it is meant to be used. A future option might be to use the guest house as a retirement spot, while you rent out the primary residence to a family that can use the space. You still get to remain on your property but make even more money than you would by renting the guest house.
- An introduction to being a landlord – For those who are interested in possibly investing in real estate, a guest house provides a much lower cost opportunity to see if you have the disposition to be a landlord.
- Increases the value of your property – Like a new paint job or a remodel, a guest house home improvement project naturally increases the value of your home. Although it does not count towards the total square footage of the primary residence, a guest house is a great incentive for someone looking to rent or to have a separate space for adult children or in-laws.
- Comfortability – When hosting visitors, a guest house gives them a space that is private and allows them to feel more like they are at home. While it is lovely to have friends and family, especially for any time longer than a few days, you want your space and privacy, and they likely desire their own privacy as well. A guest house allows you to host without feeling overwhelmed or crowded in your home.
- Privacy – Guest houses can be fantastic spaces for your kids to play or spend time in when you feel like you need time alone. It also offers a safe haven, if you need some time to yourself and want to get out of your house.
What you need to know before building your Guesthouse
Before you break ground, consider the following questions to save you from paying more in the future for changes, remodels, or fixes.
- Would I live in it? This is the very first question you should ask yourself when designing your guest house. It should be an extension of your house’s feel and design, even if it is not physically attached to the house. You should build a guest house that you would want to stay in and make it a space that you would like to utilize.
- How is the lighting? It is all too easy to forget about the lighting of a space, until it is too late, but it is such an essential factor to consider. If your main house is on a different part of your land, it may receive more or less natural light. If it has less, you may need larger windows, skylights, or additional lighting to prevent the guest house from feeling like a dungeon.
- Is the floorplan intuitive? Even though the space is tiny, there should be a natural flow and logic to the design of a guesthouse. If there is a kitchen area, it should be easily accessible and have plenty of room to navigate as well as ventilation or windows nearby for smoke or the inevitable smells of cooking. Because a guest house’s space is so tiny, there must be storage spaces in creative or unique places.
- Have you handled all the necessary paperwork? – A mistake that property owners all too often make is to begin planning the guesthouse with an architect without first meeting with a real estate attorney and getting approval from either the city planner or the homeowner’s association. If you act without making sure all your permits and paperwork is accepted, you may have to destroy any work that is done prior to approval. As you might imagine, acting before you have the green light could exponentially increase the costs of building your guest house.
Conclusion
Building a guest house can be an expensive undertaking, but one that is well worth it in the long run. Such an investment can provide you with extra space, a source of income, and increase the value of your home. Be sure to plan thoroughly and know exactly what you want so that the cost of building a guest house, tiny home, in-law suite, or backyard cottage fits your budget.
Latest Posts
The Kitchen And Bathroom Countertop Showdown: Quartz, Quartzite, Porcelain, Or Granite?
Kitchen Zones: How To Design A Kitchen Around The Way You Actually Cook
How to Make a Small Kitchen Feel Twice as Large
Get your in-home free estimate today!
When it comes to home improvement projects, you may be interested in the “DIY” route and make the repairs yourself, but what if you don’t have the appropriate skills or trust yourself enough to learn from a YouTube tutorial? In these cases, you’ll have to hire a contractor.
The first thing you’ll need to do is to conduct research to find a contractor that specializes in your area of need, whether that be a kitchen remodel, bathroom remodel, replacing windows, etc. From there, you’ll look at their portfolio of work, read reviews, and of course, check their pricing.
But there’s one important part of the evaluation process that you might be leaving out — whether or not they have a license. It can be easy to hire an unlicensed contractor by accident, or even purposely because you couldn’t pass up on their (typically much lower) proposed rate, however, this could put you in a dangerous situation. You, the homeowner, can be held liable in certain situations and be on the hook for some potentially expensive damages.
In this post, we’re going to discuss the importance of hiring a licensed contractor vs. an unlicensed contractor and potential risks involved in hiring unlicensed contractors.
Why Would You Hire an Unlicensed Contractor?
It’s expensive to maintain a home, and those needed repairs and updates can really add up over time. That’s why the price will always be one of the main deciding factors when it comes to choosing who will complete the work on your project. Your goal will be to find the best mix of price and proven success rate in your contractor.
The biggest draw for using an unlicensed contractor is the fact that they are usually able to offer a much lower price. Since you may have a tight budget for your home improvement project, this can often be a powerful draw indeed, as an unlicensed contractor will sometimes be able to significantly outbid the competition.
Other times, you may hire an unlicensed contractor not just because they are cheaper, but because they are someone you know, such as a family member, neighbor, or friend. Often, unlicensed contractors gain work through referrals from the same groups of people as well.
However, regardless of how you find an unlicensed contractor or your motivation behind hiring one, you should know that the reason they can quote the work at such a low rate is because of all the corners they have to cut to operate without a license. Like with most things in life: If it seems too good to be true, it probably is.
But the temptation of the potential savings is a common trap that people fall into. The unlicensed contractor offers their much-lower quote while promising to give you the same results as their licensed competition. And then they end up getting hired.
Things may start off smoothly and all of the work appears to be just as you pictured. But then something goes wrong. Then something else happens.
This is where using an unlicensed contractor may come back to bite you in the end — because if and when things do go wrong, you could be held liable in certain situations. This will end up costing you much more in the long run, eliminating those savings you were hoping to gain by going with the unlicensed contractor. And it’s because those corners unlicensed contractors cut are actually important in the construction process, no matter what they might try to tell you.
How Can Unlicensed Contractors Offer Lower Prices?
There are a few different reasons as to why unlicensed contractors are able to outbid licensed contractors.
The first is that it is actually a rather expensive investment for a contractor to get their license to operate. Once they go through the initial licensing procedure, they will also have to maintain their license and pay annual fees to their licensing board throughout the year. This, of course, cuts greatly into their profit margin.
Since unlicensed contractors do not have to pay these fees, they are able to offer you a lower bid, as they do not have to factor in these overhead costs. Unlicensed contractors also will not obtain a bond that protects their work, which we will get further into later on.
Finally, and perhaps most importantly, unlicensed contractors will not have liability insurance or worker’s compensation. These are additional overhead costs that a contractor without a license will not be able to attain, so they simply move forward and do the work without these measures of coverage. However, if your contractor does not have liability insurance or workers’ compensation, the liability to fix any shoddy workmanship, or for any incidents on the job will fall on you, the property owner.
This is one of the biggest risks you will take on should you choose to hire an unlicensed contractor.
Risks of Hiring Unlicensed Contractors
There are several risks involved when using unlicensed contractors, starting with the fact that working on large projects without a license is illegal in many states, including California. However, for the property owner, the financial liability risks are of much greater concern, as they could be incredibly costly.
This is especially true if a worker is injured on the job and your unlicensed contractor is without workers compensation.
Homeowners Can Be Held Liable for Injuries Sustained on the Job
The biggest risk involved in hiring unlicensed contractors comes down to liability.
When you hire an unlicensed contractor, they actually are not a contractor at all — they are your employee. Therefore, it is actually your responsibility to provide them with a safe workplace and cover them should they be injured.
An unlicensed contractor can sue you for damage if they sustain an injury while working on your project and you could be on the hook for expensive medical bills, legal fees, and also have to pay for their lost wages for as long as their injury holds them out of work. These financial damages can amount to thousands of dollars, far more than the initial savings you thought you were getting by using an unlicensed contractor.
When you hire a licensed contractor, they will have workers’ compensation for themselves as well as any employees they hire to assist with the job. If your contractor is unlicensed, he or she and anyone else that is brought on to work on your remodel are all considered to be your employees. This makes them all your responsibility to insure.
It actually doesn’t even matter if you knew that the contractor was licensed or not when you hire them, as many homeowners are in the dark about the consequences of hiring an unlicensed contractor. You, the homeowners, and employer, carry the burden of determining whether a worker is licensed. This means you could be held liable whether you knew they were licensed or not.
Many assume their homeowner’s insurance policy will cover them in an instance where an unlicensed contractor is injured on the job, however, this usually isn’t the case. Your homeowner’s insurance will not cover you in these cases, leaving you vulnerable to have to pay out of pocket. However, if you have a licensed contractor and one of their subcontractors are injured on the job, you will be protected by the contractor’s worker’s compensation insurance should that worker try to sue for damages.
The best thing to do to protect yourself against this potentially financially crippling situation is to hire a contractor who holds the appropriate license to do the work you need to be performed. This way you will not unwittingly become an employer and the target of a costly personal injury lawsuit.
Homeowners May Have to Pay for Additional Repairs
Beyond assuming the responsibility for injured workers, you also need to be wary of shoddy workmanship.
While there is no guarantee that a licensed contractor’s work will be any better than that of an unlicensed contractor, their work will at least be protected by liability insurance and legally enforceable contracts called bonds.
A bond will protect the homeowner should there be any damages caused to your home during the remodel, Contractor license bonds will state that your contractor will work within certain regulations and protect you against the risk of financial loss.
The bond and the licensed contractor’s liability insurance both exist to cover you in the instance that the work done is unsatisfactory. You can have language that requires the contractor to fix any mistakes in construction, or at the very least get financially reimbursed so you don’t have to pay someone else to come and handle repairs.
However, an unlicensed contractor is bound by no such agreement. If their work is unsatisfactory, they are bound by nothing to fix their mistakes, and you may have to pay someone else to come and make the necessary repairs. These repairs may be more expensive than hiring the licensed contractor in the first place.
Using Unlicensed Contractors Could Hurt Your Property Value
You read that correctly — using an unlicensed contractor can actually hurt your home’s property value. How?
Well, remember how the unlicensed contractor has to cut corners in order to complete your project? This includes acquiring the proper building permit for the job.
Certain home renovation projects require a building permit from the city, county, or state. Licensed contractors will always attain them, however, unlicensed contractors cannot, and so they skip this step and do not apply for them. Since the proper permits were not acquired, it can impact your overall property value.
This can become an issue when you decide to sell your home, as you will be required to disclose certain information to your buyers. Failing to disclose this information could actually come back on you and become your liability later on, so making sure you have the right permits, and that work is done up to code, will be of vital importance for any home improvement project.
You Could Even Be Held Liable for Damage to Third Parties
Not only do you need to worry about the safety of your unlicensed contractors and subcontractors, but also that of a third party. This can be a neighbor or anyone who happens to pass by your work site. Should they sustain an injury due to a sloppy work site or falling debris, this is another area for which you could be held liable.
Your unlicensed contractor’s negligence is your responsibility as well, and as their employer, you are responsible for their actions during their tenure as your employee(s). If you don’t see yourself cleaning up your contractor’s worksite so you won’t get sued by a neighbor after their child steps on a nail, you may want to protect yourself and hire a licensed contractor.
Conclusion – Hire a Licensed Contractor
To avoid being held liable for the hefty costs of medical bills and lost wages as a result of an injury sustained working on your home renovation, avoid hiring an unlicensed contractor. They’ll surely tell you that the risk of something going wrong is very low, but should something bad happen or if they do shoddy work, paying for these damages will be well beyond the potential savings of hiring them in the first place.
Always hire a licensed contractor who has workers compensation and liability insurance. The licensed contractor will acquire any necessary permits and will always make sure that their work is up to code. This is the best way to ensure that your project is done correctly and that you will not be held responsible should anything go wrong.
Latest Posts
The Kitchen And Bathroom Countertop Showdown: Quartz, Quartzite, Porcelain, Or Granite?
Kitchen Zones: How To Design A Kitchen Around The Way You Actually Cook
How to Make a Small Kitchen Feel Twice as Large
Get your in-home free estimate today!

At first thought, the guest house serves one purpose; to comfortably and efficiently house any guests visiting the property. Often adjacent to the main property, the guest house is a structure built specifically to feel just-isolated-enough that the guest(s) is part of the home but disconnected in a way that they’ll experience ample privacy. Typically, a guest house will have, if not most, all the functionality of an actual home; running water, electricity, bathroom, living room, bedroom, and a kitchen. An accessory could be a washer and dryer machine, although many guest houses include these as well.
Yet, beyond being a structure designed for visitors, guest houses or granny flats are the perfect home improvements that add major value. For one, if designed correctly (we’ll go into this), a guest house can add value to your home. It should be commonsensical that the same sized home with a guest house would be more valuable than one without. Still, homeowners don’t tend to regard guest houses in this light, as it can be hard to view them as an investment on the property in its entirety.
Further, a guest house can optimize the aesthetic of a property by filling space otherwise empty, complimenting the original architecture, and creating more room for the everyday needs of the homeowner. If you’re currently on this page because you’re considering building a guest house, then rest assured that you are in good hands. As with any home design, building a guest house takes careful consideration, a thorough understanding of the proper guest house layout design, and patience.
Simplicity & Minimalism
Before we continue, it is paramount that we speak on simplicity and minimalism. When it comes to guest house plan designs, the rule of thumb is that—despite the bells and whistles or scope of the design—it is best to keep the layout simple and minimal. This is a structure that will serve as a temporary home, like a hotel, for your guests.
The space should be open, full of light, and unspecific. You want the house to have just enough style where a guest would be comfortable hosting their own visitors but not so much that they feel out of place. Every room should be easily accessible, with the least amount of clutter possible (you want your guests to envision themselves in the space rather than staying in someone else’s). The kitchen should be open and functional, the bathroom separate enough from the rooms, and the front door positioned to retain privacy but allot accessibility.
We’re not trying to go into specifics just yet but remember, as you begin to think through your guest house building plans, simplicity should be at the heart of every decision made.
Things to Consider
Before deciding on a guest house layout, it’s important to answer a host of questions that could dictate the way in which you decide to construct the property. These questions will help shape your idea of the home both creatively and functionally.
Location
First and foremost, you’re going to want to place your guest house somewhere that offers privacy without sacrificing accessibility. This may take hiring a surveyor or seeking professional advice from a home designer. The point here is to position the property in a way that it still feels ‘part’ of the main house, yet secluded enough that a guest can comfortably live in their own world.
Dependent on the most optimal location on your property, this can dramatically affect the layout of your guest house. Say, for instance, the most optimal location happens to be the area with the least space, then that one story guest house layout may just add a second tier.
How Can it Help the Property?
A common mistake with guest houses is building it specifically for visitors. Sure, the guest house—by its very name—is a part of the property meant for your guests. As we stated before, however, it can become an incredibly valuable asset to your original property, further increasing the value. More livable space is important. It’s also coveted.
Furthermore, how can this structure assist your needs as a homeowner during downtime? We mean to say, when there’s no one staying in it, what’s it doing for you? Plenty of homeowners will decide to add storage space to their guest house, space not meant for the visitors themselves, and they’ll utilize the new addition by filling it with stuff that clutters their own home.
They can also be a fantastic tool for renovation. What happens when a house is renovated? The tenants or homeowners must leave the property and stay elsewhere. With a guest house, say goodbye to squatting at the parent’s or paying for a hotel, as the home can be used a temporary stay while the main house is renovated.
These are only a couple facets of a guest house’s attributes (additional rental income, anyone?) but are worth considering before tackling design. The best guest house will complement both the homeowner and the visitor.
The Guest House needs to be Autonomous
The place in which you’ve chosen to build your guest house, has there been anything built there previously? Is there piping (both gas and water)? How hard will it be to run electricity to the property? Depending on the budget you have for your guest house, choosing the most optimal area to build the property atop is also advised.
Given it is not in a location that renders the functionality and accessibility of the property inefficient, then why build over a piece of land where conduits will need to be dug, landscaping will eat through your wallet, and all new piping will have to be run? This, of course, is dependent on the budget you have set for your guest house but thinking through options that will dramatically cut costs can greatly affect the layout of your new tiny house.
Floor Plan for a Guest House
When it comes to addressing the ‘best’ floor plan for a guest house, we won’t be able to advise you accurately. This, of course, is due to the nature of home design and how it’s always specific to the homeowner and property. A two-story guest house may be perfect for a certain property but not for another. It also may fit well within one budget while destroying another.
Thus, the best floor plan for a guest house is entirely dependent on your overall objective, the size of your space, and the amount of money you have to put towards the casita addition. With that being said, there are generalities when it comes to floor plans that can be addressed and they’ll help shape your perspective and possibly inspire your own ideas!
The Generic Guest House
The generic guest house is best thought of as a one bedroom apartment. Typically, the square footage will range anywhere from 450-1000 sqft. The front door will connect directly to the living room, which will then open up to allow access to two other rooms; the bathroom and bedroom. Typically, kitchens are attached to the living room itself or tucked away in a corner, sometimes even having their own room.
Thus you have three rooms in total:
- Living room
- Bedroom
- Kitchen
This guest house functions exactly like a ‘mini’ property or tiny house, providing perfectly livable conditions in a consolidated space. For inspiration, one must simply research single bedroom apartments or homes to identify a given layout they desire. This leads us to our next guest house design.
The Single Bedroom Loft
When building small homes, the priority is always to utilize the limited space available. A home designer or architect will ask: how can I make this feel open, utilizing every square foot possible? A fantastic way to open space for the interior amenities is to build a loft. This will isolate the bedroom to an upstairs location, providing more room for the floor below.
This is also a great option if the space you’ve chosen does not have the room to include everything you want in only one story. By building vertically—with the decision to do so made before the structure is built—you can vastly change the amount of livable space there is in your small house.
Again, simplicity is key here. The loft need be nothing scant more than a place to sleep, or it can be fleshed out like an actual bedroom. The choice is yours dependent on your specific situation, but by all accounts, a loft (or simply adding a second story) can greatly optimize the design of a guest house. Sometimes, it is the only option that will fulfill a homeowner’s given needs.
Note:
An important note when it comes to the loft or second story is that, if the people visiting are elderly, it may be difficult for them to use the space. Being that these structures are usually smaller, a spiral staircase (or a ladder—even though these are the least stable) are most often chosen to bridge the gap between levels. Adding an actual staircase in a one bedroom eats up a significant amount of space and isn’t always preferred. By cutting this corner you could limit the type of person that’s going to be able to enjoy the home, or part of your renter’s demographic.
Renting Out Your Guest House
The guest house we’re detailing above is the full package. It’s built so that any of your visitors can experience a livable property with all the amenities offered by the main house (just in a consolidated manner). This means that, if you were to choose to rent out your guest house, which is a decision that could prove to be quite lucrative, then you’ve built a property which supports that pursuit.
However, by no means does a guest house have to include the every facet of the ‘full’ design. A guest house can complement your original property and provide the ideal sleeping situation for your visitors, but require them to use the main property for anything additional.
This could take the form of a one bedroom with no kitchen. Or a one bedroom with no washer and dryer. Even a one bedroom with no bathroom, although this is rarer. Our point here is that the guest house does not need to have the full range of amenities and can be nothing more than comfortable living quarters—like a basic hotel room—for anyone that visits the property.
The Micro Guest House
A new trend, one both innovative and DIY-focused, is the addition of a micro guest house. By the name you could guess that this type of structure is smaller than even your ‘generic’ guest house. These properties usually range from 80-400 sqft and are often products of a homeowner’s innovation. From building a small cottage, renovating a little trailer, insulating a shed, to just about any structure that could be lived-in, the micro guest house says: we’ll give you a place to sleep that feels private and disconnected from the property.
Rarely does a micro guest house provide more than a bedroom and electricity. Still, they’re a creative and fun (often DIY) way of providing a bit of privacy for your guests without having to actually erect an entirely separate home. If you’ve been thinking of making a conversion, know that you’re not alone, and a bit of research will shine a light on all the innovation being executed in the micro guest house space!
Conclusion
Guest houses are an accessory to a property that could be deemed a necessity. From providing a quiet and personal space for guests, opening up livable room for the property as a whole, increasing property value, and allotting a space disconnected from the house that can be rented, they’re by and large a fantastic addition to any home.
Choosing the best layout for a guest house is a decision that will be specific to your wants, needs, space, and budget. However, in this guide we hope to have pointed you in the right direction or at least sparked some ideas. As with most home design, the do-it-yourself model can be viable, but if you’re not a professional it’s best to consult one for their opinion and expertise. At the end of the day, you want to choose the best layout that complements both you and your guests!
Latest Posts
The Kitchen And Bathroom Countertop Showdown: Quartz, Quartzite, Porcelain, Or Granite?
Kitchen Zones: How To Design A Kitchen Around The Way You Actually Cook
How to Make a Small Kitchen Feel Twice as Large
Get your in-home free estimate today!

A current trend in home design spurs from the interest in tiny house living. What we’re talking about here is the granny flat, which, by the name, you could assume would mean a space fit to house the elderly. The name ‘granny flat’ derives from the fact that these flats, often connected or near to the main house, are built for the grandparents to move into.
By and large, these structures are self-sustainable, small, and a perfect home to a couple’s aging parents. You could best think of them as a detached or attached unit that is built upon the grounds of the property. In other words, a guest house or casita addition aimed specifically towards complete sustainability. They will have all the proper amenities of a larger home consolidated into a smaller space.
The real estate industry calls them ADUs (accessory dwelling units), which then adopts terminology like casitas, in-law units, in-law apartments, father-in-law apartments, carriage units, accessory homes, and more. Being that in today’s’ age multigenerational housing is quite accepted, a granny flat is regarded as a home improvement project that raises the total value of the property.
Our point: the granny flat is a popular addition to the main house.
Three Types of The Granny Flat
In-Home Granny Flat
One of the most sought-after types of granny flats is the in-home version. Reason being—although the governing laws for construction vary dependent on the property and location—this type of granny flat is the least costly, easiest to build, and least restricted. Think of it as a separation within an existing primary residence, with the main difference being that typically a granny flat begets a new entrance (the point is for those living in the space to remain with autonomy).
Once this separation is made, new amenities are often added to the granny flat, allowing for the area to operate as its ‘own house.’ Structurally, this also makes it easier for the property owners to check on their parents or anyone living in the house, although it’s not usually used as a rental space, being that the degree of separation is dismal.
Home-Extension Granny Flat
This type of granny flat falls along the lines of a renovated home—with the aim of extending the property. The restrictions that tack along with this type are dependent on the space of the property and the city in which it resides. However, it is what you would consider a renovation, with a new granny flat being added to an existing home.
Typically, this means another room, living room, bathroom, and kitchen, with a separate entry door. Again, this type of granny flat does not have the degree of separation most property owners would like between them and renters, so it’s usually built for the in-laws, as a guest home, or for another live-in family member. Due to the nature of renovation, it is costlier than the in-home granny flat.
Detached Granny Flat
A detached granny flat is exactly as it sounds; detached from the original home. This can accrue more costs as conduits must be dug and piping run to the area (if they are not preexisting) and typically, city ordinances will limit the types of building possible. Still, they are sought after because not only do they provide a sustainable living situation for the grandparents, but the degree of separation provides full autonomy.
What Are the Benefits of a Granny Flat?
To speak on AUDs as a whole, the benefits are somewhat endless. At the very least they’re more space and at the very most they’re a home for your aging parents or a lucrative source of rental income. They haven’t quite taken off in the US due to zoning laws that vary depending on the location. However, with their growing popularity, the states are seeing a rise in this type of housing and are witnessing community leaders rally to question zoning laws that prohibit them.
Outside of personal benefits, they’re great for communities. Being that they’re smaller buildings, they require fewer resources than the primary residence or apartments or apartment complexes. They provide those not wealthy enough to rent a ‘full’ home the ability to have their own independent property, and because they’re often placed in walkable or bikeable locations, the tenants tend to drive less, further having less of an impact on the environment.
By most accounts, the granny flat is a fantastic accessory to a home and a great trend in modern real estate. Within the new few years, expect a massive rise in this type of housing. California is the current leader in reducing statewide regulations to allow ADUs the flexibility to grow in presence.
How Do I Build a Granny Flat?
Before pouring in a ton of research into building a guest house or an AUD, it is paramount that you identify whether or not your city will give you the permit to build it. If you live in California, you’re going to have a better chance than other states. Still, it’s important that you reach out to a construction company that focuses on building and remodeling, as they will provide all the information required.
How Much Does A Granny Flat Cost?
The cost of a granny flat depends on a host of variables; the type, where you’re building, and the scope of the project. It is impossible to provide a base cost that is ubiquitous across the industry, as different housing markets vary in pricing and projects will be different than others. A detached granny flat will obviously cost more than separating an already-constructed home to serve as ‘two homes.’
With that being said, a recent report published in Portland, Oregon, states that a granny flat costs $75 per square foot. That means that a 1000 square foot dwelling unit (the general size of a two bedroom apartment) will cost around $75k. While that may seem steep to you, building a detached (or extending a home) unit anywhere costs money.
This price can fluctuate drastically but—even if it’s high for your area—at least it’s a median to reference.
An Investment
Spending money on an already-existing home can be scary. Without knowing what the future holds, a renovation that costs tens of thousands of dollars can occur simultaneously to a massive drop in the market, rendering the ‘investment’ to hold no merit as the value of the property plummets. AUDs, fortunately, are different.
Being that they’re an add-on to the home, they create more livable space which will increase the property value despite the market (we mean as a whole, here). Furthermore, they can be used as rental housing which will generate income that will go towards the mortgage or property tax. They add versatility, livability, and another option for guaranteed income (so long as you can find a renter).
When Should I Build a Granny Flat?
Taking the granny flat cost into consideration, the timing in which you should build one depends on your overall goal. Are your or your spouse’s parents in need of assisted living? Or do they simply need to be closer? Are your kids moving out soon and in need of their own living space? Do you plan on using your property as a source of income? If you’re currently purchasing your home to be used as a source of income, could a granny flat increase revenue?
If you answered yes to any of these questions, then it is likely the timing is right (regarding objective). However, the finances might not be in order. In which case, see below:
How Can I Finance my Granny Flat?
The middle-class homeowner doesn’t have an infinite bank account capable of shelling out a hundred thousand dollars for a granny flat. That’s simply not a reality. Still, being that these additions are certainly investments, there exists an array of different financing methods.
A Traditional Loan
Being that the granny flat trend has not ‘taken off’ per se, finding someone that will back the finances may prove difficult. There are development fees mixed into projects like these—set forth by the city—which work to mitigate any new building in certain neighborhoods and communities. With that being said, now that they’re becoming popular, and now that you can make the ‘investment’ argument, it is not out of the realm of possibility that you could land a traditional loan for your new AUD.
This is where research comes into play, as you’ll need to see just how high-interest rates are going to be, and exactly what ‘type’ of project your loaner considers the granny flat to fall under.
Innovative Alternatives
Being that by default, the granny flat is defined as an alternative, there are now alternative methods in funding their development. Take the Palo Alto profit share model, for instance, where a builder helps cover the cost of an AUD in return for a percentage of the rental profit. Research your specific area to see if anyone else is trying to build a granny flat and identify their successes in doing so.
There might be an option limited to your city or county that could prove worthwhile. At the end of the day, the very fact that they’re now considered an investment helps shape the overall perspective of the addition. Again, reach out to construction companies in your area as they can point you in the right direction for financing.
The more this trend evolves, the easier it’s going to be to finance the projects.
Calculating Your Risks
With all the above being said, when it comes to building a granny flat, it’s important to measure your risk versus your reward. Timing is one thing but a cost-benefit analysis can solidify your decision. Are you planning to sell the home soon and want to increase value? Are you parents in a condition where they will need a comfy place to live in the near future?
Both of these motivations stem from two different places; financial gain and love. Still, both attribute to the cost-benefit analysis as a whole. On one hand, if the risk is worth the reward then the cost of the AUD is an investment. On the other, if it is reasonable to spend the money, you’re giving back to your parents and investing in your property.
Of course, calculating the risk is solely dependent on your specific situation. We write this for the purpose of encouraging you to think through every facet of building a granny flat.
The Process
To summarize the entire granny flat process, here’s an overview that could help shape your perspective. You know how much building a granny flat costs—if that’s within reason, see below.
Determine If You Can Build One
Do your research. Determine if your property can be a host to an AUD.
Identify Goals
Is this for financial gain (investment or rental)? Or is this to house loved ones?
Find A Builder
Reach out to someone that focuses on these specific projects. They should provide you with an architect and the know-how to execute.
Financing
If you haven’t secured financing, now is the time to do it. Research alternative methods.
Secure Permits
Your general contractor or construction company should handle this. However, you’ll need to have the proper permits in order to build.
Don’t Neglect the Building Process
Once the AUD is in construction, do not step away. Stay attentive, involved, and on top of it.
Conclusion
The granny flat could very well be the housing trend of the future. Particularly in big cities, where finding an affordable standalone one or two bedroom is nearly impossible. It is an investment in the property as a whole and an asset for your loved ones, particularly those grannies! The cost of a granny flat addition should be anywhere from 40k-150k and if that’s within your budget, then become part of a growing trend here in the US.