
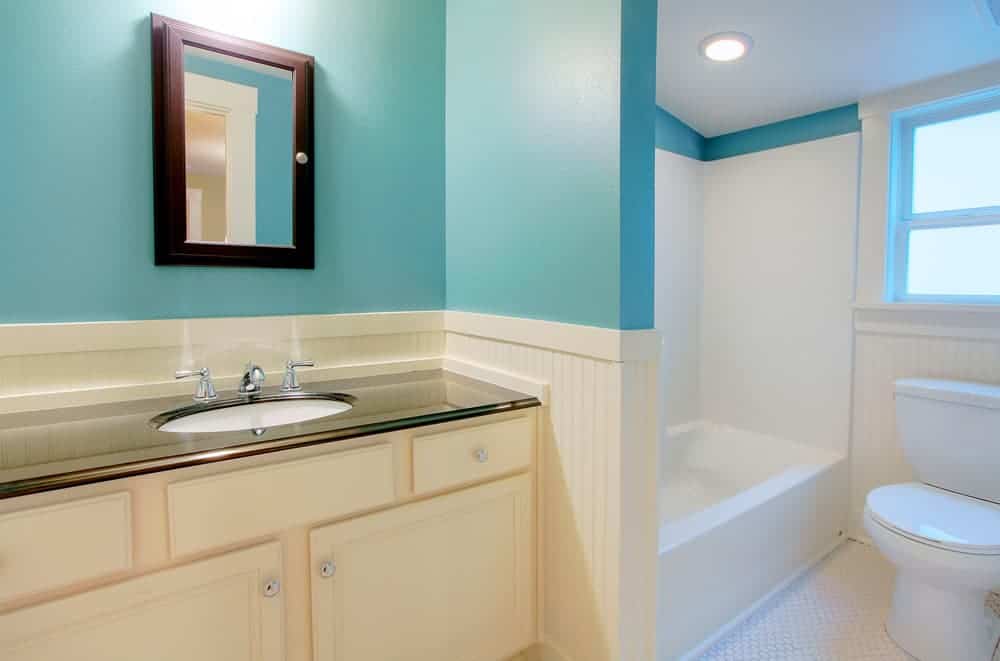
Your bathroom is one of the most-used rooms in your home, but it’s easy to overlook signs that it’s time to call remodelers in Carmel Mountain Ranch. Over time, wear and tear, outdated fixtures, and changing design trends can make a bathroom feel less functional and comfortable. Remodeling your bathroom can enhance its aesthetics, improve functionality, and even increase your home’s value. Whether it’s minor cosmetic updates or a full-scale renovation, knowing when it’s time to remodel can make a big difference in your home’s overall appeal and efficiency.
In this guide, we’ll discuss the key signs that your bathroom may be due for a remodel, including how often bathrooms typically need refreshing and when replacement may be necessary.
How often does a bathroom need to be remodeled?
Bathrooms are high-traffic spaces exposed to moisture and frequent cleaning, meaning they experience a lot of wear and tear over time. On average, experts recommend considering a bathroom remodel every 7 to 10 years. This timeline allows for replacing dated fixtures, improving energy efficiency, and keeping up with design trends.
However, there isn’t a strict schedule; rather, it depends on the condition of your bathroom and your personal needs. If you’re finding it increasingly difficult to keep your bathroom looking fresh, or if it no longer meets your family’s needs, it’s probably time to consider some updates.
When should a bathroom be replaced?
Sometimes, a simple remodel may not be enough. Here are some signs that indicate it might be time for a more extensive overhaul or even a complete replacement.

1. Persistent plumbing issues
If your bathroom frequently has leaky faucets, slow drains, or poor water pressure, it may be a sign that the plumbing needs to be updated. Persistent plumbing problems can lead to water damage and mold growth if not addressed. Replacing outdated pipes and plumbing fixtures not only resolves these issues but can also prevent future damage, making a full remodel worthwhile.

2. Water damage & mold
Bathrooms are exposed to moisture daily, making them prime areas for mold and mildew growth. If you notice mold in the grout or other areas, it’s often a sign of inadequate ventilation or water leaks. Persistent water damage, such as soft spots on the floor, peeling paint, or damp walls, indicates that the waterproofing materials have worn out and need replacing.
3. Outdated fixtures & design
An outdated bathroom design can make the entire room feel drab and uninviting. Old fixtures, such as sinks, toilets, and lighting, can also be inefficient, increasing utility costs. Modernizing your bathroom with new, energy-efficient fixtures and contemporary design elements not only improves functionality but also boosts your home’s value.
4. Storage limitations
As lifestyles change, storage needs may grow. If your bathroom lacks adequate storage space for toiletries, towels, and cleaning supplies, it may be time for a remodel. Expanding storage options, such as installing built-in shelves or adding a vanity with drawers, can make your bathroom more organized and functional.
5. Aging materials & wear
Over time, materials like tiles, grout, and countertops can show signs of aging, such as cracks, chips, and stains. These elements are not only unsightly but can also affect the room’s hygiene, as cracked surfaces can harbor bacteria. When materials start showing visible signs of wear, it’s usually time for an upgrade.
6. Inadequate lighting & ventilation
Proper lighting and ventilation are essential for a comfortable bathroom. If your bathroom feels dim or constantly humid, consider a remodel that enhances these elements. Adding brighter, layered LED lighting can make the space feel larger and more inviting while updating ventilation systems can prevent future moisture issues and improve air quality.
7. Preparing for future needs
If you’re planning to age in place or have family members with limited mobility, consider a remodel that improves accessibility. Installing features like grab bars, walk-in showers, and non-slip flooring makes the bathroom safer and more functional for all family members.
Who are the leading bathroom remodelers in Carmel Mountain Ranch, CA & the area?

From smart advice on how to pick the paint for your kitchen remodel and a quick guide on the benefits of kitchen remodeling to smart advice on revamping your bathroom with clever touches and so much more, Remodel Works has ample on-field experience and masterful expertise that put us head above the rest.
Whether you are located in Fairway Village, any other part of Carmel Mountain Ranch, or anywhere else in the nearby communities, we’re ready to arrive at your doorstep and start surveying the scene. We’ll work closely with you to get a sense of what you want to achieve, offer our suggestions, and get to work without delay. Reach out to us today!

Latest Posts
The Kitchen And Bathroom Countertop Showdown: Quartz, Quartzite, Porcelain, Or Granite?
Kitchen Zones: How To Design A Kitchen Around The Way You Actually Cook
How to Make a Small Kitchen Feel Twice as Large
Get your in-home free estimate today!
How to Choose the Best Paint Job for Your Bathroom Remodel
(858) 413-2305 Request a quoteBathroom remodel in Rancho Penasquitos is an exciting opportunity to refresh one of the most important spaces in your home. From choosing new fixtures to picking out tiles, every detail can transform your bathroom into a relaxing oasis. One decision that seems secondary but is actually a very impactful part of the process is choosing the right paint. The right color and finish can make your bathroom look bigger, brighter, and more luxurious, but with so many options available, it can be overwhelming to know where to start. The choice of paint isn’t just about aesthetics—bathrooms are high-moisture areas, so durability and resistance to mildew also play a key role.
In this blog, we’ll guide you through the most important factors to consider when choosing the best paint for your bathroom remodel. From selecting the right finish to coordinating colors with your overall design, these tips will help ensure your bathroom’s paint job stands the test of time.
How do I choose paint for my bathroom?
Choosing the right paint for your bathroom remodel requires a balance of aesthetics, durability, and practicality. Remember, don’t rush your decision, take your time to test the samples, and make sure to coordinate your choice with the rest of your bathing area to find the perfect color for its new look.
1. Choose the right paint finish
The first consideration when selecting paint for your bathroom remodel is choosing the right finish. Bathrooms are high-humidity areas, making it essential to select a finish that can withstand moisture without peeling or bubbling.
2. Consider the size and layout of your bathroom
The size and layout of your bathroom play a significant role in how paint colors will appear.
Light, neutral colors like soft blues, light grays, or crisp whites can make a small bathroom feel larger and more airy by reflecting light. For larger bathrooms, you have more freedom to experiment with bolder or darker colors.
3. Coordinate with your bathroom fixtures
Your bathroom’s fixtures, such as countertops, tiles, and cabinetry, should complement the paint color for a cohesive look. If you have white or neutral fixtures, you can be more adventurous with your paint choices. For instance, pairing white tiles with a vibrant color like turquoise or coral can create a striking contrast that energizes the space.
4. Think about lighting
Lighting is another crucial factor to consider when choosing a paint color for your bathroom remodel. Natural light can make colors appear brighter, while bathrooms with minimal lighting might make dark colors feel oppressive.
5. Invest in mildew-resistant paint
Bathrooms are prone to dampness and moisture, which can lead to mildew and mold growth if not addressed properly. To prevent this, it’s essential to choose a paint that’s specifically formulated for high-humidity areas.
6. Test Paint samples before committing
Before making your final decision, it’s important to test out paint samples in your bathroom. Paint can look different depending on the lighting, surrounding materials, and even the time of day. Most hardware or paint stores offer small sample pots that you can apply directly to your bathroom walls.
Who should I call for a sophisticated bathroom remodel in Rancho Penasquitos, CA & the area?

With experienced and meticulous craftspeople, attention to detail, and the finest selection of materials and brands, Remodel Works has developed a reputation for elegance, durability, and functionality. If you want to explore the pros and cons of vinyl flooring, wondering if a white kitchen is good for you, or you’re thinking about putting in leathered granite, just turn to our team and we’ll gladly answer your questions and offer guidance so you can find the best solution for your home.
Whether you live close to Interstate 15 or on the western side of town, we’ll be there at your place in no time to take a look at your bath and start making plans. Just tell us what you’ve always wanted to do and we’ll go above and beyond to make it happen. Reach out to us today!
Latest Posts
The Kitchen And Bathroom Countertop Showdown: Quartz, Quartzite, Porcelain, Or Granite?
Kitchen Zones: How To Design A Kitchen Around The Way You Actually Cook
How to Make a Small Kitchen Feel Twice as Large
Get your in-home free estimate today!

Why Going White is Such a Popular Choice for Kitchen Design
(858) 413-2305 Request a quoteWhen it comes to a kitchen remodel in Rancho Penasquitos, few trends have stood the test of time like the classic white kitchen. For decades, homeowners, interior designers, and architects have embraced white as a go-to choice for kitchens, and it’s easy to see why. White kitchens exude a sense of cleanliness, openness, and timeless style that other colors often struggle to achieve. Whether you’re looking to create a sleek and modern kitchen or prefer a cozy, farmhouse aesthetic, a white palette offers unmatched versatility.
But why exactly has white remained such a popular choice? In this blog, we’ll explore the many reasons behind the enduring appeal of white kitchens. From their ability to make spaces look bigger and brighter to their seamless adaptability, white kitchens continue to dominate design trends and inspire homeowners to choose a palette that is both timeless and elegant.
Why are white kitchens so popular?
Colors can impact our mood which makes them an important part of interior design. White can make spaces feel larger and brighter, matches well with a wide range of materials and styles, and provides both beauty and functionality. Whether you’re embarking on a full kitchen remodel or just updating a few elements, opting for a white palette is a decision that’s likely to pay off for years to come.
1. White creates an illusion of space
One of the most compelling reasons why white is a popular choice for kitchen design is its ability to make a space feel larger and more open. White reflects light better than darker colors, which helps to brighten the room and make it feel more expansive. In small kitchens, this can be a game-changer, creating an illusion of space where there might not be much.
2. Timeless appeal
Trends in kitchen design come and go, but white kitchens have a timeless appeal that never goes out of style. Whether it’s a minimalist modern kitchen or a traditional, rustic space, white works with nearly every aesthetic. The neutrality of white allows it to stand the test of time, making it a safe choice for homeowners who want a kitchen that won’t look dated in a few years.
3. White pairs well with other materials
Another reason white kitchens remain so popular is their ability to blend seamlessly with various materials and textures. Whether you love sleek marble countertops, warm wooden floors, or stainless steel appliances, white serves as the perfect backdrop that complements all kinds of materials. It effortlessly ties together different design elements to create a cohesive and harmonious space.
4. Clean & fresh aesthetic
Cleanliness is often top of mind when designing a kitchen, and white embodies that feeling of freshness and cleanliness. The color white conveys purity and hygiene, making it a natural choice for a space that’s used for food preparation. A clean white kitchen immediately gives off an impression of being well-kept and tidy, which can make cooking a more enjoyable experience.
5. Versatility across design styles
One of the most significant advantages of choosing white for your kitchen is its ability to adapt to different design styles. Whether your preference is for sleek modern lines, farmhouse charm, or even a vintage-inspired space, white can fit effortlessly into any design. It allows you to easily update other elements like hardware, lighting, or décor over time without needing a full redesign.
6. White brightens the space
Natural light can work wonders in a kitchen, and white surfaces amplify that effect. Whether you have large windows that flood your kitchen with sunlight or rely on artificial lighting, white will help brighten the space. This is particularly helpful in kitchens that may not have abundant natural light, as white reflects whatever light is available, making the room feel lighter and more cheerful.
Which company should I hire for a refined kitchen remodel in Rancho Penasquitos, CA & beyond?
No matter which side of State Route 56 you’re located on, Remodel Works is your one-stop shop for elegant bathroom and kitchen remodels of all shapes and sizes. We boast a team of skilled professionals with ample on-site experience, a tailored selection of brands and materials, and a firm grasp of the latest trends in both design and technology to deliver a beautiful and long-lasting kitchen that will not only put the food on the table but also put a smile on your face.
Whether you want to learn more about vinyl flooring, explore the pros and cons of leathered granite, or play with color combinations in your bathroom, our attentive team will work closely with you to find the best solution for your layout and lifestyle. Contact us today and we’ll get your project off the ground with style!
Latest Posts
The Kitchen And Bathroom Countertop Showdown: Quartz, Quartzite, Porcelain, Or Granite?
Kitchen Zones: How To Design A Kitchen Around The Way You Actually Cook
How to Make a Small Kitchen Feel Twice as Large
Get your in-home free estimate today!

Leathered Granite: Introduction, Pros, Cons, How to Care for It & More
(858) 413-2305 Request a quoteIf you’re getting ready to call kitchen and bathroom remodelers in Rancho Panasquitos and start your project, then you probably already know that granite countertops are almost a staple in modern and stylish spaces. Thanks to its durability and the natural beauty of its colors and textures, granite has been one of the building material favorites for ages.
Aside from polished and honed finish options, a new trend is catching attention: leathered granite. In this article, we will explore what makes leathered granite a fun alternative for your remodeling project, including its benefits, maintenance, and more.
What is leathered granite?
Granite is a popular material, and its polished variant is fairly common in fine kitchens all around the world. The high sheen and smooth surface make it a reasonably elegant and easy-to-maintain choice, especially for kitchen countertops. Honed granite, on the other hand, stops the sandblasting process before it achieves that highly polished gleam. Its look is more earthy and casual, although the process tends to wash out the natural color of the stone.
Not long ago, your options would have stopped there. Honed and polished may be the most common ways to treat granite, but there’s a new trend worth considering: leathering. This process brings you the best of the natural stone’s beauty, including its color, textured look, and tactile appeal.
The leathering process
A meticulous and labor-intensive process, granite leathering should ideally be performed only by skilled professionals. But what does this process look like? To achieve that signature textured and matte look, experts use a diamond-tipped brush to repeatedly grind over the stone’s surface.
This process removes minor imperfections but preserves the natural patterns and contours of the granite. Plus, it allows for a custom level of texture too, so you can achieve final looks ranging from nearly smooth to distinctly rugged. Once your granite reaches the desired finish, it’s typically sealed to protect the surface and is then ready for installation.
What are the advantages and disadvantages of leathered granite?
Like any material, leathered granite comes with its own set of pros and cons. Let’s dive into the most important ones below.
Advantages of leathered granite
If you’re looking to discover why leathered granite is gaining popularity, here are some of it’s unique benefits:
Unique, rustic style
Because of its slightly dulled hue and rough texture, leathered granite has a particular rustic charm perfect for historic homes. It’s usually seen on countertops and vanity exteriors and can bring a distinct, antiqued, rustic look to any standard surface.
Although a polished finish, with its high gloss and sheen, has its own elegance and quality, leathering makes the look more natural, as if the material was quarried from the side of a mountain that same day. With it, even otherwise overlooked surfaces get a unique appeal. Leathered granite comes in a variety of tones and textures, so you’re sure to find just the hue and feel you’re looking for.
Amazing texture
With leathering, you can achieve an almost perfectly smooth, super-texturized, and any desired feel in between. It all depends on how far you go with the leathering process, so you can essentially choose how well you want the natural texture of the cut stone to show. Honed finishes typically don’t offer this same level of customization.
Granite can have some wonderful natural texture to it that will be lost in the overzealous sandblasting of traditional finishes. But a leathered finish will feel genuine and natural even to the touch. Suffused with history and eons of mineral memory, granite’s true texture will fascinate and thrill your guests while looking incredible as well.
Natural stone color
Often used on darker types of granite, like black pearl for example, leathering brings out the natural colors of the stone while staying a few steps away from the high sheen achieved in the polishing process. A happy medium between a honed and polished surface, leathering dismisses the washed-out or overly shiny conventions in favor of a textured appearance that shows off the all-too-often disregarded color of the granite itself.
Whether your dream granite countertop is absolute black, kashmir, or green ocean, leathering will make it pop. Where honing tends to dull the natural hue of a stone and polishing misconstrues sheen for shade, leathering allows the color of your stone to become the true star of the kitchen, bath, or outdoor area.
Hard to stain
The unique texture of leathered granite offers inherent benefits that make it a practical and stain-resistant choice for countertops. The process of leathering tightens the stone’s natural pores, which creates surfaces that are much harder to damage by staining. Unlike polished or honed finishes, spills are less likely to penetrate and leave lasting marks on leathered granite.
This textured surface also minimizes the visibility of fingerprints and water spots, a major advantage for those who prefer low-maintenance countertops. Additionally, the tighter pores contribute to improved bacterial resistance, making leathered granite a more hygienic option compared to smoother finishes. This inherent quality is often overlooked but is a significant advantage, particularly in high-use areas like kitchens.
Disadvantages of leathered granite
Though leathered granite tops have a lot of advantages, there are also some drawbacks to this particular finish. Let’s take a look at some of them:
Easier to scratch
While the textured surface of leathered granite offers many advantages, it also comes with the potential vulnerability to chipping and cracking. The very grooves and imperfections responsible for its unique look can also make it easier to damage with sharp or hard objects. Such impacts can mar the surface and leave unsightly chalky patches or stone dust.
The best way to handle this side of leathered granite is to make sure the surface is properly treated with a high-quality sealant that easily enters the pores. For many, natural contours and grooves are the main reasons to choose this finish, so it’d be a shame to see those features become a source of stress and frustration.
Trickier to clean
Similarly, the natural, textured surface of leathered granite makes it harder to get noticeably dirty or stained, but it also makes wiping and cleaning harder. With leathered textures, crumbs can settle into the crevices, and liquids can pool in the grooves. But this will depend largely on the specific texture you choose. Rougher ones naturally tend to trap more debris, while smoother textures are generally easier to wipe down.
If ease of maintenance is important to you, you should consider this when picking your finish. You’ll still be able to clean your countertops, you just need to use a regular brush or a hand broom and a damp cloth instead of wiping it down. Plus, because the surface is stain-resistant, leathered granite is hard to damage with spills, even if you don’t address them instantly.
How to maintain leathered granite countertops?
Caring for your leathered granite is, thankfully, a little less complicated than it would be for polished or honed stone. This is in huge part thanks to the ability of a leathered finish to hide smudges and stains, so you can rest assured that your granite will keep looking great where its honed and polished cousins would seem shabby. Similarly, watermarks will be a thing of the past on your new and improved countertops.
The high gloss and reflectivity of polished granite make it all too easy to smudge, stain, and weather, but also easy to wipe down. Honed granite, on the other hand, will stay relatively free of smudges and visible stains. But with both, at the end of the day, you’d be sacrificing color and beauty for efficiency. This sacrifice, worth it or not, does not actually need to be made as leathering can do all of the above without washing out your granite’s natural hue or requiring daily cleaning. You’ll also be avoiding all the waxing and oiling necessary with soapstone.
Should you seal leathered granite?
Although most manufacturers routinely seal granite countertops, there’s an ongoing debate about whether this is actually necessary.
On one hand, sealing adds a layer of protection that makes the stone more resistant to stains and damage. Sealants can also be stripped and reapplied if need be, which can potentially save you from costly and premature countertop replacements. However, there’s always the risk of unsightly sealant imperfections like brushstrokes or bubbles, which can diminish the natural, textured beauty of your leathered granite.
On the other hand, skipping the sealant preserves the natural matte finish and avoids the potential imperfections of many sealants and enhancers. Leathered granite’s inherent stain and smudge resistance, coupled with its natural antibacterial properties due to tightened pores, can make sealing seem unnecessary. However, not sealing comes with risks and leaves the surface more vulnerable. Wine stains and permanent markers are the unsealed countertops’ worst enemies.
Ultimately, the decision to seal or not to seal rests with you, so weigh the pros and cons carefully. Sealing offers enhanced protection and peace of mind while avoiding it maintains the natural beauty and feel of the stone. Need durability and a long lifespan more than the completely natural look? Remember, a sealed leathered granite countertop is virtually impervious to stains and built to last for years to come.
Is leathered granite a good choice?
In recent years, leathered granite has rapidly gained popularity and is now somewhat of a standard for designer residences all over. This finish, with its practicality and natural beauty, can charm even the pickiest of cooks. Leathered granite’s unique, satisfying tactile element is both its most important trait and an often overlooked factor when choosing countertop materials. This incredibly satisfying tactile element
Whether gracing your kitchen, bathroom, or outdoor space, leathered granite adds a touch of sophistication and warmth. Its durability and stain resistance make it a practical choice for high-traffic areas, while its customizable texture allows you to tailor the look to your preferences.
Leathered granite truly strikes a balance between rustic charm and modern elegance and gives you a low-maintenance surface that is both visually pleasing and incredibly functional. If you’re looking for a countertop that stands out from the crowd, leathered granite is certainly worth considering. Its timeless beauty and inherent practicality make it a valuable addition to any home.
Who are the most dependable kitchen and bathroom remodelers in Rancho Penasquitos?
If you’re thinking about upgrading your kitchen or bathroom countertops with the timeless elegance of leathered granite, Remodel Works is here to bring your vision to life. As your trusted full-service remodeling contractor, we specialize in a wide range of projects, from cosmetic kitchen enhancements and meticulous luxury vinyl flooring installations to full home transformations.
With a proven track record of successful projects and a team of dedicated professionals, we deliver exceptional results every time. We have access to the finest materials, employ industry-leading techniques, and prioritize open communication throughout the process.
Whether your home is nestled in the heart of Rancho Penasquitos, near the beautiful Black Mountain Open Space Park, or anywhere in the surrounding areas, we’re ready to help. Contact us today to discuss your project and discover how we can elevate your living spaces!
Latest Posts
The Kitchen And Bathroom Countertop Showdown: Quartz, Quartzite, Porcelain, Or Granite?
Kitchen Zones: How To Design A Kitchen Around The Way You Actually Cook
How to Make a Small Kitchen Feel Twice as Large
Get your in-home free estimate today!

The world of general, kitchen, and bathroom remodeling in Rancho Penasquitos is ever-evolving, and the level of innovation the world has seen in the past several years has truly been extraordinary. In the realm of flooring, luxury vinyl has emerged as a true game changer. It’s stylish, modern, durable, and adorable, and an option that easily rivals many high-end materials.
But as with any choice, it’s important to weigh the pros and cons before making a decision. To help you make an informed decision, we’ll introduce you to luxury vinyl flooring and discuss its benefits and drawbacks below. Keep reading!
What exactly is luxury vinyl flooring?
Although it’s similar to standard vinyl flooring, the luxury variant stands out because its appearance can look close to that of natural materials like stone or wood. To achieve this, luxury vinyl flooring is usually thicker and has a surface layer with photo-realistic images and textures that resemble that of natural options.
Below we outline the different types of luxury vinyl flooring available for you to choose from for your kitchen, bathroom, and beyond.
1. Luxury vinyl tile (LVT)
This variant stands out as a favorite among luxury vinyl flooring options. Its appeal lies in its range of design options and a remarkable ability to mimic the appearance of natural materials like stone or wood – all without the hefty price tag or upkeep demands of the real thing. LVT has several layers: a tile backing layer, a vinyl core, a print film layer, a clear, protective ‘wear’ layer, and, finally, a polyurethane coating.
2. Luxury vinyl plank (LVP)
Another popular choice in the luxury vinyl flooring world is the luxury vinyl plank (LVP). Just as the name suggests, it’s designed to recreate the look and feel of genuine hardwood planks. Unlike sheet vinyl, these are individual pieces, which is part of how they achieve that authentic appearance. LVP comes in a variety of colors, textures, and finishes that make it a versatile option that can complement a wide range of interior design styles.
3. Engineered vinyl plank (EVP)
A subset of LVP that deserves a separate mention, engineered vinyl plank is the most similar in look, feel, and form to engineered hardwood or laminate flooring. Compared to other options, it’s much more versatile and resilient and has the added benefit of being waterproof.
It’s typically much thicker than the typical glue-down vinyl. EVP is usually about 8mm thick and constructed in layers, where the top is vinyl, the middle is a high-density core board, and there’s a back underlayment for more cushioning. In recent years, it has become a very popular alternative to pricey hardwood options and plain vinyl or laminate flooring.
What are the pros and cons of luxury vinyl?
Like any other material, luxury vinyl flooring comes with a list of pros and cons. Let’s take a look at the most important ones below.
Pros of luxury vinyl flooring
There are many “pros” of choosing luxury vinyl flooring, from affordability to multiple design options and so much more. Here are some of the things we love about vinyl flooring:
1. Affordable
Perhaps the biggest advantage of luxury vinyl flooring is that it achieves the exact aesthetic of a hardwood for only a fraction of the cost. Hardwood is an amazing choice for any space, but it’s also one of the most expensive ones with an average cost between $8-$25/square foot. But luxury vinyl is somewhere between $2-$5/square foot. It achieves the look of hardwood with only a photo of the genuine material placed between the clear wear layer and backing.
2. Waterproof
Another clear advantage over many other materials is that luxury vinyl is fully waterproof. Because of this, it’s a great option for moisture-prone areas where you still want your flooring to look good, such as bathrooms, laundry rooms, mudrooms, and kitchens. Engineered vinyl plank is a preferred option for waterproof flooring, especially compared to laminate or engineered hardwood, both of which can get ruined by moisture, let alone a floor or water leak.
3. Easy maintenance
Natural wood, stone, and any other hard-surface flooring are known as particularly difficult to maintain, but luxury vinyl flooring stands out for its low maintenance requirements. Luxury vinyl tile (LVT), for example, doesn’t need any polishing or waxing due to its protective layer. You only need to clean and mop your floors to keep LVT looking fresh.
And if you damage any planks, you can just pop them out and replace them. Depending on how thick the wear layer is, your LVT flooring may last up to a decade before needing a replacement. While other options, like vinyl composite tile (VCT), can be a bit more demanding in terms of upkeep, sweeping and mopping are usually enough to keep luxury vinyl floors in good shape.
4. Multiple design options
Luxury vinyl flooring comes in a wide variety of colors and styles. And since this material is only growing in popularity, the number of design options to choose from is still growing every day. Whether you’re looking for a modern gray or weathered woods and farmhouse looks, there are endless luxury vinyl flooring options to choose from. It can even mimic some of the texture of natural stone or wood because the patterns can be embossed into the tile to give it a more realistic feel.

One of the most common misconceptions about LVT is that the design will wear away through use. But the design is printed onto the film layer of the tile, and protected by the clear “wear” layer, which guards against scuffs and scratches and protects the printed design layer against walk-off.
5. Mimics natural materials
If you want the look and feel of real wood, but don’t want the upkeep, luxury vinyl flooring is your best option. Luxury vinyl, especially engineered vinyl plank, looks so much like real wood that many of your guests will inevitably mistake it for hardwood. Also, since the planks are thicker and more rigid, luxury vinyl feels more like a real wood floor.
6. Everyday comfort
Another area where luxury vinyl, particularly engineered vinyl plank, truly stands out is comfort. When it comes to how comfortable it is to walk on, this flooring material It’s a noticeable upgrade compared to other, less expensive alternatives. Plus, it offers the additional advantage of temperature and sound insulation. So, not only is it more comfortable to walk on, you also won’t have to worry about chilly floors or noisy footsteps.
7. Flexible installation
Although the ‘glue-down’ form was the only available option for luxury vinyl flooring much has changed in recent years. Before, this material could only be glued to a surface below, either concrete or plywood. This isn’t ideal simply because luxury vinyl is still too thin to provide the right feel and cushioning when glued down directly to a subfloor.
Nowadays, though, there are options available for “floating” luxury vinyl flooring. This means that luxury vinyl now doesn’t have to be glued down, and it can instead just lay on top of the subfloor. This makes LVF much easier to install and, when the time comes, remove and replace.
In addition, the development of engineered vinyl plank has advanced the flexibility of this material’s installation. EVP is thicker than other luxury vinyl options and is installed by clicking together individual pieces. So, not only do they provide more cushioning and insulation than other vinyl floor types, but they also stay firmly in place.
Some brands do use glue or grout, but many others have peel-off backing or simply click together. In every case, though, the installation is fairly straightforward. In general, luxury vinyl flooring is very easy to install and carries the added benefit of being easy to place on top of almost any surface.
Cons of luxury vinyl flooring
This option is affordable, durable, and looks great, but as with any product, there are some drawbacks you should be aware of. Here they are:
1. Not impossible to damage
While luxury vinyl flooring is incredibly durable, it’s not completely impervious to damage. It can scratch or scuff, which often happens with heavy furniture or appliances. On the positive side, luxury vinyl flooring is still much harder to scratch than natural wood and if you choose vinyl planks, replacing pieces is fairly easy if they ever get damaged.
2. Extensive preparation
Some luxury vinyl types are more sensitive, so if your subfloor is uneven, it may need a lot of preparation before anything can be installed on top. Engineered vinyl planks, for example, won’t line up well if you try to place them on an uneven surface. If you’re dealing with a particularly unruly subfloor, you may need to invest in a self-leveling mix – which is an added expense – or choose glue-down installation instead.
3. No long-term value
Despite the name of the product, luxury vinyl flooring won’t improve the value of your home in the same way that hardwood or tile does. If investment value is an important factor in your floor choice, you won’t want to overlook this consideration in the planning phase. This is an easy remodeling mistake to avoid.
4. Potential safety risks
While the uniform, smooth look of luxury vinyl flooring is generally a benefit, it also comes with the downside of being more slippery, and therefore more of a fall risk compared other floor choices out there. Unlike carpet, hard flooring won’t absorb moisture away, so the surface automatically becomes slippery in case of spills or very high humidity. Still, luxury vinyl tile may be more slip-resistant than some other hard surface floor coverings, so it’s still the best option if your next flooring installation specifically requires hard surface flooring.

Who do I reach out to for top-notch kitchen and bathroom remodeling in Rancho Penasquitos?
Whether you’re looking to refresh a single room with new luxury vinyl flooring, upgrade your countertops with stunning leathered granite, or start a full-scale home remodeling project, Remodel Works is your trusted partner.
We’re a full-service remodeling company with years of experience, ready to handle any project, big or small. Our dependable team brings years of industry experience and proven methods, and we’re dedicated to providing top-quality work, clear communication, and exceeding your expectations.
No matter where you are in Rancho Peñasquitos or the surrounding areas, we’re equipped and ready to help. Contact us today and let’s turn your dream home into a reality!
Latest Posts
The Kitchen And Bathroom Countertop Showdown: Quartz, Quartzite, Porcelain, Or Granite?
Kitchen Zones: How To Design A Kitchen Around The Way You Actually Cook
How to Make a Small Kitchen Feel Twice as Large
Get your in-home free estimate today!

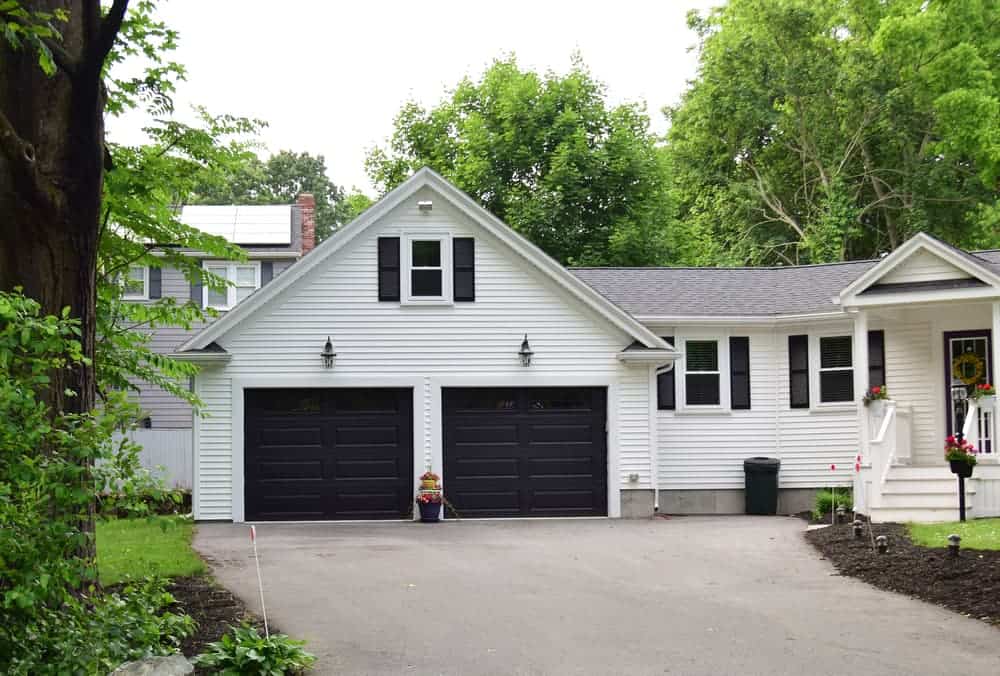
Over-the-garage additions have become a very popular choice for homeowners in recent years. This is largely due to the fact that they offer an easy way to add space to the home without expanding its footprint. Whether you want to add on a bedroom, a playroom for the kids, or even a “man cave,” there are tons of options for how to use your garage bonus room.
But is this versatile addition right for your home? If you’re thinking about getting in touch with local ADU contractors in San Diego, read on. Below, we’ll explore some pros and cons of a garage bonus room, as well as a step-by-step guide for building it.
Are bonus rooms above the garage worth it?
Like any other home addition option, adding an accessory dwelling unit above your garage also comes with some pros and cons. Before you start planning, let’s delve deeper into these potential benefits and challenges. Here are some of the top decision influencers:
Benefits
1. No additional footprint
Debatably the biggest perk of opting for an above-garage addition is that it doesn’t increase a house’s footprint. So, by building up rather than out, you can easily add to the existing structure of your home by building up. This way, the size of your lawn and property square footage remains exactly the same.
2. Cost-effectiveness
Another advantage of building a bonus room over your garage is that when you make the necessary structural additions, such as adding new support posts, beams, and concrete footings, you don’t have to worry about destroying a finished room below. Since you’re building over the garage, the cost of remodeling the existing space as you add new structural elements is minimal.
3. Enhanced curb appeal
A well-designed bonus room above your garage can have a drastic impact on your home’s curb appeal. These additions often face the street and, given their size, can make a dramatic visual impact and maybe even increase your home’s resale value.
Difficulties
1. Seamless design
Since the above-garage additions are so sizeable, it’s all the more important for the bonus room to seamlessly blend with the exterior facade of your home. This may be difficult to achieve since exterior finishes are often older than two decades and the newly built space is, well, brand new. Not to mention that finding the siding, shingles, and other materials to match what you already have can be a real challenge.
Luckily, there are a few strategies to make the addition look as seamless as possible: try to match architectural elements like roof lines and windows as much as possible, add details to the facade like the trim, and if possible, try to match the project with an exterior upgrade for the entire home.
2. Possible Restrictions
Another potential issue with building above your garage is the possibility of running into restrictions. Before you move forward with any sort of planning, check with the city or local jurisdiction to see if they have any height restrictions for a detached garage. Some of them may require things like additional parking on-site, and others have specific rules about windows and doors if the garage is too close to the property line.
3. Building a Stiff Floor
Considering the size of a typical two-car garage, usually at least 24 feet by 24 feet of long, open space, it may be a challenge to build a proper floor on top. The floor needs to support the space above properly, follow all codes, not bounce, and not interfere with the car space below. In some cases, achieving all that may prove harder than you think.
How much does it cost to add a bonus room above a garage?
As with any other home renovation, the financial aspect is one of the first things homeowners ask about. However, costs can vary depending on several factors, and we’ll explore some to help you budget accordingly.
Influencing factors
1. Size
Probably the biggest factor when determining the overall cost of your renovation is the size of your bonus room. Larger rooms naturally require more materials and labor, which will be reflected in the final price. Construction costs are estimated by square foot, so it’s best to have a clear idea of the desired size before starting the planning process.
2. Scope of Work
Another significant factor is the scope of work that needs to be done in the space. Since you’re building a brand new room on top of the garage, the space may require extra insulation or wiring that an addition in a different part of the home might not. To accurately estimate the scope of work, consider the specific requirements of your bonus room.
3. Materials
Aside from the size and scope of work needed, the materials you choose can also significantly impact the overall costs. The good news is that in this day and age, finding cost-efficient materials is easier than ever. Many budget-friendly options even mimic the look or properties of high-end materials. For example, engineered plank vinyl is much less expensive than true hardwood, but looks almost identical from the outside.
4. Labor
When it comes to personnel, this is definitely an area where you do not want to skimp. While it’s true that you can handle some tasks on your own, such as laying down manufactured flooring or installing drywall, significant structural and design changes require professional expertise. For an addition that turns out to be exactly what you envisioned, you definitely want to work with a contractor or an architect.
The average cost
For all the reasons mentioned above, the cost of finishing a bonus room above your garage can vary. Interested in learning about the approximate cost? Based on average costs for all the finishing pieces, it comes to about $35 per square foot. Keep in mind, however, that this is just an average, and any of the aforementioned factors may impact it significantly.
How do I add a room to an existing garage?
Finally, let’s dive into a step-by-step guide for creating a bonus room that meets your needs and complements your home’s style:
1. Think from the outside in
When trying to imagine your dream addition, sometimes it helps to think from the outside in. Meaning, since over-garage additions are highly visible and quite large, think about what you want it to look like from the outside first. Use that idea as a foundation, and then consider how that final look affects the structure. As mentioned earlier, the design of your bonus room should seamlessly blend with the existing facade, so this is a good starting point.
2. Verify the structure
Once you have a design idea in mind, it’s time to assess your home’s structure and think about how to build on it. A qualified engineer will evaluate whether the existing structure can handle the added weight of a bonus room. This typically involves digging several holes in the foundation to evaluate its condition and depth and testing the strength of the framing. If they find out that the structure isn’t supportive enough, you’ll need to address it before any construction begins, which can be quite expensive.
3. Check against safety codes
Safety concerns and regulations should be addressed early in your planning process. For example, per building code, your garage’s walls and ceiling need to be covered with Type-X drywall, which is 5/8 inches thick and fire-rated, before you add a room above. You must also ensure that all drywall penetrations, such as those for electrical conduit, are sealed tightly.
As you can see, these codes often mandate specific requirements for garage additions. They may seem bothersome but always remember that they exist for safety reasons. So, take time to research all relevant local regulations and codes, and make sure you comply with them when designing your new addition.
Walls
The walls of your bonus room are essential for both aesthetics and functionality. Begin by ensuring proper insulation to create a comfortable and energy-efficient space. Standard insulation is typically required, but you may want to consider adding extra for enhanced comfort and reduced energy bills. Once insulated, install drywall to create a finished look and prepare the walls for paint, wallpaper, decals, shiplap, or any other decorative touches.
Floors
There are a few factors you’ll need to consider when it comes to the floors of your bonus room. First of all, the basic frame of your addition won’t tolerate regular use and heavy foot traffic, so you’ll need to reinforce the floor joists. Next, you should add insulation to minimize noise transfer and improve temperature control.
You can then boost these properties with your choice of flooring material. Carpeted flooring adds another level of noise insulation but requires a subfloor. Hardwood flooring won’t be as sound-efficient, but its sleek appearance, versatility, and long-term cost-efficiency make it a favorite.
4. Consider plumbing & utilities
If you want to add a bathroom or something like a laundry room in your above-garage addition, you’ll need to consider utilities and plumbing. Extending pipes and drains can be challenging, especially if the existing infrastructure is located far from your garage. In most cases, it’s possible but can lead to noticeably higher construction costs.
Another important consideration is that these pipes need to stay in heated areas to prevent freezing during extreme weather. Don’t worry, because a skilled contractor will be familiar with these requirements and can help you plan accordingly. Additionally, they can help you plan your electrical setup.
Your contractor can also assist with planning electrical needs. While your garage is probably already connected to the existing power grid, it’ll need some additional wiring to meet the new space’s electrical demands.
5. Make plans that fit the space
Planning a bonus room offers so many possibilities, but remember to stay realistic. While it’s tempting to dream big, you’ll need to work within the constraints of your garage’s size and shape. For example, if you have a small, single-car garage, adding two bedrooms and a bathroom in the bonus space is either just a bad idea or entirely impossible. But if you have a spacious, two-car garage, then designing a functional living space above is a great option.
6. Create the access points
When it comes to access points that stay inside the garage, they should be designed to not take up a lot of space. Here are the popular options:
Interior ladder
Probably the most space-efficient option is a ladder, a common choice for lofts that can be easily moved around as needed. However, if the point of this addition is to create an in-law suite, a ladder likely isn’t the best option.
Interior staircase
Another common option is the traditional straight staircase. This option is very stable and easy to use, but it definitely takes up the most space. If you’re looking for a middle ground, spiral staircases have gained popularity in recent years and only take up a small circle in the corner of your garage.
Exterior staircase
If you want to maximize the interior space in your garage and your bonus room, you can also choose to set up the access point on the outside. This can be a traditional outdoor staircase made of sealed wood or a modern spiral option. Both options come with a more casual look and feel, so take that into account when considering the aesthetic of your new addition.
Who are the most reputable ADU contractors in San Diego?
Interested in a garage bonus room, another ADU project, or any other type of remodeling? Remodel Works stands ready to help with remodeling services tailored to your needs and preferences. Our skilled team takes pride in outstanding craftsmanship and uses only top-notch materials and time-tested methods for each project we take on. We’re so confident in the quality of our service that we’ve even created a comparison list with our competitors, so check it out!
Whether you need us in Little Italy, elsewhere in San Diego, or beyond, our in-depth knowledge of local regulations and architecture will ensure your project flows seamlessly. Contact us today and let’s discuss the possibilities!
Latest Posts
The Kitchen And Bathroom Countertop Showdown: Quartz, Quartzite, Porcelain, Or Granite?
Kitchen Zones: How To Design A Kitchen Around The Way You Actually Cook
How to Make a Small Kitchen Feel Twice as Large
Get your in-home free estimate today!

Are you thinking about renovating your home? Whether you’re planning a full home overhaul or preparing for kitchen and bathroom remodeling in Poway, it’s no secret that these projects can feel quite challenging if you don’t plan them well.
One thing that can help is starting with a checklist. A detailed plan like this not only puts things in perspective, it also helps you make sure that you’re not skipping any important steps. To assist you in crafting your own, we’ll go over a basic house remodeling checklist below. Read on!
In what order should you renovate your house?
Before you dive into any renovation tasks, you first need to understand the proper order of steps. Let’s see what are the necessary stages of a well-planned renovation:
1. Start with a plan
The first thing to do is make a comprehensive plan. This plan should have a detailed list that outlines the scope of work, and as many drawings as possible. When it comes to tasks, think about which ones you’re going to handle yourself, and which ones you plan to contract out.
Then, you should find contractors in your area whose work aligns with your needs and budget constraints. Don’t forget to secure any necessary permits as soon as possible. And remember: all of these steps are necessary before any type of remodeling starts.
2. Check your home’s bones
Before you dive into the renovation, professionals should evaluate your home and its structural integrity. Count on them to inspect your foundation, siding, roof, windows, plumbing, and electrical systems to make sure they don’t need any repairs. You wouldn’t want to start an expensive remodeling project only to find out that you have to tear out the work you just did because something like the foundation needs repair.
3. Begin the demolition
Once the structural integrity is confirmed, it’s time for demolition. Get a large dumpster for all the debris and waste, and start removing the materials you were planning to get rid of. This may involve dismantling cabinets, tearing down walls, removing old tiles, and more. If you don’t plan to live at home while you’re renovating, tackle as much demolition as you can early on.
4. Frame out the new structures
If your project includes putting up or moving walls, now’s the time to frame them out. Use this step to add support beams where needed, modify, add, or even remove windows or doorways, and handle any other structural modifications. Think about every aspect carefully, because this phase defines the layout and functionality of your living spaces.
5. Connect essential systems
If your renovation includes adding new parts to your HVAC system, installing extra pipes, or new electrical wiring, you’ll need to tackle all of it before you can proceed to insulation and drywall. This approach ensures that the essential systems blend seamlessly into your home’s structure.
6. Add insulation & drywall
Proper insulation makes all the difference in your home’s energy efficiency and comfort, so make sure that yours will perform well. Install this insulation in the attic and walls for a barrier that helps regulate temperature and minimizes future energy waste. After it’s in, you can have the drywall installed to get smooth walls ready for finishes.
7. Install windows & carpentry
Next, if your plan was to install any windows as part of this project, it’s now time to set them up. Additionally, this step is perfect for installing new details like molding, baseboards, trim, and built-ins that add depth and character to your living space.
8. Finish off the walls
Your walls are already primed and ready by now, so take time to add finishing layers to your walls. Paint or wallpaper are common choices, but there are other options to fit any unique taste. Though wall finishes are not as hard to replace as some other elements, you should still consider them carefully because they heavily impact the overall look of your home.
9. Put down new flooring
The final step of this journey is installing new flooring. This is often done last to make sure that the new flooring material doesn’t get damaged during construction and installation of other elements. Whether you opt for carpet, tile, hardwood, laminate, or other flooring types, this step ties together the entire renovation and completes the transformation of your home.

Who offers top-quality kitchen and bathroom remodeling in Poway?
If you’re ready to turn your home renovation vision into reality, Remodel Works is here to help. Whether you’re considering a kitchen update, want to make a plan for a luxury bathroom remodel, or wish to completely overhaul your living space, our remodeling services can make it happen. Our team boasts a proven track record of successful projects, and you can expect each of our remodelers to work hard to exceed all your expectations.
From the areas near Lake Poway, across the city, and beyond, we’re ready to assist you wherever your renovation dreams take you. Don’t start this journey alone. Reach out today and let us guide you through the exciting process of bringing your dream home to life!
Latest Posts
The Kitchen And Bathroom Countertop Showdown: Quartz, Quartzite, Porcelain, Or Granite?
Kitchen Zones: How To Design A Kitchen Around The Way You Actually Cook
How to Make a Small Kitchen Feel Twice as Large
Get your in-home free estimate today!

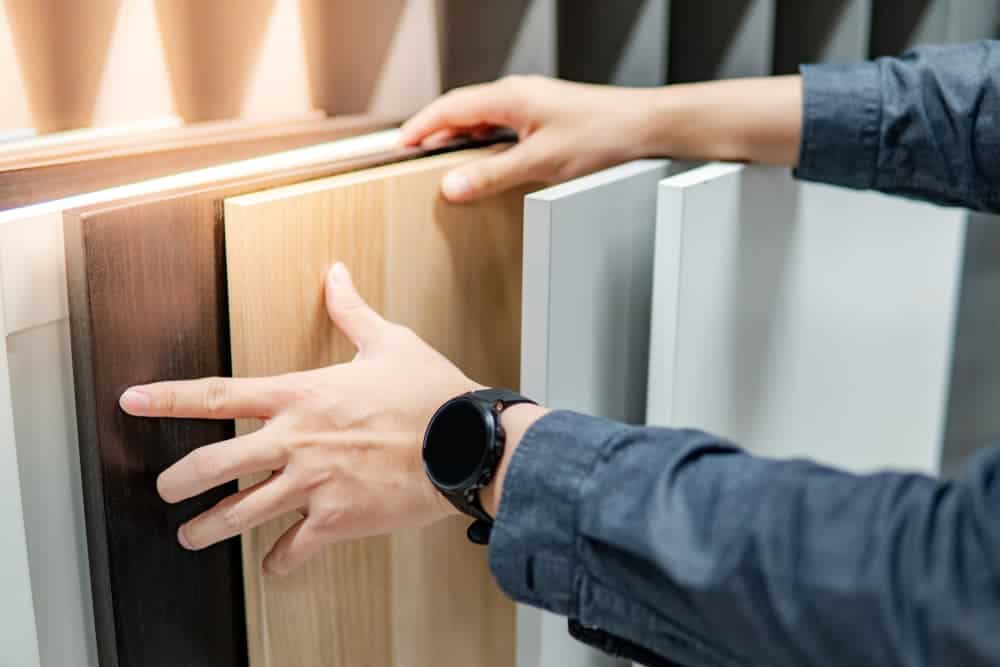
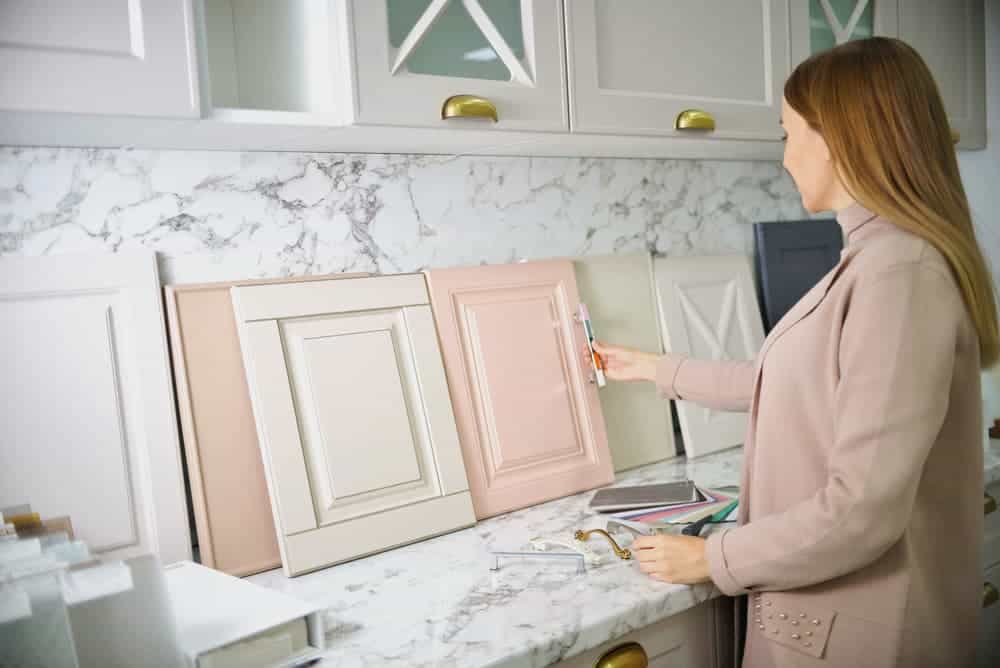
If you’re kitchen remodeling in San Diego, then you know a part of it is deciding on what you will do about your cabinets. One choice stands out for its impact on the result: picking the best materials for your new kitchen cabinets.
It all depends on whether you want to refinish, reface, or completely replace your old cabinetry. If you choose one of the latter two, then the choice of material can make all the difference in how the final result looks, feels, and fits your needs. If you want to make sure that your final decision is fully informed, read on. We’ll explore some of the most popular materials below, and talk about the pros and cons of each!
What kind of wood is used for cabinets?
Usually, kitchen cabinets are made from wood and wood-based materials. The most popular of these materials include hardwood, plywood, medium-density fiberboard, particleboard, and wood veneer. Let’s dive into the details about each of them:
1. Hardwood
A material that has been in use since cabinets were invented decades ago, and that is still the most popular one out there is – hardwood. This is a natural element, harvested directly from trees, which means that each panel slightly varies in pattern from the next one. Here are some of their pros and cons:
Advantages
Here are some traits that make hardwood such a beloved choice for cabinets:
- It has a unique appeal and beauty, in part because each panel is naturally unique in pattern.
- Hardwood is exceptionally durable, so cabinets made from it have a long lifespan.
- It’s easy to repair, sometimes even by yourself – though it’s always best to leave the job to a professional. Even in case of scratches, stains, and watermarks, just addressing the problematic spot or refinishing your kitchen cabinets usually fixes the issue.
- There’s a wide range of wooden materials to choose from, each with its own distinct look, color, and feel. Some of the popular ones include white oak, red oak, hard maple, hickory, cherry, birch, ash, and pine.
Disadvantages
Despite the appeal and all its positive sides, hardwood does have some cons you should consider:
- Wood is generally one of the more expensive materials, and because hardwood is highly sought after, the prices can be even higher. For example, wood or wood combination cabinets start at about $80 per linear foot, and that price can easily double if you’re considering custom-made cabinets.
- Hardwood is generally heavy, so if you want to use it for all parts of your cabinets, you need to make sure that the structure can hold their weight.
- Not all types of wood are equally durable. Red oak may be very strong, for example, but something like pine can be pretty soft.
- Changes in humidity and temperature cause wood to contract and expand, which may result in warping.
If this material is your preferred choice but you’re worried about the price tag, an easy way to skirt the high cost of hardwood is by employing a mix of materials. Consider using hardwood for the face frames, doors, and drawer fronts, and medium-density fiberboard or wood veneer parts to strengthen the cabinets and lighten up the cost. Knowing these shortcuts can make your kitchen remodeling journey much easier.
2. Plywood
Another popular cabinet material, plywood offers a host of benefits. It is created by laminating thin layers of wood on top of each other through a mix of glue, heat, and pressure, in alternating directions of grain to make it stronger. Here’s what you need to know about plywood:
Advantages
Here are some benefits of this versatile material:
- Unlike hardwood, plywood resists moisture, it’s also flexible, durable, and easy to install. It’s considered to be the best option by many, if not for entire cabinets, then for sides, backs, shelves, and drawer bottoms.
- Due to its unique construction, plywood has the highest strength-to-weight ratio of all of the best cabinet materials. It is very strong and quite resilient.
- Plywood is easy to repair and replace, and it also withstands drilling better than many other materials. It’s basically a homeowner’s ideal cabinet material.
- In terms of affordability, plywood is highly accessible. It’s much less expensive than hardwood and costs more only when compared to lower-end materials.
Disadvantages
Despite the numerous benefits, there are some drawbacks of plywood that should be considered as well:
- You need to make sure you are using the right thickness of material for each area of the cabinets. Thinner plywood is typically used on cabinet backs, while thicker plywood is used on the sides and drawer bottoms.
- Plywood cabinets may lack consistency. There may be some gaps or holes where the boards were combined, which could make it more difficult to install plywood cabinets.
3. Particleboard
Also known as chipboard or low-density fiberboard (LDF), particleboard is another popular material usually brought up in comparison to plywood. This is an engineered wood product, and it’s made by pressing recycled products such as wood chips and sawmill shavings together to form them into sheets.
Since these sheets alone aren’t particularly good-looking or resilient, particleboard is usually sealed in with wood veneer or laminate for a nicer, better finish. Here are some things to consider:
Advantages
Here’s a summary of the major benefits of particleboard:
- Particleboard is one of the most affordable cabinet material types available for purchase. This is because particleboard is made with scrap materials. If we’re comparing the price of a higher-grade cabinet set made from plywood with medium-grade ones made from particleboard, the cost savings are usually between 10 and 20%.
- If you make sure you’re using a high-quality option, particleboard can be quite sturdy and durable.
- Particleboard is one of the best choices for cabinet and drawer interiors. It’s lightweight, cost-effective, and easy to fit into all the necessary spaces.
Disadvantages
Let’s now take a look at some potential drawbacks:
- Unless you find a very high-quality variation of it, particleboard is not very durable for the most part. Due to its construction, particleboard is generally weak under tension and compression.
- Particleboard is not moisture-friendly and can degrade and discolor if it comes into contact with water.
- If cabinets or drawers are overfilled, cabinet shelves and drawer bottoms made from particleboard can fall victim to sagging.
4. Medium-density fiberboard
If you need a material that falls somewhere between particleboard and plywood when it comes to quality, then medium-density fiberboard (MDF) may be right for you. This is a composite material made from recycled fibers, resin, and wax, pressed together and sealed in a high-pressure system.
MDF became popular due to mainstream IKEA cabinets that feature it, and the smaller size of its wood fibers makes it more resilient than particleboard. Here are some of the notable pros and cons of using it as a cabinet material:
Advantages
Here’s what you need to know about this popular material:
- This material is strong and durable because of its special composition and small fibers.
- MDF resists warping and expansion resulting from changes in moisture or temperature.
- Since the surface of medium-density fiberboard has a smooth finish, it handles painting and staining well.
- MDF offers superior screw-holding power and, as far as cabinet materials go, it’s fairly easy to manipulate.
Disadvantages
In addition to the advantages listed above, there are some drawbacks you should know about before opting for this material:
- MDF is not as strong as other cabinet materials, like plywood or hardwood. It is susceptible to sagging and damage if cabinets and drawers are overloaded.
- Some people have concerns about MDF due to its high formaldehyde emissions, the highest among pressed woods according to the National Kitchen and Bath Association. If you’re worried about materials used in your home, you’ll want to do some extra research before moving forward with this option.
5. Wood veneer
Another option for kitchen cabinet materials is wood veneer, which is a very thin layer of solid hardwood peeled from a log. This type of material has many similar benefits to hardwood, but since it is used in much smaller amounts, it has some other qualities that should be observed.
Another option for kitchen cabinet materials is wood veneer, a very thin layer of solid hardwood peeled from a log. These layers are usually thinner than 2mm and are most commonly used in tandem with other materials. Usually, they come glued and pressed to particle board or fiberboard. This material has many benefits similar to those of hardwood but, since it is used in much smaller amounts, it also comes with some differences. Let’s take a look at them:
Advantages
- Due to its unique structure of materials that feature it, wood veneer allows homeowners to reap the aesthetics and durability of hardwood, but with some additional perks.
- Since it is lightweight yet stable, wood veneer is preferred over other top finishes.
- Wood veneer is also an affordable variation of true hardwood.
Disadvantages
While there aren’t many true disadvantages of wood veneer, keep this in mind:
- Wood veneer is a finish material, so it shouldn’t be used for cabinet interiors (e.g. the box or frame), only for cabinet doors. You will have to choose another material option, such as plywood, particleboard, or MDF to construct the interior of the cabinets.
What are kitchen cabinets made of if not wood?
If you’re not sold on the materials listed above, or if you’d like to exhaust your list of options, here are a few other cabinet materials for you to consider.
1. Laminate
A highly affordable and versatile option, laminate continues to be a popular choice for various kitchen surfaces, from cabinets to countertops and even floors. But similar to wood veneer, laminate isn’t used for cabinetry shelves or drawers – it’s only a good option for kitchen cabinet doors, drawer faces, and only some interior surfaces.
Laminate used for cabinets is made of three layers: a paper base layer, a printed and colored layer, and a protective transparent layer. All of them are saturated with resin and fused together to create a durable cabinet face alternative.
Cabinets made from this material can be quite durable, especially if you opt for a higher-quality option. The price may be higher than that of low-grade options, but they also come with a lower tendency to crack, chip, and scuff.
2. Thermofoil
Another non-wood option for kitchen cabinet materials is thermofoil. Similar to laminate, this material involves a layer being applied to a substrate, in this case – vinyl film.
This material is preferred by many as it mimics the appearance of wood even better than laminate, and comes at an affordable price. Thermofoil finishes are usually white or light in color, which can give your updated kitchen a fresh look. They are durable, less prone to damage, and overall easy to take care of.
Both thermofoil and laminate are affordable options, with an average price of $50 – 75 per linear foot. If you’re on a budget, you have the option to choose particleboard or another affordable option for interiors and use one of these non-wood materials to finish the surfaces.
Final notes
As promised, this was a summary of the best and the most popular materials used for cabinetry. Before you choose your kitchen cabinets, take time to learn as much as you can about these materials. Weigh all options carefully, and see how each fits your budget, design, and functional needs, carefully think about whether you want custom cabinetry or some additional features or improvements.
Which company specializes in quality kitchen remodeling in San Diego?
If you’re looking to transform your kitchen with perfect new or updated cabinets, count on Remodel Works to make it happen. Whether you want to refresh the feel of your space, open up the kitchen to the dining room, or renovate another part of your home, we can make your vision a reality.
Our dedicated professionals have the knowledge and experience to tailor any project to your specific needs and deliver results that exceed your expectations. From downtown San Diego to the farthest corners of the city and beyond, we serve the entire metro area and can help wherever you are. Contact us today to start your dream remodel!
Latest Posts
The Kitchen And Bathroom Countertop Showdown: Quartz, Quartzite, Porcelain, Or Granite?
Kitchen Zones: How To Design A Kitchen Around The Way You Actually Cook
How to Make a Small Kitchen Feel Twice as Large
Get your in-home free estimate today!
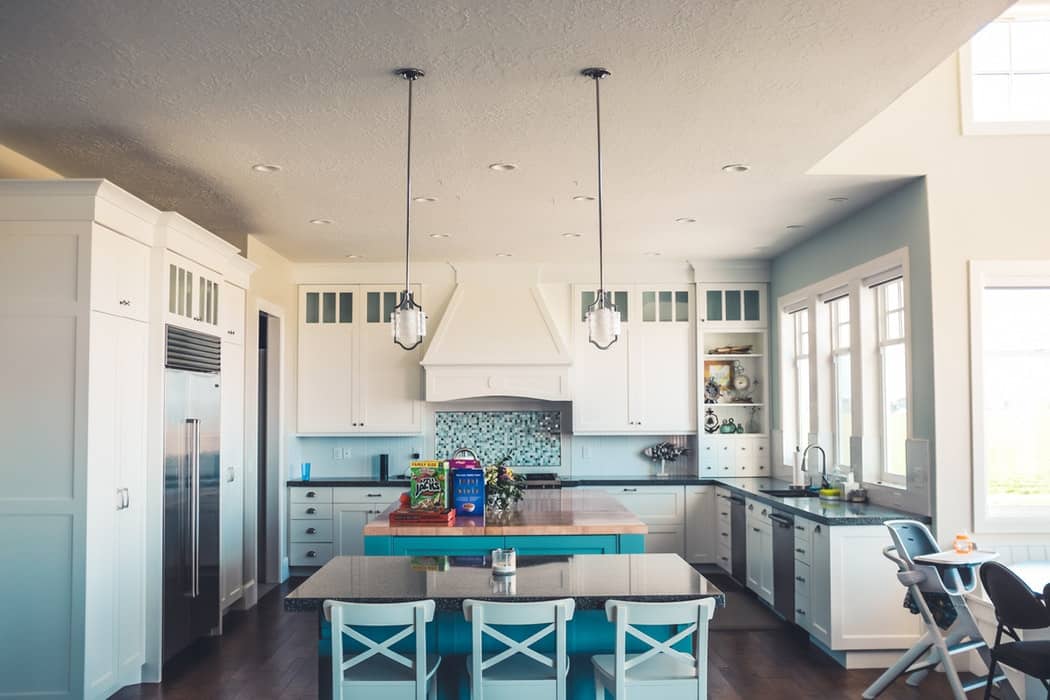
Open kitchens, also called ‘open-concept’, can do wonders to transform your home. And while there are a wide variety of ways to design and execute an open-concept floor plan, perhaps the most popular route is opening up this space to a dining room.
But before you reach out to your kitchen remodelers in San Diego, read on. Below, we’re offering you an in-depth guide for opening up a wall between the kitchen and dining room, as well as an overview of the benefits of making this move.
Should you open the kitchen to the dining room?
Open-concept plans have become wildly popular in recent years, and it’s no wonder why: they do an excellent job at creating more space, improving functionality and flow, and overall enhancing and modernizing the aesthetic of any home. When it comes to which room to open up your cooking area to, the dining room stands as the most popular choice. Here are some reasons why:
1. Modern look & functionality
In the mid-1900s, open-concept homes did not exist. Instead, homeowners and designers opted for multi-roomed homes, where each room had its own specific function. But as time went on and technology improved, designers realized how much more effective the use of space could be in open-concept plans. That’s how open-concept kitchens first came to be.
Today, this layout is used to instantly modernize homes and improve the functionality of their spaces. If you’re interested in a cost-effective solution, you could renovate your existing kitchen by opening it up, though many homeowners also choose to add to their homes instead. Either way, opening up the walls that surround this room and allowing the space to expand beyond it makes the space feel more spacious without the cost of adding more square footage to your home.
2. Better for families
Another reason why more and more homeowners are opening up their cooking areas into dining rooms is the family-friendly factor. Without walls and obstructions between the kitchen and the dining room, parents have a much more kid-friendly sightline. With this layout, mom and dad can more easily keep an eye on kids while preparing meals.
3. Better for entertaining large groups
For a similar reason, this is also a great option for homeowners who enjoy entertaining. From dinners and parties to informal gatherings with friends, open-concept floor plans like this work well with conversation.
There are no awkward walls and doorways to block the view of other family members or guests present, and the open concept facilitates easier traffic patterns with large groups as well. Not to mention, many open-concept kitchens include islands or bar-style countertops, which are great for appetizers and buffet-style dining.
4. Less formal dining space
If you don’t necessarily love the idea of a formal dining space, then this open-concept room combo may be perfect for you. It’s actually a common reason that many homeowners choose this option! With the dining area unseparated by walls and easily accessible, it may become easier for families to get together and share a meal.
5. Purely aesthetic reasons
Perhaps one of the top reasons that homeowners choose this specific open floor plan is its pure aesthetic value. Kitchens open to dining rooms, if designed and crafted well, usually look stunning. Plus, many popular design trends work especially well with this type of layout. For example, exposed shelving and glass cabinets boost visual openness, which can help make the space feel even more spacious.

How to open up a kitchen to the dining room?
Although it’s one of the more common options for open-concept designs, deciding to open up a kitchen to a dining room still presents its own unique set of challenges. Here are some of our top tips for this remodel:
1. Direct traffic away from work areas
One common problem of small culinary areas is that they often have too many circulation routes. This can disrupt the primary activity areas, such as the sink, stovetop, and dishwasher. Meanwhile, dining rooms remain underused.
When you combine cooking and dining areas into one spacious family room, you get a much more efficient space for families. Plus, this helps direct traffic away from those activity areas we mentioned, which maximizes efficiency.
2. Make the new design functional
Yes, looks are important, but if this remodel that you’ve invested a lot of time and money into doesn’t improve the functionality of the space, you will regret it. Your remodeled space needs to feature a proper, working, practical culinary area.
Good architectural design solves functional requirements first and aesthetics second. A good working floor plan allows you to live in your house with ease and comfort.
3. Consider the transition zone
There is more than one way to plan the actual opening from the cooking area to the adjoining space. When you remove a wall, you’ll get a lot of usable space where it once stood. You can emphasize this transition zone with a design element such as an arch, a defining light fixture, or even a change in ceiling height.
Often, these help define these somewhat separate areas within one open space as well as an island or a peninsula. And if you’d like to have a concrete separating element but find those too bulky, a half-wall is a great choice that doesn’t take up as much space.
4. Use cohesive design elements
Since you’re combining two rooms that were once separate, it’s hard to keep them completely design-independent of each other. The best designers will tell you to pick a few cohesive elements and integrate them in all spaces now connected by your open floor plan.
For example, similar colored trimmings or accent colors throughout will create a connected aesthetic and prevent rooms from competing with each other.
5. Define space without walls
Part of what makes linking the kitchen and dining spaces feel natural is that their individual rooms remain defined but open to one another. All great designers will emphasize that good design does not need walls to define space, and this can be tastefully done in any home no matter its age.
There are many ways to define separate spaces without using walls. Some of the most popular examples are wing walls, enlarged openings with pilasters and entablatures, columns, dropped ceilings, and more. In addition, changes in floor materials are another useful way to define space.
6. Integrate more natural light
When planning your open-concept kitchen design, take advantage of exterior walls by adding windows and doors to introduce more daylight into this space. If you add windows or, even better, French doors, you could see the landscaping from the inside too.
Not only will this make the space feel bigger, but it’s also a great way to bring the outdoors inside. Corner windows can be particularly effective for opening up the view, but even if there’s no view, they can noticeably brighten the space and introduce an airy feel to any room.
7. Streamline the entire area
Remodeling to get an open-concept plan should be a process of simplification. If there are any elements or functions in this space that aren’t directly related to preparing or eating meals, you should try to relocate them elsewhere.
For example, many older homes have a pathway or closet space between the kitchen and the backyard. Instead, you could use this space for a laundry. Also, you should see to eliminate, relocate, and group any doorways that disrupt circulation. Here’s a great rule of thumb to follow: Rooms that aren’t related to the kitchen shouldn’t connect to it either.
8. Don’t do it all by yourself
Everyone loves a good DIY project, but don’t make this one of them. A remodel is a tough job even if you’re lightly updating a single room, and now you’re working with two specialized rooms at once. For this project, it’s truly best to enlist the help of a professional.
9. Plan the new design
There are so many design routes you can go with for your open-concept kitchen. While a modern aesthetic will almost always complement open-concept designs, that doesn’t mean it’s your only option.
Take a look at your current kitchen and dining room, and make note of what you like about them design-wise. Do you like the overall style and the material of your kitchen cabinets? Is there a certain lighting fixture you absolutely love? A few antique pieces that add extra character? Choose to build around these elements in your new, open space.
What are the pros and cons of an open kitchen layout?
Like any other design, open floor plans come with their own pros and cons. Let’s explore some of the benefits and potential drawbacks of merging your cooking area and dining room into one open space:
Advantages:
- Potential for upgrading the space: This project will naturally improve the flow and functionality of the two – or more – rooms you decide to connect. There’s also a great potential for improving or customizing the design.
- It’s a great investment move: if you have any plans to sell your home in the near future, this specific remodel will almost certainly help with resale value.
- Wellness-related benefits: There are many potential well-being and health-related advantages of this remodel. For example, it’s a way to bring more natural light into your home, which can positively impact your mood and productivity. The lack of walls can boost social interaction between family members, which can help improve communication.
Disadvantages
While there aren’t many, this option still comes with some potential drawbacks:
- Less privacy: This type of remodel does boost social interaction, but this also makes this new open space less private. Think about this carefully if you are the kind of person that enjoys privacy while cooking, or if you want to be able to get a quiet moment alone in this space.
- More noise: Without any walls to absorb the sound, the entire area can become noisy. If you see this as something that could bother you in the future, weigh your options carefully.
Overall, the benefits outweigh the drawbacks. Despite everything that you need to consider about the process, it isn’t overly difficult. However, it does require thoughtful design and careful planning, tasks that are best handled by professionals.

Who are the most dependable kitchen remodelers in San Diego?
If you’re searching for experts to help you with your open-concept kitchen project, look no further than Remodel Works. We are a team of professionals passionate about transforming residences throughout San Diego County through our tailored, top-quality remodeling services. Whether you’re looking to update, renovate, or build an addition for your home, we have the expertise and dedication to bring your vision to life. Contact us today to start your journey toward a more functional and beautiful home.