
Are you planning to remodel your shower? There are lots of decisions to be made throughout the process of a shower remodel – from the fixtures to the showerhead, to the tile… it can be a lot to decide on! But the value of remodeling a shower is undeniable: according to Home Advisor, a “full bathroom remodel can boost your home’s resale price by 20%,” and a shower remodel is an important element of that equation. Here’s a guide to help you understand common do’s and don’ts for how to remodel a shower.
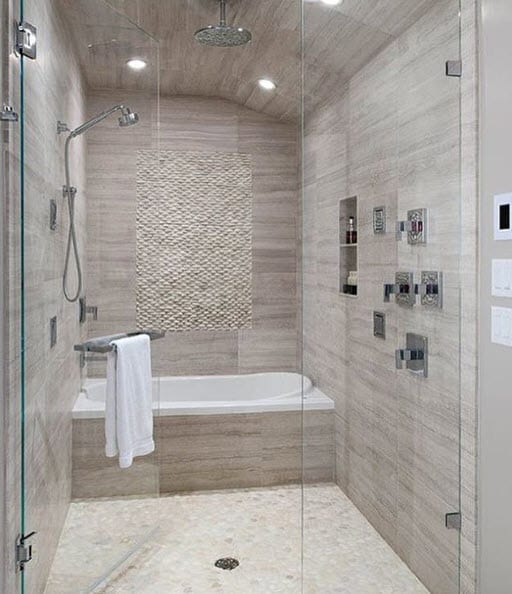
Tips for a Shower Remodel
If you’re overwhelmed by the idea of how to do a shower remodel or are wondering where to start, this guide has you covered. Here is the top “do’s” for your shower renovation.
DO prioritize what’s important to you
As with any remodel, costs add up quickly, and a $1,000 project can easily spiral to the $5,000 range and beyond if you’re not careful. To keep your expenses under control, decide early on in the process what’s important to you. Do you want to invest in some beautiful custom shower tile? Do you want to splurge on the massaging shower-head? What are your priorities? If you can decide on a few items of the remodel that you know you want to prioritize early on, it will help you make realistic, budget-friendly choices on the other components of your shower remodel.
DO have a clear sense of your desired aesthetic going in
Not saying that you need to have every single detail of your new shower decided before you begin your renovation, but you should at least have a sense of the style and aesthetic you want. For example, do you want a classic, clean look? Do you want something more striking? Do you want a variety of colors (if so, what colors?)
A great way to decide on aesthetics that you like (and rule out ones that you don’t) is by spending some time on visual inspiration sites like Pinterest or Houzz. You may not be able to envision your perfect bathroom on your own (don’t worry – most people can’t!). However, looking at pins and images of shower designs will help you get a sense of what you like, research popular bathroom and shower remodel trends, and decide what you can imagine going into your new shower.
DO consider working with a professional
You will definitely need to hire some contractors and specialists to help you execute your shower remodel project, but if you’re really not sure what aesthetic would work best in your existing bathroom space, even after looking at some visual inspiration sites, you can always work with a consultant or a bathroom remodel specialist to help give you some direction. They do this type of work for a living and will be able to give you a professional opinion on what will work best in your space.
In addition, when you’re scouting for contractors and other professionals to help you with your renovation, don’t be afraid to ask around and get quotes from a variety of candidates. This is an easy way to make sure you’re getting the quality of work that you want and not over-paying for remodeling services.
DO pick a shower style you like
In addition to having a sense of your general aesthetic for your shower, you should have a specific style decided upon for when you start selecting materials.
“Farmhouse” is a style that has definitely grown in popularity amongst homeowners in recent years. This style can be applied to your bathroom or shower remodel with a few simple touches. For example, combining wood (usually a distressed looking wood – luxury vinyl plank flooring, a popular bathroom floor type – would be a great option here) and rustic metal fixtures are classic farmhouse elements. For tile in the farmhouse style, you can use hexagonal tile in black or white, subway tile in black or white, or tile that looks like concrete or wood (Cherished Bliss). You can also add charming touches – like a unique sign or rustic lighting fixture to complete the look of your farmhouse shower remodel.
“Modern” showers are always popular, and there are so many different ways to go about them. For example, a seamless shower (where doors extend seamlessly up to the ceiling and provide complete visibility through the absence of any sort of hanging rod or shower curtain) is a strikingly modern approach to shower remodeling. Sticking to a neutral color palette is the easiest way to help you achieve a modern, clean look in your shower remodel.
A fun twist on the modern style is “industrial.” To embrace the industrial style in your bathroom, lean on metals and an unfinished/exposed look to anchor the aesthetic. You can also do something more drastic with your shower, like this black steel-framed floor-to-ceiling shower enclosure.
If you want to create a truly luxurious looking setup for your shower remodel, that makes you feel like you’re in your own personal spa, then opt for marble or porcelain tile, which immediately creates a luxurious vibe. Or, use elements of nature to create a natural-inspired spa setting in your dream shower renovation. One of the best ways to do this is by using tile that resembles natural materials – like tile that looks like natural stone – to create a relaxing setting every time you step into your new shower.
DO think outside the box with fixtures
It used to be that when it came to bathroom and shower fixtures, you had very limited options: some form of metal or brushed metal, and little design variation. Today, there are so many different types of fun fixtures you can install in your bathroom! You can choose a showerhead with a funky shape, or even upgrade your shower or sink faucet handles to a fun shade of rose gold.
Just remember: you likely want to have some sense of consistency between the fixtures in your bathroom. So, the shower handles should correlate with the sink faucet handles, and maybe the towel bars, too. Don’t go crazy with shower fixtures without considering the other fixtures in your bathroom to ensure the entire room ties together well.
DO use the existing pipe setup
Another must-do as you are planning the details of your shower remodel is to resist the urge to move your shower set up to another spot in your bathroom. It’s always better to use existing piping. It makes for a much easier job, and you will save a lot of money by working within your existing pipe setup. According to home designer Justin Riordan, it costs “about $5,000 each time you move plumbing fixtures.” That kind of money could cover 1-2 shower remodels on its own!
Things to Avoid During a Shower Remodel
Now that we’ve covered some of the steps you should definitely take during the shower remodel process, it’s important to also share things to avoid to make sure your renovation goes as smoothly as possible. Here are some “don’ts” that you should be aware of when it comes to how to do a shower remodel.
DON’T assume your bathroom remodel is a DIY project
While it can be fun and rewarding to complete repair and remodel projects within your own home, you need to consider carefully before moving forward with your shower remodel on your own. Depending on the kind of work you want to be done, it almost always makes sense to hire a professional. Especially if you want to install any sort of intricate tile setup, if you are doing any significant plumbing modifications, or if you have never done any home renovation work before, your bathroom remodel is not going to be a good time to start.
DON’T forget the lighting
When you think about a shower remodel, there are several components that immediately come to mind: the floor and wall tile, the showerhead, the shower curtain, and door. But one element that people don’t often think of right away is the shower lighting. And yet lighting can play such a big role in improving safety in your bathroom, refining the aesthetic of your remodel and providing a finishing touch.
It’s likely that the lighting installed in your shower and bathroom right now is what came with the original house, maybe even builder-grade lighting. These fixtures are functional, but aren’t pretty to look at, nor do they do you any favors when you’re looking in the mirror. This is why remembering to factor in lighting can be such a game-changing element of your shower remodel. According to HGTV, adding lots of light to a bathroom is one of the most valuable changes a homeowner can make. And, these lighting upgrades don’t have to be expensive! You can easily find quality fixtures and bulbs at local home improvement stores.
Another cool lighting upgrade to make during your shower remodel is adding in a dimmer switch. Especially if your new shower is a tub and shower combination piece, being able to dim the lights while you take a relaxing bath in your tub is a nice touch.
If your bathroom is situated near the roof of your home or connected to an outer wall, you can choose to make more of a drastic lighting upgrade by knocking out a new window or even a skylight. Nothing beats natural light when it comes to light quality, and this will make your bathroom look bigger and brighter on its own. Plus, installing a skylight over your shower gives you the experience that you’re showering under the stars at night, which is a very freeing sensation.
DON’T shy away from color
While white bathrooms used to be the traditional norm, nowadays bathrooms are more colorful than ever! Navy blue bathrooms exploded in the last year, and more and more homeowners are gravitating towards color in their showers and bathrooms.
And that doesn’t mean you have to paint your bathroom bright blue from top to bottom. You can use colored paint as an accent, or work in color in other ways: a bright pop of tile in a shower shelf, a painted wall above the shower, or even a white and colored tile pattern can help add some more dimension to your shower remodel. A favorite option is to add an accent tile wall in your shower that draws the eye, and can even make your bathroom look bigger.
DON’T assume “it will all just come together”
You absolutely must have a plan going into your shower remodel. If you go into the process without a plan, you’ll definitely end up spending more money than you need to, taking more time than is necessary, and will likely have some frustrated contractors and family members on your hands.
Do your due diligence and work closely with your remodel team (which may include designers, architects, and contractors) to define the remodel style, the budget, and set a timeline for the project. This will make sure that everyone is on the same page at the start of the project, and minimize miscommunications and unrealistic expectations.
Also, don’t be afraid to be a part of the process. Yes, you’ve hired these people to be the experts at what they do, and create your perfect shower remodel, but if you don’t understand something, or if you’re not comfortable with development during the remodel, speak up. Yes, your contractor might not be happy if you decide you don’t like the tile once they’ve started installing it, and yes, you might have to pay extra costs to re-do it, but at the end of the day, you being completely satisfied with your new shower and your home is what matters the most.
It’s important that remodeling your shower should be a fun and rewarding process. And it can be with the right preparation and education. Do the work up front to make sure you are clear on style, budget, and intention, and you will enjoy a relatively stress-free remodel process, with a finished product that you absolutely love.

Latest Posts
The Kitchen And Bathroom Countertop Showdown: Quartz, Quartzite, Porcelain, Or Granite?
Kitchen Zones: How To Design A Kitchen Around The Way You Actually Cook
How to Make a Small Kitchen Feel Twice as Large
Get your in-home free estimate today!

An important element of any shower is the tile. Not only is the tile functional – it keeps from slipping while you use your shower – but it also is a key aesthetic piece that helps to create your shower and bathroom overall look and feel. If you’re planning to remodel your shower, taking time to research different types of shower tiles is one of the best ways to make sure you end up with a finished product that you absolutely love. Here are 16 shower tile design ideas to help you get started.
Subway Tile
Subway tile has risen in popularity in recent years, and become a staple of the trendy “farmhouse” style. It’s surely one of the most versatile options out there as far as tile goes, and even though it’s trendy, it still has a timeless look and feel. White is definitely the most popular subway tile option, but black is popular as well, and you can certainly find several other colored subway tiles, including blue, grey, and darker hues. Since subway tiles are simple, you can easily adjust the way you lay them to create your desired look. Mix things up by changing up the layout of the tile: either aligning it in a stacked pattern, offset, or even diagonal (Tile Shop)
To create a unique big-city look by using subway tile, consider using classic white subway tile, but grouting with a dark, black filler. This creates a chic finish that is nicely complemented by matte black accent and industrial accessories.
Hexagonal Tile
Use of hexagonal shower tiles is another bathroom trend that is popping up in showers (and kitchens, and bedrooms, and restaurants) all over the place. Hexagonal shower tiles are available in a variety of sizes and colors, and you can also find them in cascading colors (over a gradient), which will help create a sense of dimension and depth in your shower design. And although hexagonal tiles are highly trendy right now, it’s safe to assume that this trend isn’t going anywhere!
Baroque Tiles
If you like the intricate shape of hexagonal tiles, but want to venture further down the path of an intricate tile design, then baroque tiles may be exactly what you’re looking for. Baroque tiles are hallmarked by curved edges that are both feminine and powerful. You can access this aesthetic by using tiles in the shape of baroque patterns or using square tiles that are painted with these intricate shapes. Either way, they create a sophisticated, memorable look and work great as an accent tile.
Geometric Tiles
Another fun way to employ unique shapes in your shower remodel is by using unique geometric tiles. This creates a modern, almost futuristic vibe in any bathroom, and is well complemented by strong colors and lots of modern lines. If you want to create a bathroom like none of your guests have ever seen, the use of geometric tiles will certainly help you achieve this goal!
Glass Mosaic Accent Tiles
If you like the idea of a classic white tiled-shower, but want to intersperse some color, a great way to do that is through the use of glass mosaic accent tiles. Glass mosaic accent tiles come in a variety of colors, shapes and styles, so no matter what you’re looking for, you’ll be able to find something that fits your design and budget.
If you’re looking to create any sort of accent wall or pop of color, using glass mosaic tile is one of your best choices to do so. Simply use some colorful glass mosaic tiles to add a colored strip to your shower, or even a recessed shelf lining.
Using glass mosaic tile is also great because they come with colors already paired together that you know you love. If you choose to create a custom tile display, you will have to go through the process of setting a color scheme, choosing individual tiles, and making sure everything works together. When you opt for glass mosaic tiles, much of this work is already taken care of. This is a big reason why glass mosaic tiles are so popular and can be found at pretty much any home improvement store (Tile Shop).
Marble-Style Tiles
If you like the luxurious look of marble, you can easily incorporate it into your shower design with marble-style shower tiles. These tiles present the classic Grecian appearance of marble, to give your shower a classic look, but convey wealth and power. While you can find tile made of actual marble if you want, you can also easily find stone or mosaic tiles with a marble-like appearance for a much lower cost at your local home improvement store. Stone tiles that are manipulated to look like marble through screen printing are actually better for bathrooms since marble is notoriously slippery for tile floors. Actual marble is also highly absorbent and susceptible to staining, which are all less-than-ideal qualities for a room of your home that is frequently exposed to water.
Natural Stone Tiles
If you love the outdoors and want to bring the beauty of nature into your bathroom, then consider using natural stone tiles in your shower for the walls or floor. Stone tiles can be found in a variety of sizes and finishes, from large grey stone to smaller, mismatched pebbles inlaid in cement. Natural stone tiles are great for creating a calming bathroom aesthetic that evokes a day at the spa. And who wouldn’t want to have their very own spa at home?
Faux-Wood Tiles
If you love the aesthetic of wood planking and want to find a way to work it into your shower design, then faux-wood tiles are a great option for you. Although they are designed to look like wood, faux-wood tiles are usually made from porcelain (one of the most popular materials for tiles in any bathroom remodel). Like many of the faux-laminate and vinyl flooring options available today, faux wood tiles also come in a variety of colors and wood finishes. You can find a lighter wood that emulates bamboo, or a darker wood that creates a richer tone in your overall bathroom landscape.
Faux-Brick Tiles
If you want to create a rustic vibe and create a truly unique shower, then faux-brick tiles can help you achieve that aesthetic. Brick tiles aren’t made of actual brick, but rather, typically made from clay, porcelain and stone and then visually manipulated to look like brick. Especially when paired with wood-modeled walls and floors (like in this beautiful example from Home BNC), brick tiles are perfect for creating a cozy, cabin-like aesthetic that you can’t help but relax in.
Cement Tiles
Cement tiles have become extremely popular in recent years for shower floors and walls, both in homes, as well as in commercial spaces. When used as shower tile, cement pieces offer a unique texture to see and feel, and can really be leveraged to create a bathroom that wows both your family and your guests.
Cement tiles also offer the benefits of being highly durable, as well as water resistant: both necessary qualities for bathroom and shower tiles. In addition, cement tiles provide a smooth finish without being slippery. Tiles made from cement offer the benefit of not being “slick like other glazed tiles and often come in a matte finish which won’t become a slip and slide when wet” (Granada Tile).
One way to employ cement tiles in your shower design is to use them in their natural state, and in colors like gray, beige, and muted red. Especially if you are looking to create a rustic aesthetic, or like the look of raw materials (maybe in an industrial setting), then natural cement tiles will be a great choice for you.
Scandinavian-Style Tiles
Scandinavian-style bathrooms have become increasingly sought-after in the United States over the last decade, and it’s easy to see why. These bathrooms are the pinnacle of simplicity, comfort, and functionality. If you’re intrigued by the idea of Scandinavian design, you can use it in your shower tile design by opting for natural wood tones and clean lines.
In addition, the imagery of the dark Scandinavian bathroom has taken Pinterest boards by storm. A great way to achieve this is by tiling your shower with bright white subway tiles, stacked on top of each other in vertical lines, and setting this bright shower against a darker-toned painted wall, in dark grey or even navy blue. Complete the look with rustic wood accents.
European or Country French Tiles
Another way to utilize European-inspired accents in your shower remodel is through the use of patterned blue tiles that hearken to the ever-popular country French style. The use of blue in your decor color scheme always provides a calming effect, and classic blue and white patterned tiles offer an understated elegance that elevates the style of any shower or bathroom.
Mermaid-Style Tiles
If you live near the beach or have a deep love of all things related to the ocean, then mermaid-style tiles (or Moroccan fish scales) may be your perfect shower tile option. This tile design is designed to mimic the tail of a mermaid, and instantly creates a unique look in any shower or bathroom. Since this pattern can be quite striking on its own, it’s best used as accent tile for a wall or a shelf inset. Pair a brightly colored mermaid tile accent wall with classic white surrounding tile walls to create a perfect oceanic bathroom aesthetic.
If a mermaid-tile is a little too in-your-face, but you still want to achieve an oceanic-inspired design for your shower, consider using shell tile, where bits of real or manufactured shell are inlaid into cement. You’ll feel like you’re standing on the beach every time you take a shower!
Ombre Tiles
Another way to make a statement with your shower tile is by creating an ombre-style design, with different shades of the same color family cascading down your shower wall. You can achieve this effect by seeking out small tiles in either mosaic glass or porcelain and in complementary shades in the same color family. Enlist the help of a tiling professional to create your perfect ombre accent wall, and design a truly unique shower.
Black and White Tiles
Black and white is a classic option for bathroom and shower floors. There are so many different ways these two different colored tiles can be strung together. You can use this color combination to create a distinctive “retro” look or arrange the tiles so that they mimic a classic Roman bathhouse floor, like in this example. Even if you want to use colorful walls or other accents in your bathroom, black and white tiles provide the perfect anchoring color scheme for almost any style. Bottom line: you can’t go wrong with black and white shower tiles.
Large Tiles
Finally, if you’re going for ease of installation (and ease of cleaning), one of your best options for shower tiles is going to be large format tiles. You can find these in a variety of shapes, although square and rectangular tiles are the most popular. There are so many benefits to using large tiles in your shower. For starters, they can easily cover large areas, so they are a great choice for large, master bathrooms. Plus, the larger tile sizes offer the illusion of making a small space look bigger than it is (Tile Shop).
A popular way of tiling a shower with large-format tiles is to opt for large, classic rectangular tiles, and stack them in direct lines, one on top of the other. It’s a subtle shift away from the usual way that tile is laid, so it draws the eye and makes a statement, but not in an overt way.
These are just a few suggestions to get you started as you start to think about remodeling your shower, and which different types of shower tiles best fit your ideal design and style. Take your time to select shower tiles that speak to you, and don’t be afraid to try something unique! The only necessary requirement is that you absolutely love the final product.
Latest Posts
The Kitchen And Bathroom Countertop Showdown: Quartz, Quartzite, Porcelain, Or Granite?
Kitchen Zones: How To Design A Kitchen Around The Way You Actually Cook
How to Make a Small Kitchen Feel Twice as Large
Get your in-home free estimate today!
There are many reasons to add a bonus room to your house. The addition of a bonus room helps to increase square footage and property value, makes living space for additional family members, provides additional storage space, and gives your home some new life. But regardless of why you’re choosing to add a bonus room to your house, one thing is certain: it will be a significant investment in your future and the future of your home, with a significant associated cost. If you’re wondering “how much does a bonus room cost,” read on.
Average Cost of Adding a Bonus Room to Your House
Like any major home improvement, the costs of home extensions are significant. Based on the most recent data, the national average cost for building a home addition or extensions is about $42,000, with the range extending from $21,000-$65,000.
Some extensions on the smaller scale, and in which there was a setup primed for new construction, have been reported to have cost less than $10,000.
At a minimum, you should expect that adding a bonus room will cost at least $15,000-$20,000, but you should expect to spend more than the minimum, especially depending on the size of your addition.
Factors that Affect the Cost of Adding a Bonus Room
Of course, there are many individual factors that affect the cost of adding a bonus room that can sway this average number up or down.
Probably the biggest factor is the size of your bonus room, specifically square footage. According to Salter Spiral Stair, the approximate cost of adding a bonus room (specifically over your garage) is approximately $350 per square foot. So, the more square footage you want to add, the more you can expect your bonus room to cost
Another factor that impacts how much your bonus room will cost is the materials that you decide to use. There are standard materials that will have to be used as part of almost every bonus room addition project, such as insulation and standard building materials. But costs can creep up depending on how you decide to decorate and furnish your finished room. For example, what kind of flooring will you be using? What quality of paint and primer would you like to see on the walls? Are you going to adding baseboards? Crown molding? Any finishing touches? All these details can add up quickly to contribute to the overall cost of your bonus room.
In addition, the existing condition of your additional space will also play a role in how much your bonus room costs. For instance, if your addition requires you to make structural changes to the existing frame of your house, and the area where the bonus room will be built off of, then you can expect to pay more for those adjustments.
Lastly, you will have to pay for contractors and a team of specialists to help you complete the installation and construction of your bonus room. There are many projects that can fall into “DIY” territory, but adding a bonus room to your home is definitely not one of them. When it comes to making long-term adjustments to your home, and making a significant investment in your future, you’re going to want to choose a team of experts to help you get the job done well.
How to Save Money On Your Bonus Room Addition
Bonus rooms can cost at least $10,000-$20,000, and probably more, depending on the factors mentioned above. However, there are steps that you can take to keep costs down and work within the budget that you have set.
First of all, when it comes to deciding where and how to build your bonus room, your most cost-efficient option is going to be to work within the space that you already have. A great way to do this is by building “up” instead of “out,” meaning building your addition on top of the existing space of your home, like above the garage, or another room of your home that can easily withstand building on top of. If you’re able to work with your home’s existing structure, you will save yourself unnecessary costs.
Secondly, another place where you can save costs is by getting a quote from different contractors before beginning work. It pays (quite literally) to shop around, so ask friends and family for their recommendations, do your research, and make some inquiries. It doesn’t hurt to get quotes from a number of different building companies. That’s one of the best ways to ensure you aren’t overpaying for labor.
In addition, once you get to the stage of selecting materials, you can save costs by taking the time to research and price out different material options, instead of just going with the first ones you find. The great news about any home renovation, improvement, or addition project is that there’s no shortage of materials for you to choose from. And today, manufacturers are able to create affordable decor and design elements that resemble high-end products, but at a much more budget-friendly price. Either way, it’s a good rule of thumb to have more than one option for each material your new bonus room will need (like flooring, paint, finishes, etc). That way, if something unexpected happens during construction, you already have a backup option selected that you like, and you can still feel confident that you are creating the bonus room of your dreams.
How Much Value Does a Bonus Room Add to a House?
Another big question that homeowners have as they begin the deliberation process of whether or not they should add a bonus room to their house is how much value will it add? Whether you’re looking at your bonus room addition as an investment, or you’re planning to add the room to improve resale or rental value, these numbers are important.
Generally, the addition of square footage will pretty much always add value to a home. On average, you can expect your bonus room to add anywhere from $10,000 to $30,000 in monetary value to your home, although it is very hard to put an official number on this quality since the market is always changing and every home is different. As a rule of thumb, if it adds value for you, it will add value for someone else.
Specifically with rentals, if you are able to add on another full bedroom (and a bathroom too), then you will see the desirability of your property go way up in the market, and you can end up charging tenants more.
Options for Adding a Bonus Room to Your House
Depending on where you decide to add on your bonus room to your home, the costs may vary slightly. Here are some of the most popular options for adding a bonus room to your house.
Adding a Bonus Room Above the Garage
If your home has a single-level garage, then one of the best places to add your bonus room is above as a garage addition. This way, you don’t have to worry about finding new land on your property to build on, since you’ll be building up and not out. Over-the-garage additions also have a positive impact on the desirability, curb appeal, and value of your home. A typical two-car garage is about 24 feet by 24 feet, or bigger, so adding a nicely finished garage bonus room can greatly improve not only the aesthetic but also the home’s resale value.
Adding a Bonus Room Above an Existing Bedroom or Room
Building up is always a great option, and if you build on top of an existing bedroom or family room, even better. This provides a unique opportunity to connect rooms by installing a fun staircase, which is always a striking feature of any home!
One of the only downsides of building your bonus room on top of an existing area of your home is that it may temporarily displace residents. Unlike building a bonus room above a garage (where people aren’t spending time during the day), building a bonus room above a more lived-in area of your home may create more disruption throughout the renovation period. But a short term discomfort can be well-worth the long-term value of your new home addition, and the joy it brings you and your family.
Adding a Bonus Room As a “Build Out”
Another way that you can choose to add a bonus room to your home is by “building out” from your existing home’s perimeter onto your land. There may be a part of your land that lends itself naturally to this, whether there’s already cleared space to build onto and a room that would flow naturally into another, new room.
However, this option can be much trickier than “building up.” For starters, you need to make sure that you have the space to build onto. If your surrounding lawn and property aren’t that big, then this will immediately present a problem. There are also external factors to worry about – any time you decide to expand the current perimeter of your home, realize that there may be other agencies that need to get involved. For example, depending on where you live, there may be restrictions for the property you aren’t aware of, or the city where you live might require a building permit. If you do decide to build out for your addition, you should absolutely do this research ahead of time to prevent any unnecessary headache.
Adding a Bonus Room As a Detached Unit
A final way that you could add a bonus room to your home is as a completely detached unit – like a “granny flat” or even a “she shed.” These are truly unique ways to expand the square footage of your property, while also creating an opportunity for rental property, or maybe a new home office (and a potential tax write-off).
This option can be truly valuable to your family (for visiting guests and older family members to have their own space), but it’s also one of the most expensive ways to add a bonus room or unit to your home. Typically “granny flats” serve as tiny houses, with their own amenities, including a kitchen and bathroom, so you would be paying for new plumbing, electrical wiring, and other structural must-haves as part of this construction. But, if it serves your family and your needs, creating a detached unit “granny flat”-style bonus room can be a great move in the long-term.
Another option is to create a detached unit more in line with the setup of a “she shed,” which is basically a single room hideaway equipped with furniture, a desk, or even a daybed – whatever fits the needs of the intended occupant for space. Whether it be a small home office, living area or small extra bedroom, a she-shed serves a great purpose. She-sheds (the female equivalent of the “man cave”) have skyrocketed in popularity in recent years as an outlet for women who work from their homes or need a space of their own.
As you can see, there are significant initial costs associated with adding a bonus room to your home, but with the right strategy, not only can you keep costs down, but you can also expect to see a sizable return on investment from your project.
Latest Posts
The Kitchen And Bathroom Countertop Showdown: Quartz, Quartzite, Porcelain, Or Granite?
Kitchen Zones: How To Design A Kitchen Around The Way You Actually Cook
How to Make a Small Kitchen Feel Twice as Large
Get your in-home free estimate today!

Your home is one of your largest investments. And, like any investment, it needs to be taken care of. But, a home is a big project- where do you start? And how can you make sure you’re doing the right things, year in and year out, to keep your home in tip-top shape? Here’s a home maintenance checklist to help you take care of every part of your home throughout the year.
Interior Home Maintenance
You see the inside of your home a lot more than you see the outside of your home, so this is where your checklist of maintenance tasks begins. Here are the major components of your home interior that need to be maintained, and how often you should be checking up on them.
Circulation Maintenance
One of the important systems to keep an eye on is your home’s HVAC (heating, ventilation and air conditioning) system. You should be inspecting your HVAC filter on a monthly to bi-monthly basis – this frequency can vary depending on the size of your home and how often you clean and vacuum up dust. Minor HVAC updates are easy, but replacements are a pain, so staying on top of maintenance for your HVAC system is crucial for the overall health of your home (and your budget). After inspecting your HVAC filter, if you find that it’s dirty, you can replace it with a relatively inexpensive one. If your filter is clean, then you’re good for another month.
Speaking of heating – if you live in an area where winters are particularly brutal, make sure you are doing seasonal home maintenance services on your heating system and preparing it for winter. These can cost an arm and a leg. You should get your furnace serviced and/or inspected at least every other year. Making sure that your furnace filter is clean and removing dust build-up, will help ensure your home is using heat as efficiently as possible. You can also take the easy step of making sure that both heating and AC vents are never blocked, which can be a safety hazard, especially in their peak seasons of use. And if your home has a chimney, you’ll want to make sure that that is seasonally inspected for safety as well, whether you are using it regularly or not.
Like your HVAC system, your water line is also an important element of your home that you need to keep an eye on. For the most part, your water line itself shouldn’t give you much trouble, but it’s in your home’s best interests to make sure that you are checking your water heater pressure relief valve, at least twice a year. This will help your heater run more efficiently (which will help you keep your energy bill at a healthy level), as well as prevent mineral and corrosion buildup, and help protect against leaks (Art of Manliness).
Overall, one of the best things you can do for your home is to keep it clean. Regularly cleaning and not letting dust, grime, and dirt build up over time will benefit the health of your home, as well as the people living in it! Aim to vacuum and sweep floors on a weekly basis to prevent the buildup of dust, and dust walls, windows and other nooks and crannies at least monthly.
Kitchen Maintenance
There are a few high priority areas in your kitchen that you need to maintain regularly for a healthy home. For example, anything related to the sink and plumbing is important to stay on top of. The last thing you want is a leak or inefficient drainage that leads to a damaging pipe flood (even a tiny leak can cause a ton of water damage!)
Stay on top of your sink maintenance by frequently cleaning out the garbage disposal (beyond just “running it”). One of the best ways to do this, according to Art of Manliness, is with vinegar ice cubes; “put some vinegar in an ice tray and let it freeze, then run the ice cubes through the disposal.” The vinegar keeps your garbage disposal fresh and also sharpens the blades to help with future draining. Flushing with hot water and baking soda is another popular disposal-cleaning option.
One to two times a year, clean the kitchen exhaust fan, or range hood filter. Or if your kitchen exhaust fan is getting a lot of use, you may want to upgrade this timeline to quarterly. The best way to clean a greasy range hood and filter is by using a cleaner/degreaser like “Super Clean.” Simply spray the product on the filter and let it sit for about five minutes before rinsing. This video offers a great tutorial.
If you’ve had your home for a few years, or certain appliances and structures are especially dated, it may be a better use of your time and money consider upgrading and remodeling your kitchen versus doing continual maintenance on a sink, or cabinet set up that you don’t love anymore.
Bathroom Maintenance
The bathrooms are the workhorse of your home – they are subjected to water, wear and tear, often on a daily basis. So, it’s important that you keep up regular maintenance in your bathrooms to prevent long-term water damage.
Make sure that bathrooms and commonly used areas are wiped up and disinfected often – weekly is a good goal. This includes the sink and other fixtures where water can accumulate and leave grime. Inspect grout and tile in these areas and repair it as needed to make sure that sealants are working properly, and keeping water out of unwanted areas. Take a good look at your tubs and sinks for stubborn debris and make sure drains are un-clogged on a monthly basis.
Leaks are a homeowner’s worst nightmare, so on a yearly basis, you should be checking toilets and faucets for any small leaks. In general, anything related to plumbing and water circulation in your home should be checked fairly regularly. For example, checking the water softener, cleaning faucet aerators and shower heads to remove mineral deposits, and unclogging any drains should be done on a monthly to bi-monthly basis, according to Better Homes & Gardens.
If you live in a home with multiple bathrooms, some of which you may not use regularly (like a guest bathroom), it’s important to make sure you’re still running water and flushing the toilets in these bathrooms every so often to prevent build-up and grime. Quarterly should work fine for most of these cases.
Window Maintenance
While windows technically appear on both the exterior and the interior of the house, they are of great importance to your interior home quality of life, as well as to increasing the resale value of your home. If you are looking to sell your home, then upgrading or updating your windows can be a great move. In addition, making sure windows are working effectively (keeping out/in air, noise, and unwanted pests) is of utmost importance to the health of your home.
Be sure to inspect your windows every six months or so, including window screens. Damaged window screens should be replaced quickly to prevent further issues. And any leaks should be sealed by caulking or weather stripping.
Exterior Home Maintenance
The exterior of your home is equally as important as the interior of your home. Not only does your home’s exterior provide curb appeal, but it also provides protection of your home’s interior from the elements! Here are some home maintenance tips for the exterior of your home.
On a yearly basis (usually in the summer is recommended), take a good look at the exterior of your house, including the paint, the siding, the roofing, and other details (like the doors and windows). Make note of cosmetic improvements that may need to be made, like paint chips, as well as more serious potential issues, like cracks in the foundation of your home. Repair these serious issues in a timely manner.
Summer is the best time of year to make improvements to your home’s exterior. If you have a deck or other outdoor area that’s gotten particularly dirty, summer is a perfect time to rent or employ a power washer to make that deck shine again. You can also power wash the exterior of your home to make it look sparkling bright again (depending on material). And if anything needs repainting or retouching, summer is the time to do it.
Another great task for the summer is cleaning out your gutters and downspouts – although depending on where you live and the weather, this may need to be a quarterly task. Winter and fall can be especially tough on gutters since snow, leaves and other debris tends to accumulate during these cold weather months. Don’t let this material settle into your gutters, and ensure regular maintenance by cleaning it out every couple months.
Speaking of water direction, especially if you live in an area that gets a lot of annual rain, it’s important to stay on top of the prevalence of standing water near your home. All houses and landscapes are ideally constructed in a way in which rainwater flows away from (not towards the house). As a result of this design, puddles caused by rainwater should disappear over the course of 24 hours. If they do not, then you may have a grading issue, which can be resolved in a number of ways. The important thing is to resolve it so your home does not develop drainage problems.
Landscaping Maintenance
Landscaping should also be assessed on a biannual-to-yearly basis. Especially if you have trees surrounding your home, make sure that roots are not growing invasively, or branches are not hanging in a potentially hazardous way. As trees grow, it’s common that they will continue to impede on surrounding territory, which may include power lines, neighboring property and more. If you have especially tall trees, trim unsafe branches often to prevent accidents from a sudden fall, which can happen often during summer rainstorms and other inclement weather.
In addition, use ideal seasons to maintain and nurture your greenery. In the spring, rake up any leftover leaves from the winter, and laying down mulch in any flowerbed and other garden areas. This is a crucial step, since “a thin layer of mulch will protect plants from drought and keep weeds at bay,” according to the New York Times. Spring is also the perfect time to do any maintenance and improvement to your lawn itself, like if it needs reseeding or some extra watering treatment.
Safety Maintenance
Finally, you should make sure that your home safety measures are up to date. These can be the first line of defense in protecting your home from a major accident or hazard.
So, make sure that you first have carbon monoxide and smoke detectors installed in your home. The National Fire Protection Association recommends that you have at least one smoke detector installed “inside every bedroom, outside each sleeping area and on every level of the home, including the basement.” Carbon monoxide detectors should follow the same rules; you should at least have one on every floor of the house.
Test these detectors quarterly. Most carbon monoxide and smoke detectors have a “test” button installed that you can press to make sure they’re working properly. If you find that they’re not (although most detectors will let you know when their batteries are low), simply replace the batteries and test again.
You should also make sure your home has at least one fire extinguisher on the premises, and that it is in working condition. Most fire extinguishers last 5-15 years, and they almost always have a listed expiration date that you should check annually to ensure that your fire extinguisher is still functional and can aid you in case of emergency.
With this checklist of maintenance tasks, you should be armed with all the information you need to keep your house in good condition and safe, both on the inside and the outside. If you take care of your house, it will take care of you for years and years to come.
Latest Posts
The Kitchen And Bathroom Countertop Showdown: Quartz, Quartzite, Porcelain, Or Granite?
Kitchen Zones: How To Design A Kitchen Around The Way You Actually Cook
How to Make a Small Kitchen Feel Twice as Large
Get your in-home free estimate today!

Whether your home has a basement and you’re looking to install new flooring, or you’re looking to add a new basement onto your home, the type of flooring you choose is important! Basements have a very unique set of elements that they deal with, including moisture and extreme temperatures, and flooring needs to be able to stand up to all of them. Here’s an overview of the best types of flooring for basements to help guide your decision-making process.

Carpet
One of the most historically popular flooring materials for basements is carpet. According to the National Association of Home Builders, “more than 28% of basement floors in newly built homes are finished with carpeting.” Here are the pros and cons of using carpeting in your basement.
Pros of Carpet Floors in Basements
Here are some of the major benefits of choosing carpet for your basement flooring.
Warm Underfoot: The obvious benefit of using carpet in the basement is the warmth. Since basements are located underneath your house and underground, they’re more susceptible to cool temperatures, which can mean cold floors. Carpeting helps to provide a buffer against these cold temperatures, by insulating the room from the ground up, and also keep the ground warm underfoot. If you opt for carpeting your basement floor, you can usually get away without needing any sort of radiant heating, which also helps with cost-savings.
Cost-Efficient: As far as costs go, carpeting is one of the cheapest options out there for full coverage of your basement space. But this varies greatly depending on the style and thickness of the carpet. Standard low-pile carpets are highly cost-efficient, but if you upgrade to thicker carpeting, you can expect to pay a lot more.
Great for Kids: If you have young children that you expect to spend a lot of time in the basement, carpeting is a safe bet, since it’s naturally cushioned. Especially if your children are at an age where they are spending a lot of time playing on the floor, carpet flooring will give them more padding.
Sound-Prohibitive: Even though the basement is situated away from the main area of the house, if you’re sending kids down there to play, or if you have any sort of deluxe sound system in your basement, you are going to want to make sure you have sufficient noise-proofing measures in place. Carpet works well as a basement flooring option for this reason – it helps to absorb noise so what happens in the basement is only heard in the basement (and vice versa for the rest of the house).
Cons of Carpet Floors in Basements
There are a few drawbacks of basement carpeting that should be taken into account. Here are the major “cons” of carpeting in basements.
Not Ideal for Moisture: If you live in an area with high humidity or potential for flooding, then the carpet is not going to be your best choice for basement flooring. There’s a reason why carpeting isn’t often used in bathrooms: carpet and water do not mix well. If it gets wet, carpet takes a long time to try, and mold growth can occur if water sits too long in carpeted places, which can be a huge problem.
Staining: If you have young children (or any family members who are at all messy), then you’ll need to worry about staining with carpeted basement floors. Most of the time, cleaning maintenance won’t be a huge hassle with carpeting – a weekly or biweekly vacuuming can keep carpets in good shape. But, spills are a different issue. Especially if they aren’t caught and cleaned up right away, spills can turn into hard-to-remove stains on your carpet floor.
Vinyl Flooring
Another popular flooring option, both in basements and in main areas of the house is vinyl flooring. Vinyl is available in many different forms for flooring, but the most popular option by far today is luxury vinyl flooring. Here’s what you need to know about the pros and cons of luxury vinyl flooring.
Pros of Vinyl Flooring in Basements
Vinyl flooring has a number of general benefits and some that apply specifically to basements. Here are the primary benefits of vinyl flooring you should know about.
Highly Durable: One of the main benefits of vinyl flooring, whether it’s sheet vinyl or luxury vinyl flooring, is that it’s highly durable. Vinyl flooring has been around for a long time for this reason – it continues to stand the test of time in terms of durability and strength. It’s highly resistant to scuff marks, scratches, and gouges (and even more so if you opt for luxury vinyl flooring, which is virtually indestructible).
Water-Resistant/Water-proof:
Vinyl floorings’ primary benefit is that it’s water resistant, but luxury vinyl flooring offers a distinct advantage of being entirely waterproof. As such, this makes luxury vinyl flooring a perfect choice for areas within the home that receive plenty of exposure to moisture such as the bathroom, kitchen, laundry room, and etc. Laminate or engineered hardwood isn’t as ideal because they both can be ruined from moisture, however, engineered vinyl plank can provide waterproof flooring while still offering the look of true hardwood floors.
Easy to Maintain: Vinyl flooring also offers the benefit of being easy to clean. Since it’s water resistant or waterproof, depending on the style you choose, you don’t need to worry about spills causing damage, and you can easily wipe them up. In addition, many luxury vinyl flooring options come equipped with a protective wear layer that makes maintenance even easier: all you need to do is sweep or mop on an as-needed basis.
Endless Options: Vinyl is highly versatile. No matter what you’re looking for, you’ll be able to find a vinyl flooring option that fits your design aesthetic and needs. Luxury vinyl alone comes in planks, sheets, and tiles, and in many cases, is designed to look almost exactly like true hardwood, so you can get the beauty of wood floors without the hassle.
Cons of Vinyl Flooring in Basements
In addition to the benefits, there are a few potential downsides of vinyl flooring that you should be aware of.
Moderate Costs: Depending on what kind of vinyl flooring you go with, costs vary. Vinyl sheet flooring tends to be a cheaper option, but higher quality luxury vinyl flooring (especially if it’s thicker) can add up to a greater cost. Careful Installation: Another reason why vinyl flooring is great for basements is that it is very easily installed over a concrete floor, which is a foundational element of all basement floors. However, if you’re not careful throughout the installation process, and if you don’t ensure that your concrete slab is completely smoothed out, then it’s very possible that imperfections will show through the vinyl floor (especially if you’re using sheet vinyl or thin tiles), and potentially even damage the floor itself.
Ceramic Tile Flooring
Ceramic tile flooring is another popular option for basements: and with good reason! Ceramic tile is versatile and durable. Here’s what else you need to know about ceramic tile as a basement flooring option.
Pros of Ceramic Tile Flooring in Basements
Here are some of the top benefits to choosing ceramic tile, or porcelain tile, as one of your flooring options for a basement.
Easy Installation: Ceramic tile floors are one of the easiest types of flooring to install in the home, and they work especially well in basements since they install readily over a concrete slab (House Logic). You can install ceramic tiles on your own if you’re comfortable doing so, but you can easily hire a contractor to help you out for a reasonable price.
Longevity and Durability: Another benefit of ceramic tile is that it offers durable flooring for basements. Especially if they are installed properly and well-maintained, once you lay down your ceramic tile in the basement, you’ll likely never have to replace it.
Many Design Options: Ceramic tile comes in so many different varieties, colors, and sizes. You can even opt to order custom ceramic tiles if you want a truly unique floor for your basement. As far as flooring options go, ceramic and porcelain tile is one of the most versatile choices out there.
Water-friendly: Ceramic tile is an excellent option for basement flooring, specifically, since it does so well in contact with water. Ceramic tile easily dries out and will remain “undamaged in the event of flooding” (The Spruce). You’ll never have to worry about rot or mold and mildew with a ceramic tile floor in the basement.
Cons of Ceramic Tile Flooring in Basements
In addition to its benefits, ceramic tile also has some potential drawbacks that you should be aware of; here are the “cons” of ceramic tile as a basement flooring option.
Slip Potential: Ceramic tile has the potential to be slippery, especially if it’s exposed to moisture or condensation, which can be highly dangerous in the home (especially a home with small children or older family members). There are tile flooring options that come with an anti-slip finish, so if this is a concern for you but you have your heart set on ceramic tile flooring, consider upgrading to anti-slip for the surface. You can also mitigate the slip factor by using area rugs in your basement over the tile. This will help with comfort as well.
Hardness: Another potential drawback of this type of flooring is the hardness of the tile. Depending on what your basement is going to be used for, this could be a problem. For example, if it’s going to serve as a playroom for children, you might want to opt for a softer flooring option like carpet or vinyl.
Cold-Finish: Due to the hard nature of ceramic tile, this also translates to the material being very cold, naturally. And since basements have a tendency to be chilly, porcelain or ceramic tiles can enhance this drawback. However, the good news is that radiant heating can easily be installed underneath ceramic tile – it just will be an added cost for your home.
Engineered Wood Flooring
Another potential flooring option for your basement is engineered wood flooring. Engineered wood flooring is a variation of true hardwood, but it’s made up of several layers of true hardwood, plywood, high-density fiberboard, and other miscellaneous wood substitutes. This allows engineered wood flooring to be more durable and affordable than true hardwood but still provides that beautiful hardwood finish. Here’s what you need to know about engineered wood flooring as a basement floor option.
Pros of Engineered Wood Flooring in Basements
Engineered wood flooring offers many benefits as a basement flooring choice. Here’s a summary.
Visually Appealing: Since engineered wood flooring was created to resemble true hardwood (without the upkeep and malleability), it’s arguably the most beautiful flooring option out there, depending on your style and design preferences. Since engineered wood flooring uses a thin layer of actual hardwood to achieve this effect, you’re able to reap the benefits of the beautiful finished look of hardwood, but at a fraction of the cost.
Moisture-Resistant: Engineered wood flooring also offers the benefit of standing up to significant amounts of moisture. This is because the plywood within the planks is “more dimensionally stable than solid wood, allowing the planks to withstand temperature and moisture fluctuations without warping” (House Logic). If you live in an area with mild-humidity, then engineered wood flooring may be your perfect basement flooring option
Cons of Engineered Wood Flooring in Basements
Despite the luxurious appearance, there are a few potential drawbacks to engineered wood as a choice of flooring options for a basement.
Expensive: Compared to the other flooring options on this list, engineered wood flooring is likely going to be the most expensive option. It’s more affordable than true hardwood, but you can still expect to pay for quality. And if you live in an exceptionally humid area with lots of potential moisture exposure, it may not be worth the cost.
There are many different basement flooring options that you can choose from, each with their own set of pros and cons. Depending on your family structure, your desired aesthetic, and your intended use case for your basement, some of these flooring ideas may work better for you than others.
Latest Posts
The Kitchen And Bathroom Countertop Showdown: Quartz, Quartzite, Porcelain, Or Granite?
Kitchen Zones: How To Design A Kitchen Around The Way You Actually Cook
How to Make a Small Kitchen Feel Twice as Large
Get your in-home free estimate today!

Your cabinets are a key part of your home’s kitchen, but from an aesthetic and functional standpoint – in most kitchen remodels and renovations, the cabinets alone can take up 40% of the total budget. So, if you’ve decided to upgrade or replace your kitchen cabinets, you have a big decision on your hands! Perfect kitchen cabinets are a worthwhile investment. Use these five tips to help you choose the perfect kitchen cabinets for your home.
1. Evaluate your existing kitchen storage space
The first step to choosing the perfect kitchen cabinets is to take a hard look at your existing kitchen space. Ask yourself: What do you currently like about your kitchen? Is it functional? Big enough? Your desired aesthetic? Answering these questions before diving into cabinet design and details will help you determine if just a cabinet refinish is the ideal solution for you, or if it’s worth it to undergo a full kitchen remodel.
Cabinets are certainly a key element of your kitchen, since they both store all your important items and also contribute significantly to the overall design aesthetic of your storage space. So if you’re looking to upgrade your kitchen solely for functionality, cabinets are a good place to start. But if you’re planning to upgrade your cabinets for function’s sake, you will also want to consider the design impact as well. For example, if your current kitchen is a bit dated, and your cabinets are darker that you would like, then you can use your kitchen cabinet upgrade as an opportunity to completely overhaul the aesthetic of your cabinets, and maybe opt for something more modern, sleek, and bright like white cabinetry.
The point is to think carefully about what you’d like to change about your kitchen first, and then see how cabinets fit into that equation. The last thing you want is to move forward with new cabinet implementation, and then realize that your new cabinets completely clash with your existing design aesthetic. Do the work ahead of time to evaluate your existing kitchen space, and brainstorm all possible renovation options.
2. Determine Which of the 3 R’s You Want to Do
When it comes to upgrading your cabinets, you generally have three options of kitchen cabinet types: you can choose to refinish, resurface or replace your cabinets. Here’s the difference between each of these options to help you decided which one is best for you.
Refinishing
Refinishing is the cheapest option for breathing some new life into your kitchen cabinets. This process involves sanding down what is already there and painting or staining to obtain a new look. Here are the pros and cons of refinishing your kitchen cabinets.
Pros of Refinishing
If your cabinets are already in good condition, and you are pleased with the functionality, then refinishing your cabinets by adding a new coat of paint or stain is a good option to consider. If this is the case, the price of your kitchen cabinet project may not be that high.
- Refinishing cabinets is the least expensive cabinet upgrade option
- Refinishing cabinets can be done on your own – you don’t necessarily need to hire someone, which is another cost-saving bonus. If you’re an avid DIY-er, you may enjoy the refinishing process.
- Refinishing cabinets is a shorter process than either resurfacing and replacing, so it’s the best option if you are in a time crunch
- There are many options available if you want to refinish your cabinets, with several different stains, paint colors and glazes to choose from.
Cons of Refinishing
While refinishing cabinets is a great option, there are a few potential “cons” to take into account.
- Refinishing your cabinets is not the best long-term upgrade. If you’re really looking for a better functionality solution for your cabinets, refinishing the exterior won’t help – you may be better off investing your money in a long-term solution, like replacement.
- Not all cabinets can be repainted – if your cabinets are warped, severely chipped, or if they have dramatic grain patterns, the can be impossible to paint.
Resurfacing
Another option for creating your perfect kitchen cabinets is resurfacing (or “refacing”) your existing cabinets. The process of resurfacing involves changing out cabinet doors, or applying a new layer on top of existing cabinet doors to give them a fresh new face. The most common process is to reinforce existing cabinet frames with “durable ¼” plywood, then a veneer of real wood or maintenance-free laminate is applied over the plywood” (Kitchen Magic). Here are some of the pros and cons of resurfacing.
Pros of Resurfacing
If your existing cabinets are in decent condition but you’d like to update the appearance, resurfacing can be a great option that’s one level up from refinishing. Here are the major pros of resurfacing kitchen cabinets.
- Resurfacing is a permanent solution. Unlike repainting cabinets, which may chip or wear away over time, resurfacing cabinets is a more permanent upgrade solution.
- Most cabinets can easily be refaced – it’s a very accessible option.
- Resurfacing is cost-effective – it creates an impressive transformation at a fraction of the cost of new cabinet door installation.
- You can make some functionality adjustments to your cabinets during the resurfacing process, such as increasing height, changing out fixtures and hinges, and changing out drawers. You can also add in details like crown molding, glass panels, and more during this process, so there’s some more room for customization with resurfacing.
- Many colors and styles available – as is the case with all upgrade choices for your kitchen cabinetry, you can expect a variety of options to choose from with resurfacing.
Cons of Resurfacing
In addition to the many benefits, there are some potential disadvantages to consider for resurfacing your kitchen cabinets.
- Resurfacing is cheaper than new cabinet installation, but still an investment. According to The Spruce, generally refacing “costs about 50 percent of the cost of a new custom cabinet installation and about 70 to 80 percent of the cost of installing stock cabinets purchased off the shelf from home improvement centers.” You may be better off installing new stock cabinets, depending on what you are looking for.
- You cannot change the kitchen cabinets layout through resurfacing. If you have issues with the layout of your existing cabinet setup, then installing new cabinets is going to be a better option for you.
- The interior of cabinets does not get updated through the resurfacing process. If you want to add any shelving or organizational units, you will have to do that separate.
Replacing
The final option for choosing the perfect kitchen cabinets is completely replacing your existing kitchen cabinet setup with new kitchen cabinets. Replacing will be the best option for you if the cabinets you already have were low-quality to begin with; refacing or refinishing low quality cabinets will only delay the inevitable need for replacement. Here are some of the pros and cons to consider when it comes to replacing kitchen cabinets.
Pros of Replacing
Despite the costs, replacing kitchen cabinets is always going to be a great investment for your home. Here are the major advantages of replacing kitchen cabinets.
- Major kitchen upgrade – installing new cabinets in your kitchen instantly up-levels the design aesthetic, as well as the overall value of your home.
- You have several options to choose from when you replace your kitchen cabinets. Whether you want to go for stock, semi-custom, or custom cabinets, there are hundred, if not thousands, of choices.
- It’s the simplest choice to make. There’s something to be said for picking out new cabinets, and then paying for someone to install them. It’s a simple process for you, the homeowner, and you know it will be handled smoothly and by a team of professionals.
Cons of Replacing
While replacing your cabinets will guarantee a fresh new look and functionality, there are some cons to be considered before you make your decision.
- The obvious “con” of replacing kitchen cabinets is that it’s the most expensive upgrade option. Even if you choose to install new stock cabinets that you purchase from a local home goods store, you can still expect to pay around $4,000.
- Replacing kitchen cabinets is also a significant time investment, since in addition to the time of installation, you also have to factor in time for ordering new cabinets, removing existing cabinets, labor, and cleanup. If you are in a hurry, then installing new cabinets may not be your best option.
- You have to hire professionals (at least it is strongly recommended that you do) to complete the installation, which means additional costs.
3. Set your budget
At some point during the process of choosing your perfect kitchen cabinets, you will need to set (and stick to) a budget. It is best to take this step early on in the process, to make sure you’re not surprised by an unwelcome price tags down the road.
Especially if you are opting for total cabinet replacement, setting your budget will help you determine which new cabinet option will work best from you, between the choices of stock, semi-custom, and custom, which rank from least expensive to most expensive in that order. Stock cabinetry is generally highly affordable and offers plenty of options to choose from, but if you have more room in your budget, you can consider upping to semi-custom or custom cabinetry for a truly unique look. Having a better understanding of price range will help you budget your project more effectively.
4. Choose your kitchen cabinets styles and materials
Cabinets take up a lot of space in your kitchen, so you need to spend careful time and attention making sure you select a style and complementary materials that achieve your desired aesthetic. Below we review some of the most common options for kitchen cabinet styles and materials
Kitchen Cabinet Style Options
When it comes to styles of kitchen cabinets, there are many different customizations you can make, including:
- Framed or frameless? When it comes to kitchen cabinet styles you have two options for framing. Framed cabinets are what you would expect, with a box and face frame, while frameless cabinets (or European-style cabinets) don’t have a frame, so the doors and drawers connect directly to the cabinet box. Frameless cabinets tend to look more contemporary and can create a modern kitchen.
- Windows or no windows? Another customization option that has become more and more popular for kitchen cabinets in recents years is the use of windows or glass panes. The obvious advantage of this style is it gives the homeowner (and any guests) a glimpse into what is stored in each cabinet. This can also create a nice contemporary aesthetic.
- Any door details? Another style element that can have a significant impact on the overall look and feel of your kitchen is any door details you add to your cabinet faces. For example, you can implement arched cabinets or cathedral cabinets, to create a classic, cozy look.
Kitchen Cabinet Materials
Another important element is the kitchen cabinet material you end up choosing. Wood and wood-based materials are the most popular materials, followed by wood veneer, medium-dense fiberboard (MDF), and particle board.
There are several different options for wood that you can choose from when you’re ideating your perfect kitchen cabinets. For example, if you want a rich, dark finish for your kitchen cabinets, then a wood like cherry, mahogany, or red oak may provide the desired aesthetic you are looking for. If you want something lighter and brighter, then a wood like bamboo or hickory can provide that.
Once you choose your wood, you still have further choices by way of finish. You can choose to glaze your cabinets, leave the wood looking more natural and textured, or somewhere in between.
These are small decisions, but they cumulate in creating the design of your kitchen cabinets, and how they play into the overall aesthetic of your kitchen. If you have a specific theme to your kitchen’s decor, such as classic, contemporary, coastal, or industrial, then you will want to factor that into your cabinet style choices as well.
5. Decide on the details
Once you have the big pieces in play for your perfect kitchen cabinets, the final step is to decide on the details. Details include such elements as hardware (handles, knobs and hinges), which can provide a nice finishing touch to any kitchen look.
You can also consider any unique features that you want to install in your perfect kitchen cabinets, such as a “pullout trash can and built-in charging station” (Consumer Reports). You can also factor in details like installing soft-closing functionality on kitchen cabinet doors to prevent the sound of slamming doors. These are little things that make a big impact!
With this guide, you’ll be able to better navigate the process of ideating, selecting and installing your perfect kitchen cabinets. If you are looking for professionals to help with your cabinetry renovation, our San Diego home remodel experts are here to help. Contact Remodel Works today to learn more about our kitchen, home, and bathroom remodel services.
Sources:
https://blog.kitchenmagic.com/blog/the-pros-and-cons-of-diy-cabinet-painting
https://www.kitchenmagic.com/cabinet-refacing
https://www.thespruce.com/cabinet-refacing-demystified-1822044
https://www.consumerreports.org/cro/kitchen-cabinets/buying-guide/index.htm
https://www.foodnetwork.com/not-available.html
Latest Posts
The Kitchen And Bathroom Countertop Showdown: Quartz, Quartzite, Porcelain, Or Granite?
Kitchen Zones: How To Design A Kitchen Around The Way You Actually Cook
How to Make a Small Kitchen Feel Twice as Large
Get your in-home free estimate today!

The process of remodeling your kitchen takes a lot of planning, time and effort. And there are many different moving pieces. One of the most significant elements of any kitchen remodel is the installation of the kitchen cabinets. Here’s how long it takes to install new kitchen cabinet doors , as well as some other frequently asked questions about kitchen cabinet installation.
Steps of Kitchen Cabinet Installation
To understand the process of “how long does it take to install kitchen cabinets,” it’s helpful to first get an understanding of the timeline of the process, and get a sense for how long each individual phase takes before choosing your kitchen cabinets . Here are the major steps of kitchen cabinet installation.
1. Plan Your Design
The first step of any redesign or remodel process is to gather inspiration and plan out the design. Depending on how many changes you are planning to make, and how long you’ve been thinking about executing the remodel (or the kitchen cabinet installation), the timeline of this step can vary greatly: anywhere from 2 weeks to 6 months. This timeline shortens considerably if you enlist the help of an interior designer, who can help provide a vision and assistance on what specific kitchen cabinet options will best suit your desired look and feel.
Here are all the elements that you will need to consider as you map out your new kitchen cabinet installation:
Will you refinish, resurface, or replace your cabinets?
Depending on your budget, and exactly how great of a change you are looking to make in your existing cabinet setup, you may find you’d rather refinish or resurface your existing cabinets, instead of completely replacing them.
For the most part, refinishing or resurfacing cabinets is a cheaper option than installing brand new cabinets, and it can be significantly less complicated as well. If you are pleased with the functionality, size, and setup of your current kitchen cabinets, then an aesthetic upgrade by refinishing or resurfacing may be a better solution.
If you want to “start over” and rework the layout of your kitchen cabinets, or if your current cabinets are very old, then replacing them will be your best option. Decide which option will work best for you, and then you can begin to design and plan accordingly.
Do you need some design help?
If you are planning to do a full scale kitchen remodel, or a major kitchen cabinet rework, then it may make sense for you to enlist some extra help. This can be as simple as heading to your local home improvement store, perusing their selection of cabinetry, and striking up a conversation with one of their design team members.
You can also choose to seek out and hire the services of an interior designer, if you have the budget. This will cost you some extra money, but the benefit is that you will get recommendations that are completely customized to you and your space.
A third option is to work with a company that specifically deals with and specializes in remodels, whether in the kitchen, the bathroom, or other key areas of the home. If you’re interested in this option, you can always strike up a conversation, ask questions, and then get a quote for your project, no strings attached. You can even repeat this process with several remodeling vendors to compare quotes and price points – in fact, it is highly recommended that you do!
2. Decide on Your New Cabinets
Once you’ve determined which option between a new kitchen or a cabinet refinish will work best for you, decided if you are going to get some professional help with your remodel, and have locked down your initial design plan, it’s time to select your kitchen cabinet materials. This process will take about 1-2 weeks, depending on how quick of a decision maker you are.
Here are the elements you will need to consider as you decide on your new cabinets:
What material do you want your cabinets to be made out of?
There are many benefits and drawbacks associated with different types of kitchen cabinet materials. Hardwood is luxurious and durable, but expensive. Particleboard is affordable but can be weak and susceptible to sagging. At the end of the day, you’ll probably end up choosing a mix of materials, and if you decide to go with stock cabinets, your decision will be incredibly easy.
Do you want stock, custom, or semi-custom cabinets?
For the most part, kitchen cabinets can be purchased in three varieties: stock, custom or semi-custom. Stock kitchen cabinets are the most readily available to homeowners, and can be shopped for at your local hardware and home improvement store, or online. These types of cabinets are completely “buy as is,” and your installation team will install them directly. Stock cabinets are the most affordable option.
If you want something truly unique, and you have a sizeable budget, then you can consider custom cabinetry. Depending on how custom you want to get, you can even build cabinets completely from scratch with this option. But, it will cost you.
A great middle-ground option between stock and custom is semi-custom, which, as you can expect, is a more customized type of stock cabinet that you can choose to install in your home.
Take the time to decide what level of customization you need in your cabinets, and what fits in your price range.
What other aesthetic elements are important to you?
Your kitchen cabinets take up quite a bit of space in your kitchen, so you need to make sure you like the way they look. After deciding on material and your level of customization, think about any other aesthetic elements that you want to manipulate in the design and building process. For example, if you want to paint your cabinets a certain color to match your design aesthetic, or if you want to install custom fixtures for a special touch.
3. Hire Your Team
While it is probably possible for you to install your kitchen cabinets on your own it will be much more time efficient for you to hire a team of professionals to complete the installation process.
Reach out to family and friends, use review sites, and talk with your local home improvement vendors to find a contractor or cabinet installation specialist who can assist you with your specific needs. Depending on the level of specification you need, this process can take 2-7 days to find the right contractor for you.
Once you hire your team, make arrangements with them for when the installation will begin
4. Demo Day
Depending on which option you move forward with (refinishing, resurfacing, or replacing), you may have to completely remove your existing cabinet setup in order to install your new cabinets.
Fortunately, this is a pretty quick part of the process. Most demolitions for kitchen cabinet installation take less than a day, although it can take longer than a day if you are doing a full-scale kitchen remodel, and need to remove other pieces around the cabinets.
5. Install or Treat Your New Cabinets
Depending on which new cabinet option you’ve selected, you can expect a slightly different “installation” timeline for each.
How Long Does it Take to Install New Cabinets?
After you’ve done all the planning and prep work, the last step in the kitchen cabinet installation process is to actually install your new cabinets. Depending on the level of customization, and the unique setup of your kitchen, the length of time it actually takes to install your kitchen cabinets can vary. For the most part, it takes a week on average (usually closer to three working days) to complete a new kitchen cabinet installation.
If you are just installing new kitchen cabinets’ doors, through either refinishing or resurfacing, then you can expect this process to take a much shorter amount of time. You won’t have to make nearly as many design choices. You won’t have to worry about ordering new cabinets at all. And you won’t have to worry about new materials.
How Long Does it Take to Refinish Cabinets?
If you’re opting to refinish your cabinets, you have the easiest task in front of you. On average, refinishing it takes about 3-5 days to complete, according to Ehow.com. This timeline involves: preparation, stripping, sanding, and finishing with paint. Of all those steps, sanding takes quite a lot of time and varies greatly on the type of wood or material of your cabinet doors. Painting, or finishing the application, should be expected to take at least two days.
How Long Does it Take to Resurface Cabinets?
If you’re opting to resurface your cabinets, you have a similar timeline ahead of you to refinishing. In almost all cases, it is recommended that you enlist the help of a professional to complete resurfacing your new kitchen cabinet doors. According to Home Advisor, “most refacing can be done in 2-4 days,” although this does depend on the size and efficiency of the company working on your installation. This 2-4 day timeline does not include any time you need to spend planning or ideating your ideal design.
Other Elements That Impact Timeline of Kitchen Cabinet Installation
In addition to the steps listed out above, here are some other elements that can potentially impact the timeline of your kitchen cabinet installation.
Do you need to order your cabinets?
If you find your perfect cabinet set, and you need to order them either online or in-store, you might need to add in some time for delivery.
How busy is your contractor?
If you are dead-set on a certain contractor, you will have to be flexible with their schedule and wait until they have availability to work on your specific project. If time is more important to you than who your contractor is, then be sure to ask that question during the vetting process.
Are you making any major layout changes?
If you’re opting for a stock cabinet tear-down and install, that’s fairly simple. But, if you’re looking to adjust the layout of your kitchen, and install a differently-shaped kitchen cabinet setup, then you can expect for this to take more time.
Are there any additional changes you want to make?
The process of completing a kitchen cabinet installation or remodel takes a lot of time and effort, so you might as well make any other changes you’ve been considering for a while during the process. For example, if you want to install new flooring, or a new backsplash, or upgrade your appliances, you can easily enlist the help of a contractor to perform that work in addition to your kitchen cabinet upgrades.
Plus, the kitchen cabinet installation process is messy – you can expect lots of dust and exposed walls during the process. Capitalize on this teardown period to create the kitchen you’ve always dreamed of. Otherwise, it will probably be a long time until you’re ready to go through the process of hiring a contractor, demo-ing your space, and overturning your daily routine, all over again.
In Summary: How Long Does it Take to Install Kitchen Cabinets?
While the process of physically installing new kitchen cabinets can take about a week, the process of ideating your design, selecting materials, demolishing your existing setup, and fine-tuning details can take anywhere from two weeks to six months.
Either way, this is a decision that shouldn’t be rushed. Regardless of your worries around “how long does it take to install cabinets,” take your time to decide which styles, materials, and price options work best for you and your family. Do your best to enjoy the process, and keep the kitchen remodel process a positive one, where you are happy with the end result. Kitchen cabinets are truly an investment, so you want to make sure you completely love the final product. To learn more about kitchen and bathroom remodels, please contact our San Diego renovation experts at Remodel Works today.
Sources:
https://www.ehow.com/info_8317132_long-refinish-cabinets.html
https://www.houzz.com/discussions/2693597/how-long-should-cabinet-install-take
https://sebringdesignbuild.com/how-long-does-a-kitchen-remodel-really-take-a-realistic-schedule/
Latest Posts
The Kitchen And Bathroom Countertop Showdown: Quartz, Quartzite, Porcelain, Or Granite?
Kitchen Zones: How To Design A Kitchen Around The Way You Actually Cook
How to Make a Small Kitchen Feel Twice as Large
Get your in-home free estimate today!
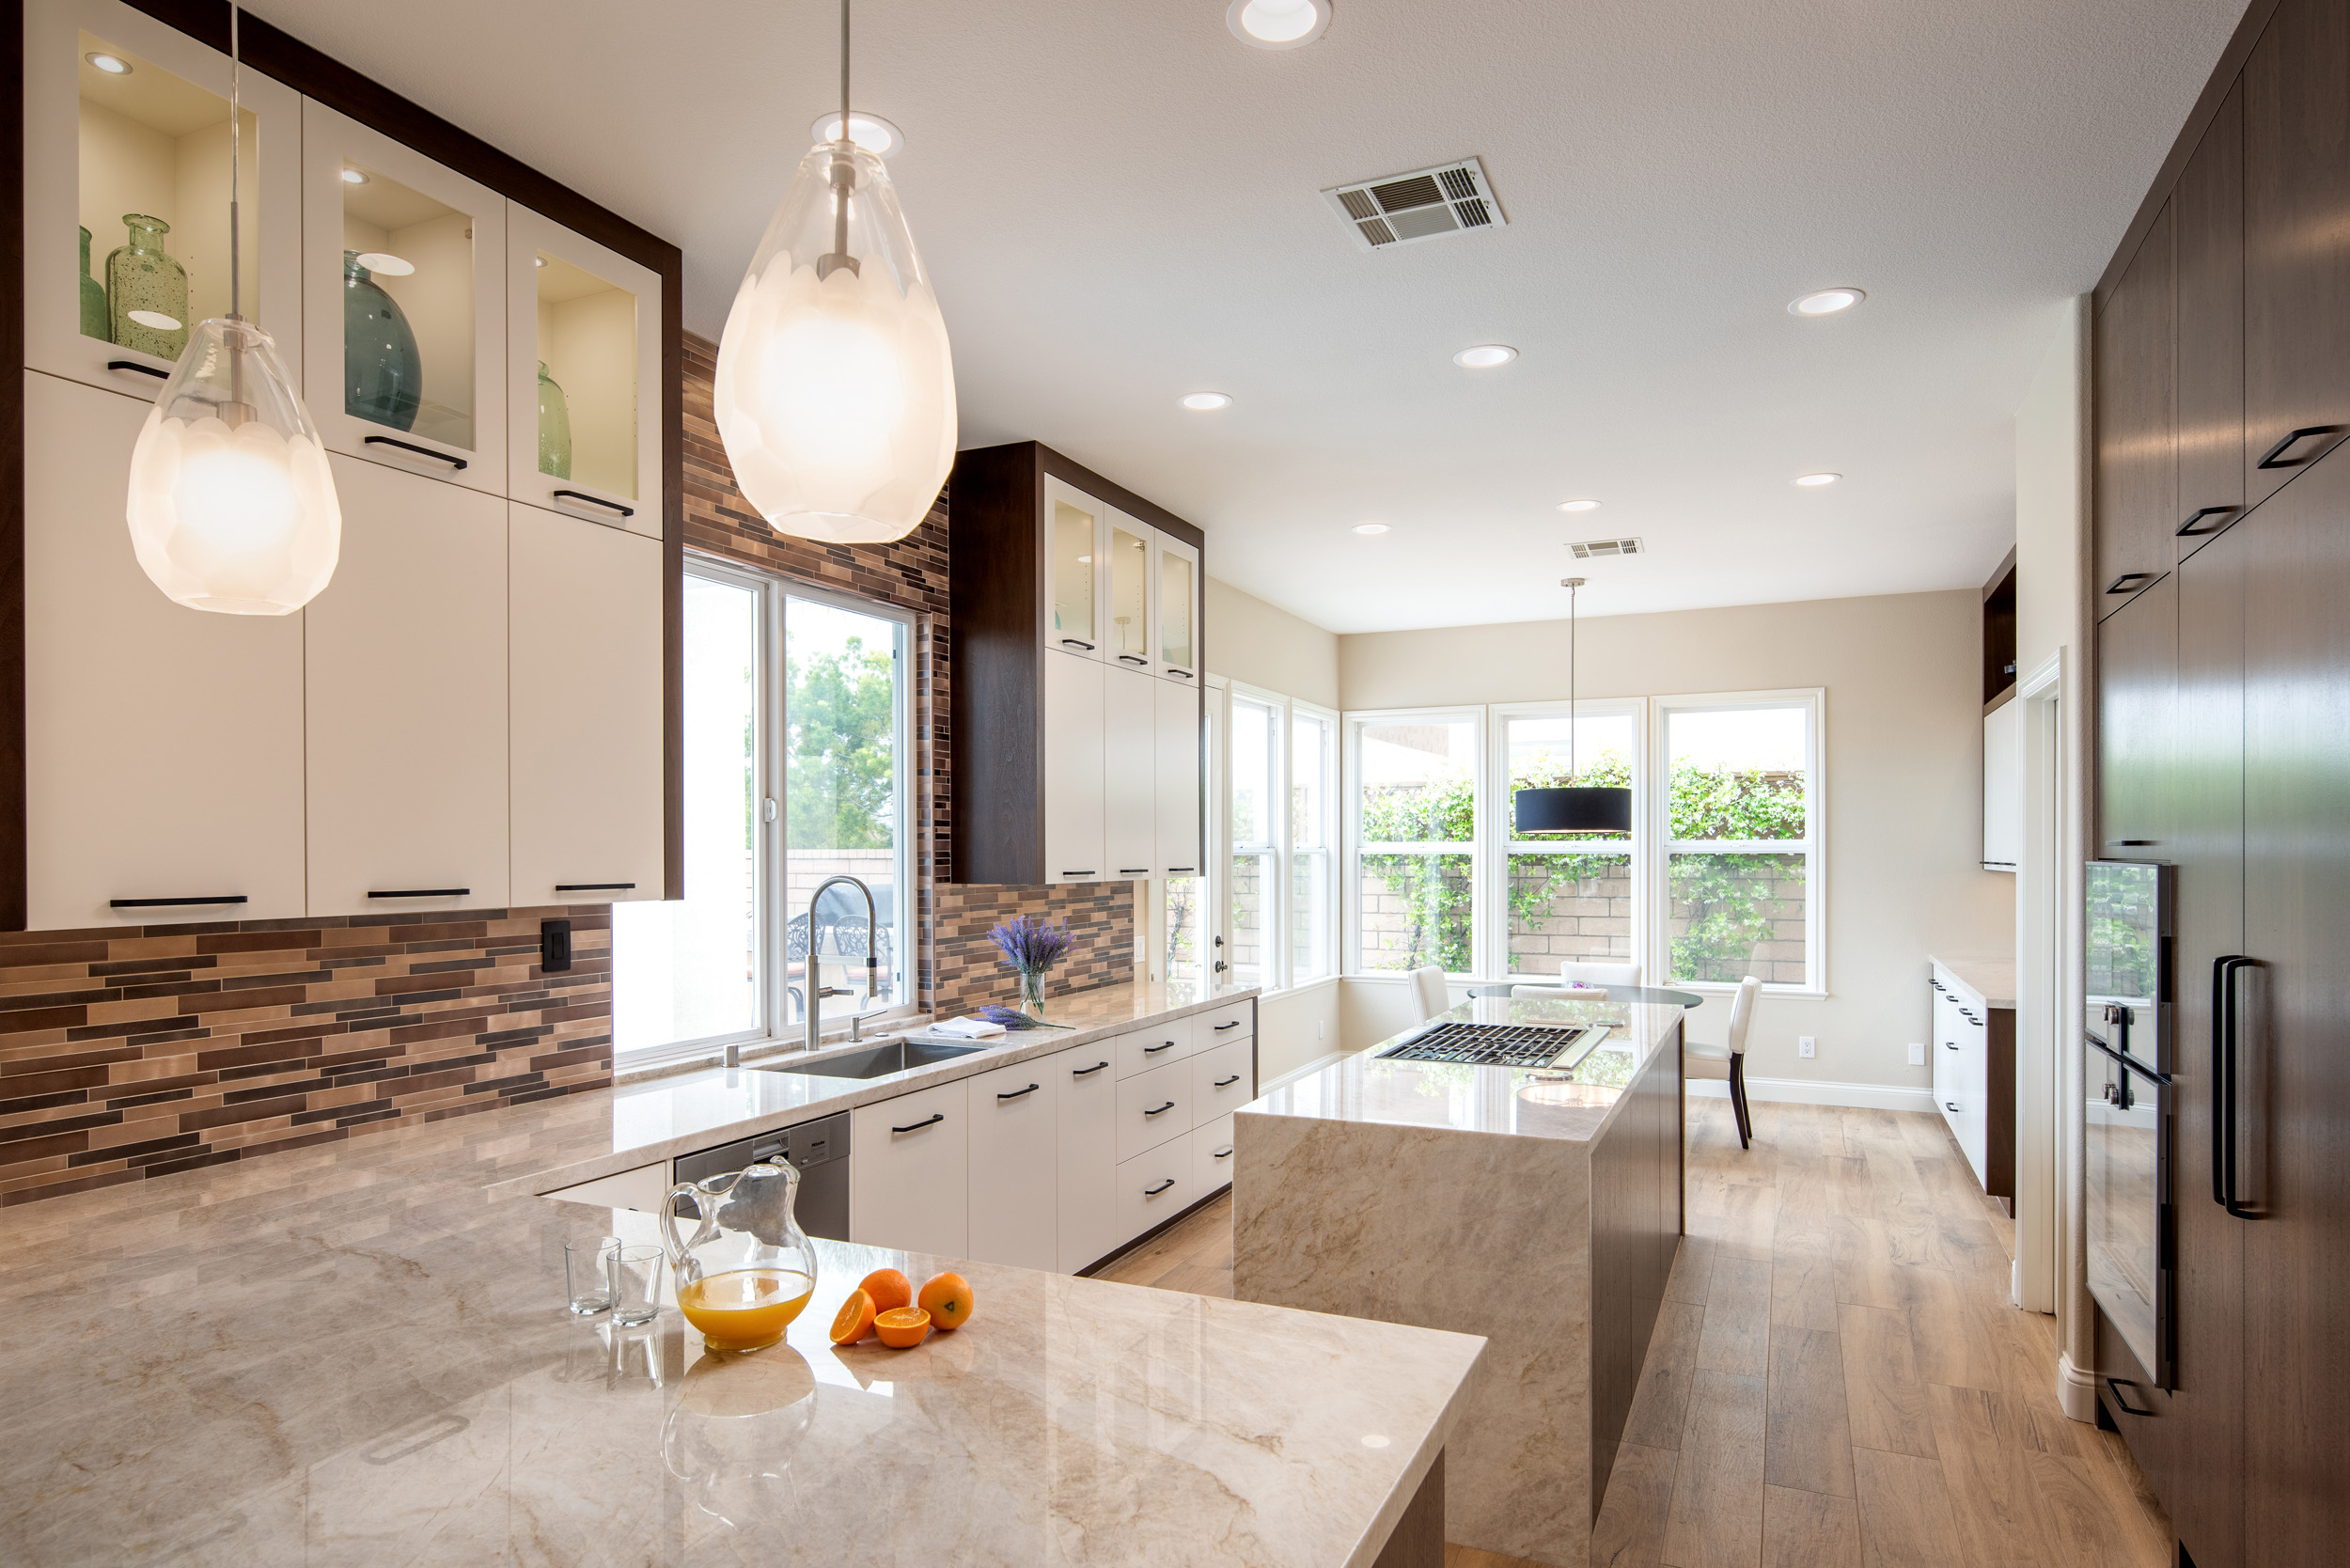
If you are looking to replace or install new kitchen cabinets, there are a number of factors you’ll need to consider, including look, finish, size, and of course price. In this article, we will review the average kitchen cabinets’ cost, as well as factors that affect price, and affordable alternatives to new cabinets.
Average Price for New Kitchen Cabinets
While the cost to install or replace kitchen cabinets will vary based on the project, the overall average cost of installing new cabinets is $4,000-$6,000.
In the scope of a larger scale kitchen remodel, installing new cabinets typically takes up about 40% of most kitchen remodel costs, according to Better Homes & Gardens. In the scope of your kitchen, your cabinets, which include upper and lower cabinets, as well as all drawers, take up a lot of space. So the high percentage of total cost in understandable.
Suffice it to say that your kitchen cabinets are a long-term investment. You can expect to put down a decent amount of money, but to fully understand the process, let’s break down each of the factors that affect the kitchen cabinets price breakdown.
Factors that Affect Kitchen Cabinets Cost
There are a number of specific factors that affect the total cost of kitchen cabinets. Here are the most signficant price factors you can expect to encounter.
Removing Existing or Old Cabinets
To install new kitchen cabinets, you must first get rid of your old or existing cabinets. While this is something that you can do yourself, if you are into “do it yourself” projects, most homeowners opt to have a professional remove existing cabinetry. Especially since the tear down and removal process can be quite extensive, and you don’t want to run the risk of damaging a surrounding wall, kitchen counter, or other element that juts up against the old cabinet.
Plus, many cabinet installation professionals and contractors will bundle in the cost of removing existing cabinets into your overall project cost, and even then, it won’t cost you very much. On average, the cost of professional kitchen cabinet removal is $300, but that number can fluctuate higher or lower depending on the size of your kitchen, the intensity of the cabinet setup, and other miscellaneous factors.
There’s no way to skirt the cost of removing your existing cabinets – in order to install new cabinets, you must remove the existing ones. However, if you’d rather not go through the hassle of teardown and rebuild, then you can also consider the option of refacing or refinishing your current cabinets, which will be detailed later on.
Cost of Installation
Similar to removal of existing cabinets, you will also have to pay for the installation of your new cabinets. This is a job that should be reserved for professional installation specialists who have been trained to install cabinets both securely and safely.
The average cost for kitchen cabinet installation ranges from $3,000-$4000, but installation costs will depend on the size of your project, and the rates of your specific contractor. As a rule of thumb from Cliq Studios, you can expect the installation cost to be 50% of the total cost of your new cabinets.
Customizations
One factor for kitchen cabinet cost that you have significantly more control over is the level of customization you choose for your new cabinets.
While most homeowners choose ready-made or “stock” cabinets that can easily fit into their existing kitchen design, you can opt to buy custom cabinets and create them specifically to match your home. Of course, choosing custom kitchen cabinet styles is the most expensive kitchen cabinet option. According to HGTV, you can expect to pay around $500 and $1,200 per linear foot for custom cabinets, with the average custom kitchen cabinet unit landing around $800.
If you’re looking for the most affordable option, then your best choice is stock cabinets. Stock cabinets are also the easiest to find, either from large home improvement and furniture retailers or online. These types of cabinets are fully prefabricated and sold as-is by these retailers. Stock cabinets are also the best choice if you are on a tight timeline, as you can usually take them home same-day, or within a few days at the most. For this reason, stock cabinets are favored by the majority of homeowners, as well as those in the home improvement and house-flipping business.
Compared to custom cabinets, stock cabinets are significantly cheaper, with the an average cost per linear foot at around $60 to $200 per linear foot. So you can see why many homeowners favor this price range! Plus, even though they are “stock,” there are so many options available for purchase today in the stock cabinet space, so you’ll likely be able to find something that fits both your budget and your aesthetic, no matter what you are looking for.
If you’re looking for something in between stock cabinets and the price of custom cabinets, the third option you can choose is semi-custom cabinets. Semi-custom cabinets allow for slightly more customization, so they can be a nice in-between option for homeowners looking to create something unique with lots of storage space.
Like custom cabinets, semi-custom cabinets typically require a longer lead-time for build and assembly. From a pricing standpoint, semi-custom cabinets range from $100 to $650 per linear foot, according to HGTV, so they provide a nice financial middleground between stock and custom kitchen cabinetry.
When we look at all three kitchen cabinet options side by side, and add up costs for an average-sized kitchen, here is the average cost of new kitchen cabinets for an average kitchen for each cabinet type:
| Type of Cabinets | Average Cost of Kitchen Cabinets in 150 Square Foot Kitchen |
| Stock Cabinets | $3,000-$4,000 |
| Semi-Custom Cabinets | $6,000-$9,000 |
| Custom Cabinets | $15,000-$20,000 |
Data supplied by Cliq Studios
Choice of Materials
An additional factor under the umbrella of types of kitchen cabinets that will affect the price for kitchen cabinets – whether you opt for stock, custom or semi-custom cabinets – is materials.
When it comes to kitchen cabinets, wood and wood-based materials are the most popular for construction. The most popular materials for kitchen cabinets include: hardwood, plywood, medium-density fiberboard (MDF), particleboard, and wood veneer.
Over the years, hardwood has come to be the most popular type of materials for high quality kitchen cabinets. But since hardwood is expensive, and also more pliable and less water-resistant than other types of woods, it is typically paired with other materials, or applied as a veneer over a plywood or veneer base.
Some different types of hardwood options available for kitchen cabinets according to Better Homes & Gardens, are red oak, white oak, hard maple, hickory, cherry, birch, ash and pine.
True hardwood kitchen cabinets are appealing, but your best bet is to opt for an engineered wood material or composite wood product, where you still get the benefit of the hardwood finish and look, but also the durability of an engineered product. Plus, true hardwood or plywood cabinet boxes tend to be more expensive than engineered materials, so you can save money on your bottom line by opting for engineered material cabinets.
Size of Kitchen
A major factor that will affect the cost of kitchen cabinetry installation is the size of your kitchen. It may seem obvious, but installing cabinets in a larger kitchen will cost more money than installing the same type of cabinets in a smaller kitchen.
If you want to determine the number of cabinets that your kitchen will need, and get a benchmark of cost based on just the size of your kitchen alone, follow this formula from ImproveNet: measure how many linear feet require cabinetry, and then, “multiply that number by $100 for basic cabinets, $200 for mid-range cabinets and $300 for upscale or custom cabinets.”
Other Factors Affecting Kitchen Cabinets Cost
In addition to the factors listed above that affect kitchen cabinets price, you should also consider your geographic region and home location, as well as how quickly you need the project done by. Anytime you need to “rush” a project, you can expect increased costs. Same goes for if you live in a particularly affluent neighborhood or region.
Other Options for Kitchen Cabinets
If you’re not ready to fully commit to brand new kitchen cabinets, you have other options you can pursue. Namely, you can choose to refine your existing kitchen cabinet setup by either refacing or resurfacing. Here we break down the differences between each on.
Refacing Kitchen Cabinets
Rather than replacing kitchen cabinets, you can just reface them by applying a new veneer covering to your existing cabinet setup. The full range of refacing varies from project to project, but refacing typically includes all exposed parts of the cabinet frames, the kitchen cabinet doors and fronts of cabinet drawers.
There are three options for cabinet refacing when it comes to materials you can choose from. In order of highest quality and most expensive to least, they are:
- Solid Wood
- Laminate
- RTF (fiberboard coated with a tough vinyl film)
Solid wood tends to be the most popular option due to the high-end appearance it creates, but laminates offer a number of options for homeowners to choose from, in tandem with maximum durability.Cost of Refacing Kitchen Cabinets
Compared to installing new kitchen cabinets, on average, refacing existing cabinets will cost you about $3,200.
Refinishing Kitchen Cabinets
Another option for improving your existing kitchen cabinets is refinishing, which improves your existing cabinets’ exterior by either staining or painting. This tends to be the cheapest option of all for improving your kitchen cabinet set up, even more so than refacing.
If you want to pursue refinishing, you need to take a look at your existing cabinets and decide which type of refinishing would work best. For example, if you have wood cabinets, then staining is a preferred option (although painting would work too – you may just need to do some sanding first, especially if your cabinets are older). Staining is the easiest refinishing option.
Painting is the other popular refinishing option – a good coat of paint can make cabinets look new again in a matter of hours! And, it’s a process you can do completely on your own – no professional help needed.
Cost of Refinishing Kitchen Cabinets
Compared to installing new kitchen cabinets, on average, refinishing existing cabinets will cost you about $2,264.
How to Decide Between New Cabinets, Refacing Cabinets and Refinishing Cabinets
When deciding between the options of new cabinets or refacing or refinishing existing cabinets, there are a few major factors you should take into consideration. Ask yourself the following questions to help you make your decision:
- What is your budget like?
- Are the existing cabinets in good condition?
- Is time a factor?
- Are you willing to invest for the long-haul?
- Do you want to complete the process by yourself?
If you have a sizeable budget and want to make significant changes for the long-haul, then new cabinet installation may be the best route for you. If you are short on time and looking to spruce up a rental, then refinishing by paint is probably your best choice. The bottom line is that you have options, and they all have varying price points for you to consider.
How Much to Spend on Kitchen Cabinets
In addition to deciding on which kitchen cabinet option to pursue, you also need to determine how much you’re going to spend on the process. Take into account factors like: length of time you have lived (or are planning to live) in your home, whether you have children and pets and the value of your home and neighborhood.
Weighing these factors will help you determine a viable budget for your kitchen cabinets, and decide which kitchen cabinet option may be right for you and your family.
As you can see, there are many options for upgrading your kitchen cabinets, and they all have different price points and use cases. Take some time weighing which option may work best for you, determine how you can get your best price for kitchen cabinets, and get ready for a serious kitchen remodel upgrade! For more information on home renovation projects, feel free to contact our San Diego remodeling company today.
Sources:
https://www.bhg.com/kitchen/cabinets/styles/kitchen-cabinet-costs
https://www.improvenet.com/a/how-much-do-kitchen-cabinets-cost
https://www.hgtv.com/remodel/kitchen-remodel/kitchen-cabinet-prices
https://www.bhg.com/kitchen/cabinets/styles/kitchen-cabinet-material-types
Latest Posts
The Kitchen And Bathroom Countertop Showdown: Quartz, Quartzite, Porcelain, Or Granite?
Kitchen Zones: How To Design A Kitchen Around The Way You Actually Cook
How to Make a Small Kitchen Feel Twice as Large
Get your in-home free estimate today!

If you’re planning on a kitchen remodel, you have a lot of choices that you will need to make. You’ll need to decide on new appliances, countertops, paint, backsplash, and, of course, cabinets. Within cabinets alone, you have many options: you can refinish your existing cabinets, or opt to choose brand new kitchen cabinet doors. If you choose the latter, there are so many styles of kitchen cabinets to choose from, all with different cabinet door types that affect both functionality and aesthetic. Here are the main types of cabinet doors, and everything you need to know about choosing the right kitchen cabinet doors for your home.
3 Types of Cabinet Doors
When it comes to kitchen cabinets’ doors, there are generally three types of doors you should be aware of. They are: inset, partial overlay, and full overlay. These are some of the key terms used to describe cabinets – we’ll go over what each one specifically means below.
#1 Inset Cabinet Doors
One of the oldest and most long-standing styles of kitchen cabinet doors is the inset style. In this style, small hinges are “mounted right on the face frame” or immediately inside of it, so hinges are usually visible with the inset cabinet door style, even when the door is shut (Houzz). In inset cabinet doors, all elements are on the same plane – the inner element of each cabinet door is almost recessed back into itself to create a flush look.
Advantages of Inset Cabinet Doors
Since this style of cabinet door has been around for a while, it is notoriously reliable. The inset style was the first cabinet door type ever designed, and is “associated with Shaker, Craftsman and Mission styles” (Cliq Studios).For this reason, many kitchens constructed in the early 1900s have inset cabinet doors, so this style of door naturally creates a very traditional look, which is appealing to a lot of homeowners. Inset cabinet doors look especially nice in kitchens which are looking to evoke a farmhouse or classic style.
Disadvantages of Inset Cabinet Doors
Probably the biggest disadvantage of inset cabinet doors is that they are expensive. On a design level, it takes a higher level of craftsmanship to be able to create this antique-level style. The inset design, with its naturally recessed interior, takes great attention to detail to fit perfectly inside the frame. In addition, inset doors require special hinges, and other fixtures, which also impact the price of kitchen cabinets.
Plus, due to this recessed interior, inset cabinet doors also create a smaller interior surface area inside the cabinet, so you’re getting less space for more money, in many cases.
#2 Full Overlay Cabinet Doors
Overlay is a popular genre of kitchen cabinets that has been around for many years. More recently, full overlay has become the more modern and popular style, but partial overlay provides a classic look and feel.
Full overlay cabinet doors (also called “Euro style”) are the most modern type of cabinet doors available. In the full overlay style, the door of the cabinet (or the drawer face) completely overlays the box – it covers the entire surface area, with “as little as 1/4″ to 1/2″ of frame” visible between cabinet units (Cliq Studios). With this style, there is no visible face frame when the cabinet doors are closed, so special hinges (usually concealed) and tactile fixtures are installed to ensure that doors can be easily opened.
Advantages of Full Overlay Cabinet Doors
The obvious advantage of full overlay cabinet doors is the modern look and feel. Sometimes, just upgrading cabinet doors to full overlay is enough to modernize a dated kitchen in need of a renovation.
In addition, with full overlay cabinets, there are very small gaps between each individual door or drawer, which creates a “consistent and continuous appearance” (Houzz). This can help make kitchens look bigger and more spacious. It also creates the largest internal surface area within each cabinet and drawer, which can give you the most bang for your buck in terms of functionality. Full overlay cabinets offer the most sizeable amount of storage space.
Disadvantages of Full Overlay Cabinet Doors
While full overlay cabinet doors look modern and sleek, they have a couple disadvantages that should be considered. For example, since the edges of the cabinet doors are almost flush to each other, there is less available space in between cabinet doors, especially when opened. So, homeowners must be careful to make sure doors don’t bang against each other when opened. In addition, since full overlay cabinet doors require knobs, handles or some sort of fixture for ease opening (the cabinet doors are flush to each other, there’s no “side grip” to hold onto to open), these should be carefully considered as well. Knobs can easily ding open doors if opened to quickly and carelessly. These are easily avoidable scenarios, but they are certainly worth being made aware of.
Furthermore, since every inch (and quarter-inch!) is utilized carefully in full overlay cabinet design, it’s essential that you work with a contractor who has experience installing these types of cabinet doors. Otherwise, you could end up with some dimensional or functionality issues when installing new kitchen cabinets.
#3 Partial Overlay Cabinet Doors
Another style of cabinet doors is “partial overlay.” Also known as “standard overlay,” this style serves as a happy medium between inset and full overlay, since the doors completely cover the opening of the cabinet, and partially cover the finished frame. It is probably the style you are most familiar seeing in either your own home, or the homes of friends and family members.
Advantages of Partial Overlay Cabinet Doors
One of the advantages of partial overlay cabinet doors is their accessibility – the relative affordability of partial overlay cabinet doors make them a popular choice in homes throughout the country (and the world). Partial overlay cabinets tend to be the most affordable because the doors and drawer fronts are smaller, which means they naturally use less material, and manufacturing costs are naturally lessened. This also makes partial overlay cabinet doors a top choice for contractors and those who work in the business of “flipping” homes.
In addition, the construction of this style of door makes it much easier to install. Since each cabinet door has about 1-2 inches of face frame exposed between units, functional hardware can be more easily installed.
Disadvantages of Partial Overlay Cabinet Doors
Perhaps the biggest disadvantage of choosing partial overlay cabinet doors is that they have come to be associated with affordability. Partial overlay cabinet doors are not modern, nor necessarily unique, so if you’re really looking to make a statement with your cabinets, you will either want to customize, or choose a different door style.
In addition, since the partial overlay affords a lot of extra space between cabinets, it can make cabinet doors and drawers look disproportionate – like small doors on a larger surface area. You will also likely have to be okay with visible hinges if you opt for a cabinet design that uses partial overlay doors.
Different Styles of Cabinet Doors
Now that you have a handle of the three kitchen cabinet door types, it’s helpful to also understand specific styles for each type. Here are some of the most popular styles of kitchen cabinet doors, and the names that they go by. These styles can be used to customize the types of cabinet doors listed above.
Raised Panel Cabinet Doors
As the name implies, raised panel cabinet doors have “a center panel that is raised from the rest of the door, many times with a contoured edge that gives it a specific style” (MasterBrand Cabinets). This is one of the most popular and versatile styles of cabinet doors out there, and is available in many colors and wood materials. They are often employed in a more traditional design aesthetic (similar to the inset cabinet door type).
Recessed Panel Cabinet Doors
Popular in modern designs, recessed panel cabinet doors (or “flat panel cabinet doors”) are characterized by a center panel that is recessed and appears lower than the rest of the door. The outer edges are higher, and can be unique stylized to create a desired aesthetic.
Arch Cabinet Doors
Arch cabinet doors are characterized by a signature arch at the top of the interior panel, which is raised. The half-oval or circle-shaped curve is the signature of this door style, which lends itself well to a very classic, homey look. This style of door is making a comeback in recent years, as the “farmhouse” and antique styles are becoming more popular in home renovations and remodels.
Cathedral Cabinet Doors
Cathedral cabinet doors are similar to arch cabinet doors, however the raised panel is marked with a more open, medieval-style arch. Cathedral doors are often used to “enhance entryways, or they may used for decorative touches on cabinet doors” (Kitchen Cabinet Kings). They are sophisticated and elaborate.
Shaker Cabinet Doors
Shaker-style cabinet doors are inspired by the original cabinet style and are an example of the inset cabinet type. They are simple, which light finishes and minimal hardware, which is where their beauty comes from. Homeowners who appreciate a truly classic look and feel will like Shaker-style doors.
Slab Cabinet Doors
Slab doors get their name from their simple and straightforward design, with flat panels that are even. These types of doors are typically employed in “transitional and contemporary designs” (Dura Supreme). Despite the name of this style, slab doors can be created in a number of materials, including wood and even acrylics.
Glass or Mirrored Cabinet Doors
A style that’s becoming increasingly popular installing glass or mirror panels within traditional cabinet doors. These are also often referred to as “open frame” cabinet doors, since the interior is open. There are also options for glass-types in these doors, including lead glass, painted glass, and even stained glass. This creates an open aesthetic, and is also functional in that it allows the homeowner to see what’s inside the cabinets (in the case of glass panels). On the flip side, this also means that the interior of cabinets are exposed – and there’s extra pressure to keep them tidy!
Mullion Frame Cabinet Doors
Similar to glass-frame cabinets is the mullion-frame style. Mullion is a unique pattern in which wood is designed in a striking pattern overtop a glass interior panel. The wood can be laid out in horizontal and vertical directions, or patterned in more geometric or curved shapes. This is a truly striking cabinet style, but these types of doors can also be expensive and difficult to wrangle.
Beading
Another style element of cabinet doors that should be considered is beading. Specifically with inset cabinet styles, these doors can be personalized with “either beaded or non-beaded inserts” (Master Brand). With this type of customization, a beaded insert is added to create a custom edge detail. The beaded insert is fitted into the cabinet door itself, providing an edge detail that evokes fine craftsmanship.
The use of beading can also be paneled to create a “beadboard” look, which is popular in many different styles of decor. Beadboard paneling is available in many different kinds of wood and materials for cabinets and can add a nice finishing touch to any cabinetry display.
Now that you know all the terminology and categories of the different types of kitchen cabinet doors, hopefully you will be able to make a more informed decision on which type of cabinet door will work best in your kitchen. If you feel overwhelmed with choices, you can always choose to go the route of refinishing or resurfacing your cabinets. There are so many possibilities for how to make your kitchen, and your cabinet setup, uniquely yours. For more information on kitchen cabinet remodels, contact our San Diego home renovation experts at Remodel Works today.
Sources:
https://www.houzz.com/ideabooks/23429483/list/learn-the-lingo-of-kitchen-cabinet-door-styles
https://www.cliqstudios.com/cabinet-door-types
https://www.masterbrand.com/get-started/design-your-room/cabinet-101/cabinet-doors
https://kitchencabinetkings.com/glossary/cathedral-door/
https://www.durasupreme.com/door-styles/slab-doors#.XD2B7c9KjOQ